All about polymer clay mugs

Polymer clay mugs are becoming more and more popular among people. Such products are quite simple to make, do not require specialized skills, and are also great for gifts or presentations.


Advantages and disadvantages
Polymer clay is a special substance that can be easily formed, as a result of which it is able to take on a variety of shapes and contours. Due to its unique properties, this plastic material is actively used to create various decorative elements. You can independently make a variety of crafts from it, including polymer clay mugs, interior items, beautiful figurines and much more.
Craftsmen are often involved in the creation of clay products, but you can learn how to do simple things at home.


Equally important advantages of using polymer clay:
- lack of specialized skills, education and high financial costs;
- variety of shades and colors;
- the ability to embody almost any fantasy in molding with decorations;
- absence of harmful chemical compounds.


The relative disadvantages of polymer clay are the presence of some safety rules and the low strength of finished products. Also, for professional and frequent sculpting, expensive equipment may be required.
Types of clay for modeling
Depending on the operational and technical features of the plastic material, polymer clay is conventionally classified into two types: baked and self-hardening. Each type has its own merits.


Self-hardening
It is a plastic material, a distinctive feature of which is its rapid hardening in the open air. Due to this property, such a substance is always stored in a sealed package. The self-hardening variety is divided into the following subspecies.
- Liquid. A thick gel in a translucent or white shade, usually used to create small decorative elements. After hardening, this material practically does not differ from plastic.

- Cold. One of the most flexible types of self-hardening clay, excellent for re-painting.

- Heavy. A distinctive feature of this species is the maximum similarity with natural clay. Requires additional softening with water. The disadvantage is the high chance of cracking or chipping in the finished product.

- Lightweight. The most popular type, characterized by high plasticity and ductility. This variety is best rolled and warmed on the work surface.

The advantage of self-hardening clay is the ability to make any changes to the shape and size of the finished product during its hardening. It is also worth noting the quick cleaning of the clay surface from dust and high performance.
The disadvantages are the pallor of the colors used when solidifying and the impossibility of using clay for small parts.


Baked
Baked clay is a classic polymer material that begins to harden at temperatures above 100 ° C. Unlike the self-hardening variety, an oven or microwave will be required to create any products from this type.


The most important advantages of baked clay are the high strength of the finished product and the preservation of the colorfulness of the shades used. This material is great for sculpting complex and small details. The main disadvantages are the inability to quickly correct the shortcomings and the mandatory observance of the cleanliness of the working surface.


Design options
A polymer clay mug will be a great gift for both girls and boys. Despite the stereotypical opinion, such products are actively used as gifts for men or women. Simply put, self-made mugs are suitable for anyone, regardless of age, gender or professional activity.


Recently, clay products decorated with inscriptions have become especially popular. On such a circle, you can write good wishes to a loved one, make a funny joke, or simply add any suitable words from yourself: it all depends on imagination.


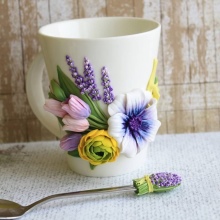
Cups with flowers, pictures or stucco are often presented as gifts. On September 1, you can quickly and easily make a beautiful gift for the teacher, and the New Year holidays can be diversified with amazing circles with themed figures.


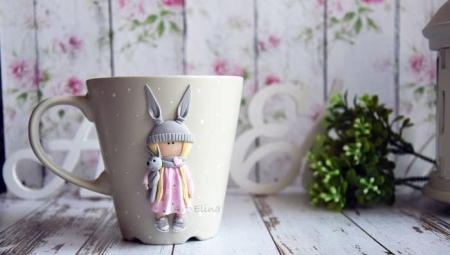
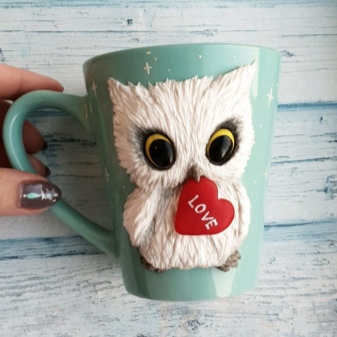
Products with sculpted animals are no less popular: hedgehog, tiger, lion, panda and bunny. Some craftsmen make mugs with owls, wolves, foxes and many other animals. As for children's cartoons, you can often find cups with yellow minions and characters from the Paw Patrol cartoon.


Care and storage rules
So that a mug made of polymer clay or any other product made of this material does not lose its operational and visual characteristics for a long time, you need to know about the rules and recommendations for storage and care. The main tips from leading experts are as follows.
- Particular attention should be paid to the washing of polymer products. Such products should be washed exclusively with water at room temperature.
Otherwise, there is a rapid destruction of the top lacquered layer and a deterioration in the performance of the entire structure.

- You also need to pay attention to the choice of detergent. For polymer products, it is recommended to use regular shampoo or any detergent diluted in plain water (ratio 3: 1). It is forbidden to wash self-made mugs with solutions containing a large amount of chlorine or abrasive substances.


- For better cleaning of polymer products, use the soft side of the sponge or a small rag cloth. Hard brushes must not be used, as there is a high risk of damaging the surface of the product. In the presence of dirt, it is better to use specialized brushes with natural and soft bristles.


- Drying a polymer cup after washing is quite simple; for this you can use an ordinary rag, towel or napkin. It is not recommended to use a hairdryer. Also, during the drying process, you should not rub the finished product; it is enough to run it with a dry cloth several times. Otherwise, you can spoil the product and damage the embossed surface.

- It is forbidden to combine earthenware with alcohol, various perfumes, acetone, solvents and many other chemicals. It should also be remembered that plastic material deteriorates quickly enough at low temperature conditions.


- Testing of manufactured products for durability, strength or flexibility is strongly discouraged. Any products made of polymer clay are plastic, therefore they can easily be damaged when dropped from a great height or in the case of minor impacts on the overall structure.

- Experts also pay attention to the fact that the clay cup should not be exposed to prolonged exposure to cold or heat. Based on this feature, the product must not be heated in a microwave or oven and left in a place that is exposed to prolonged exposure to direct sunlight.

- It is best to store ready-made clay dishes in a specially designated container or small casket. The use of a separate package will allow you to avoid scuffs, chips and any other unpleasant consequences that are observed in the process of long-term dust settling. It is not recommended to leave such cups with the rest of the dishes that are not yet dry.


- If any part of the product breaks off or breaks, you must use a special glue. Experts strongly recommend to abandon the use of quick-drying adhesive solutions such as "Moment" and other similar solutions.
You should also store the finished product in a place that is difficult for children or animals to reach.


How to do it yourself?
Let's see how you can create a mug from the described material with your own hands.
Tools and materials
The first thing to do before making a polymer clay mug is to prepare a certain set of tools and materials. The basic equipment for beginners looks like this.
- Rolling tool. An acrylic roller is commonly used. The special device can be replaced with a classic rolling pin, glass bottle or flat glass.

- Working surface. It is any clean and smooth canvas made of ceramic, plastic, glass or silicone.

- Sharp blades. They are used for cutting clay substances. In stores you can find special knives for polymer products.

In addition to the above tools, it is also necessary to purchase high-quality waterproof glue. Experts recommend paying attention to epoxy compounds that are used to attach certain parts to the polymer surface. The paint varnish can be selected from polyurethane or acrylic.
You can also use silicone molds, which allow you to quickly make small parts. If additional decoration elements will be created, you should take ordinary wooden toothpicks, which are great as a stand for small components. Recently, specialized stamps and sheets have been gaining popularity, which are designed to create a particular texture. To make a thin, even clay layer, it is recommended to use narrower paste machines.


To roll out polymer clay, experts advise purchasing an acrylic rolling pin, the surface of which does not stick to the plastic material. This tool allows you to quickly blend clay bases of different shades and create pleasing visual transitions.
If possible, it is better to go through a master class, which will greatly simplify the further creation of products at home.
In the modern world, there is a wide variety of private schools and institutions, whose masters teach the correct handling of tools, modeling techniques and many other features of handling polymer clay.


Process of creation
The step-by-step process for creating a mug from polymer clay is as follows.
- Preparation. Take the necessary tools and prepare the clay substance of the desired color. At this stage, the future sketch of the cup and the presence or absence of additional decorative elements are also determined. In the process of preparation, it is necessary to unfold the work surface and pick up the rolling tool.

- Modeling. To mold the finished craft, you should wield polymer clay in the same way as with plasticine. Initially, the substance must be well warmed up and kneaded in hands. First, experts recommend making a small "sausage" that will become the handle of the future product. If necessary, you can use ready-made machines for easier and faster work. Next, the main bowl and bottom are made, which are made in smooth and circular movements. It is better to purchase a special rolling circle for this. If you plan to add different decorated figures and patterns, they are all created separately from the cup.


- Baking. A mug and additional decor are neatly laid out on a metal or ceramic surface. To install small parts, use wooden matches or small heat-resistant containers. Further, the products are tightly pressed to the surface and sent to the oven. The average duration of thermosetting is 10-15 minutes, depending on the size of the product and the number of other details for decoration and application.

- Gluing jewelry to the mug. At the end of the baking process, the polymer product should be thoroughly dried using specialized equipment or after waiting 2-4 days. Further, with the help of epoxy-based glue, additional decor should be glued. Before carrying out this manipulation, the outside of the mug is treated with a degreasing solution.


Here are some more tips for newbies.
- Some experts recommend placing the workpiece not on the baking sheet itself, but in a special baking sleeve. This recommendation allows you to avoid unwanted accumulation of harmful chemical compounds that are released during the frying process.

- To prevent the mug and its additional decorative elements from sticking to the surface of the baking sheet, plain foil or parchment paper should be used.
In some cases, it is possible to use a silicone base, which is made from a heat-resistant material.


- In addition to the classic epoxy glue, you can purchase a special polymer gel, which is baked directly in the oven. Latex and cyanoacrylate adhesives can also be used.The last substance most effectively and quickly glues the parts together.

- If you need to make additional polishing of the surface, it is recommended to use any sandpaper, the grit of which varies from 600 to 1250. If you do not have it, you can use a regular sanding file used for nails.


- For greater protection of the finished product, the polymer substance should be coated with special varnishes. A clear acrylic lacquer on a polyurethane base is best suited for this. This substance dries the fastest and contributes to the formation of a dense coating on the outer surface of the product.


- Contrary to popular belief, you can't use regular hair or nail polish. A similar prohibition applies to a varnished substance, which is produced on the basis of acrylic. Such products are most often used for finishing plastic products.


- To better apply varnish, you should prepare several brushes in advance, differing in thickness and structure. It is recommended to use synthetic fluff heads, which have a high safety and efficiency rating.

In addition to the above technology, you can make a polymer mug using the cooking method. To do this, you need to use the following instructions.
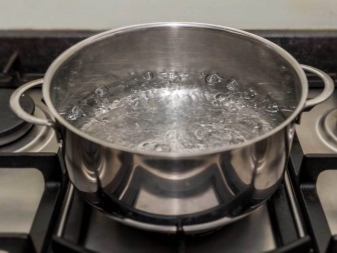
- Take an old or unwanted saucepan and pour a small amount of clean water into it. Then wait a certain amount of time required for boiling, and carefully dip the product in water. For this, it is better to use heat-resistant gloves and a slotted spoon.


- Boil the polymer vessel for 3-5 minutes. By this time, you should add another 1 minute for each millimeter of the thickness of the polymer mug. As practice shows, it is better to overexpose the product in boiling water than underexpose it.


- After the specified time has elapsed, carefully remove the polymer product from a saucepan and cool thoroughly with cold running water.
The cooling process usually does not take place immediately, but only 5-8 minutes after removing the mug from boiling water.

The only drawback of this method is the high probability of the formation of unwanted white plaque on the outer surface of the product, but it can be easily removed using ordinary sandpaper. After the individual elements of the mug have been glued together, it is prohibited to cook the product.
Experts recommend avoiding any bubbles or unwanted formations that occur during the sculpting process. If any are observed, the resin mug should be disposed of and the above steps should be started over. Otherwise, the product will quickly crack and become completely unusable.

Professional craftsmen also advise you to carefully count the amount of clay material for modeling. As practice shows, it is better to bake the product in a well-ventilated area, which will avoid the negative effects of chemical fumes.
Before placing the mug in the oven, it is recommended to place a small piece of clay on the baking sheet. This way you can quickly check the temperature and humidity conditions. Also, you should not be lazy to knead polymer clay: if you do not do this, the mug will turn out to be quite fragile and ugly.


For information on how to create a decor for a mug, decorating it with a very cute and fluffy bunny, see the next master class.


