Polymer clay modeling for beginners
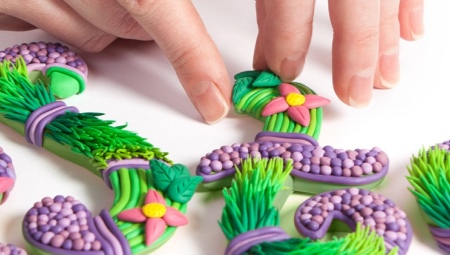
Polymer clay is one of the most popular materials used to create original crafts. Anyone can easily learn to work with it.
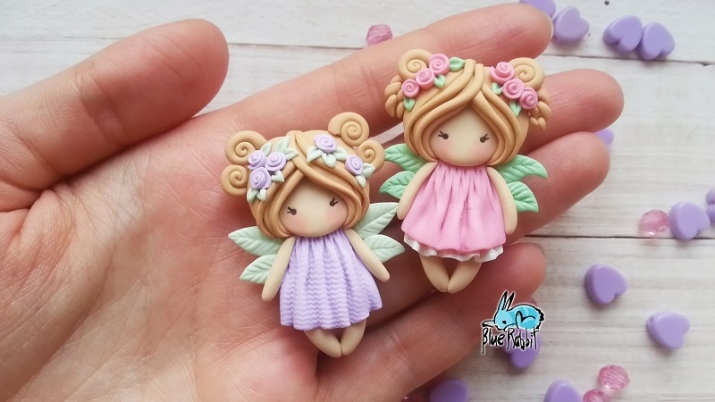


Clay selection
Many people are now engaged in the production of polymer clay. Therefore, it can be difficult for novice creators to choose the material that is suitable for the job. When buying clay, it is recommended to pay attention to the following points.
- Type of material. On sale there are both self-hardening clay and one that is intended for baking. The first type of material cures in air. The second has to be baked in the oven at temperatures above 100 degrees. Self-hardening clay is more convenient for beginners to work with. But from the mass for baking, stronger and more durable crafts are obtained. In addition, it is much easier to make small parts out of them.
- Date of manufacture. The selected clay must be fresh. The soft material kneads well and does not stick to your hands. But stale clay crumbles during work. This situation can be corrected by using a special softener.
- Color palette. Clay of all colors is easy to find on sale. You need to choose materials taking into account your creative plans. For a beginner creator, you can choose several basic colors and mix them to get the desired shades.
- Manufacturer. In order not to be disappointed in the quality of the material, it is best to buy products from trusted manufacturers. Among those who have been engaged in this type of creativity for a long time, the brands Fimo and Cernit are popular.
You can buy good clay in stores with office supplies or specialized places with goods for creativity and needlework.


What tools are needed?
In addition to clay, before starting work, the creator needs to prepare all the necessary tools.
- Working surface. It will be more convenient to knead and roll the clay on a dense and smooth surface. For work, you should prepare a plastic board or ceramic stand in advance. To bake clay crafts, you need parchment.

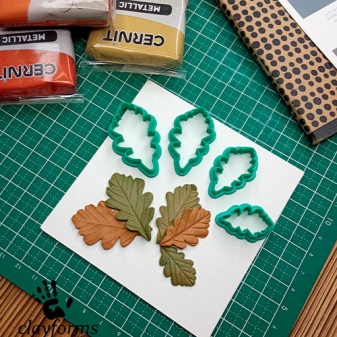
- Stack. This tool is used not only for cutting the material into separate pieces, but also for "drawing" individual parts on finished crafts. Instead of a special stack, you can temporarily use a utility knife with a flexible blade.


- Toothpicks. You will need wooden toothpicks or small needles for making small holes or decorating jewelry and figurines.

- Rolling pins. Special rolling pins are also actively used when working with clay. They help to roll the material or connect individual colors to each other. If there is no opportunity to buy special rolling pins, they can be replaced with oval glass or metal objects. It is not recommended to work with wooden rolling pins, because clay sticks to them very quickly. A good alternative to conventional rolling pins is a special pasta machine. It rolls the clay much faster and better.


- Mold. Special molds are needed to make all kinds of jewelry. They can also be found easily at craft stores.
Small beads, sequins, metal fittings and transparent varnish are also useful for decorating homemade crafts.


How to work with the material correctly?
Care must be taken when working with polymer clay. Knead the material with gloves. This will prevent the colors from mixing. To create any crafts, you need to master several basic sculpting techniques.
- Kneading. Before work, any clay must be kneaded. This helps to make it soft and pliable. If you skip this stage of work, air bubbles will remain in the plastic. When heated, the air will expand and the product will lose its shape.
- Rolling. Most of the elements are created from blanks in the form of small balls. Therefore, after preliminary kneading, the pieces of polymer clay are usually rolled.
- Smoothing. This technique allows you to correct basic imperfections. Polymer clay is usually smoothed with a light touch of the fingers.
- Connection of parts. Many polymer clay crafts are made up of several pieces of different sizes. At the end of the work, all these blanks are connected to each other, pressing strongly against each other and smoothing the attachment points. You need to act very carefully so as not to deform your craft.


Having understood the basic principles of working with polymer clay, you can move on to mastering the most popular modeling techniques.
- Salt. This is one of the simplest techniques that beginners can learn. Parts made of polymer clay are rolled in salt. This is usually done with small beads. After that, the plastic parts are baked. After cooling the beads, they are immersed in water. There, the salt crystals dissolve. After drying, the parts are covered with an unusual relief pattern.
For information on how to make polymer clay beads using the salt technique, see the next video.
- Watercolor. Working in this technique involves mixing different colors. You can combine both contrasting colors and shades close to each other. The step-by-step scheme for creating a part with smooth transitions looks very simple. Pieces of multi-colored clay are rolled out with a rolling pin. Further, the individual layers are stacked on top of each other. After that, they are passed over them again with a rolling pin. This allows you to combine them and create beautiful watercolor transitions between different colors.


- Millefiori. This technique is more complex than the previous one.The step-by-step process for creating blanks in this style is as follows. To begin with, the selected colors are kneaded and rolled out with a rolling pin. A sausage is formed from the main part, which is immediately cut into seven parts. One piece is wrapped in a strip of a contrasting shade. The remaining six parts are laid out around this core. The shape of future petals is corrected using a toothpick or a stack. Above, the flower is wrapped in a strip of contrasting color. Its shape is corrected again. Next, the sausage is carefully rolled out, lengthening. The finished part is cut into smaller pieces. Each of them is rolled out with a rolling pin.
If unused pieces of polymer clay remain after the end of the work, they must be carefully wrapped in cling film or put in zip bags. Otherwise, the material will lose its plasticity.


What to do after sculpting?
If self-hardening clay was used to create decorative figures, it is enough to leave the crafts overnight to dry. Otherwise, the figures will need to be baked. Before sending a piece of jewelry or figurine to the oven, you must carefully read the instructions on the package with clay. After all, the time for baking clay from different manufacturers varies. After firing the figurines, the room must be ventilated.
Cool the finished product. If there are any roughness or irregularities on it, it must be additionally sanded. For this, it is recommended to use a moisture-resistant type of sandpaper. It can be purchased at many automotive stores. The finished product must be additionally covered with a layer of transparent varnish.
It is best to use a clay product. But if such a product is not at hand, it can be replaced with a varnish intended for decoupage creativity.


Manufacturing technology of light crafts
Having figured out the basics of working with polymer clay, you can start creating your first crafts.
Pendant
A great option for beginners is a beautiful polymer clay pendant. A master class on creating such an accessory consists of the following steps.
- First, a piece of polymer clay of the selected color must be kneaded well in your hands. Then it must be rolled into a ball.
- This workpiece needs to be flattened. Press a glass pebble into the center of the craft.
- The edges of the pendant must be smoothed out so that they are thinner than its center.
- Insert a pin into the top of the craft.
- Next, you need to take clay of a contrasting color in your hands. It is rolled out to form a very thin strip.
- This blank is used to decorate the craft. The edges of the strip are carefully adjusted with a toothpick. It can also give relief to the selected material.
The prepared pendant is sent to the oven. After baking, it is covered with several layers of varnish. Each new one is applied to the surface only after the previous one has completely dried.


Bunny
You can quickly learn how to sculpt animal figures from polymer clay. One example is a bunny craft. It is done quickly and easily.
- It's worth starting work by creating a face. To do this, you need to form a small ball from white clay. This workpiece must be carefully flattened.
- The bunny's head is placed on a flat surface. Its edges are neatly rounded.
- A small triangle with rounded edges is made of blue material. This piece is attached to the body.
- Next, the blue triangle is cut in the middle. Legs are formed from two side parts.
- A small circle is made of white clay. It needs to be cut into two pieces. One of them is placed under the head.
- Two sausages of different sizes are formed from the same material.
- Two equal pieces are cut from each of them. Droplets are formed from them.
- Ears are made from large blanks, paws are made from small blanks.
- These parts are attached to the body and head of the bunny. One eyelet can be folded neatly.
- A hare's face is formed from white balls, a nose from pink balls.
- Using a stack of balls, recesses for the eyes are made on the muzzle. Black blanks are placed there. They can be decorated with small white plastic dots.
- Pink dots are glued under the eyes, imitating blush and antennae. Above them are thin cilia and eyebrows.
- Next, the product is baked, following the instructions on the clay package.
The finished craft can be used as a pendant or decor for a large painting.


New Year
There are many interesting Christmas decorations that can be made from polymer clay. The simplest version of such a craft is suitable for beginners.
- To create the lollipop, you need white and red plastic. The materials must be kneaded and formed into two identical balls.
- Then they need to be rolled out.
- The sausages are neatly intertwined.
- The edges of the workpiece are smoothed. When everything is ready, the top of the lollipop should be carefully folded over.
The process of creating such a craft takes no more than 10-15 minutes.


Other
In addition to the proposed ideas, there are other options for crafts that can be easily done by hand.
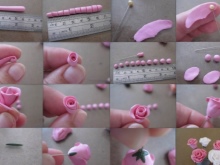
- The Rose. You can use pink or white polymer clay to create delicate flowers. The material needs to be kneaded well and rolled into a sausage. One of its edges should be wider. Then this sausage needs to be cut into small pieces. The most voluminous must be rolled out, forming a wide strip. It is necessary to wrap a bead with it. The edges of the flower must be carefully straightened. Small petals are made from the rest of the details. They are attached to the base of the rose. The joints of the flowers are carefully straightened. You can additionally attach green parts to the bottom of the flower.


- Beads. Such a simple decoration is made from materials of different colors. Beads can be made the same. But the combination of large and small details will look no less beautiful. A small hole is made in each of them with a needle. Next, the beads are baked and then strung on a thread.


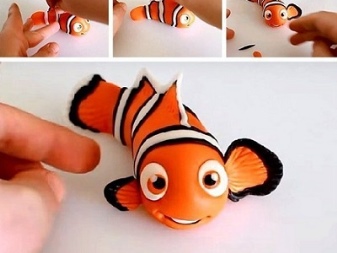
- Fish. To create a cute fish, you need orange plastic. The torso of a cartoon character is formed from it. On the back of the figurine, fins and a tail are distinguished. Small depressions are made on the head with the help of a stack of balls. The same white balls are inserted into them. Dots in black and brown are attached to these parts. They are carefully smoothed and decorated with white highlights. Using a stack, the mouth is cut out at the bottom of the head. A thin strip made of white plastic is placed inside. The same details are glued to the body. They are carefully smoothed and supplemented with black stripes. The fins of the fish are designed in the same way. A lateral fin is made of orange plastic. It, along with the tail, is complemented with black stripes. The fin is attached to the body of the fish. When the figure is ready, you can tweak it with a stack, adding realism to the product.
Ready-made polymer clay crafts can be used to decorate the interior or complement your outfits, as well as original gifts.

In the next video, you will find an overview of tools for working with polymer clay.


