Light crafts from natural materials

Making crafts from autumn natural materials is an exciting activity for children and parents. What simple work on the theme of autumn to do for school or kindergarten with your own hands step by step with the children, you will learn in this article.
To be fully equipped for the autumn craft contests, take your children for a walk in the forest or park. Admire the autumn landscapes and collect the material you need for creativity: chestnuts, acorns, moss, twigs, tree bark, leaves, nuts, cones. All this wealth will definitely come in handy for creating works.


How to make an owl?
To make an owl, prepare:
- a large pine cone - the fruit of the Pitsunda pine or cedar will do;
- thin twigs of birch 8-10 cm long;
- a branch 3-5 cm thick and 10 cm long;
- jute rope;
- plastic eyes from a craft store;
- a piece of brown felt for the beak;
- hot gun and transparent glue sticks;
- if you do not know how to work with a glue gun, use Titan glue.
Before starting work, wash the cones and twigs well, dry them thoroughly. You can make an owl when the bump is completely open in the warmth, otherwise you risk ruining the whole work.


Let's start making crafts.
- Cut out of cardboard foundation for eyes - 2 circles with a diameter of 2.5-3 cm. In each circle in the middle we make a hole.
- We cut pieces about 3 cm long from jute rope and glue them tightly to each other on cardboard, leaving no gaps. We carry out this operation from 2 sides of the blanks.
- We connect the circles together, and we cut the threads in a circle, so that they do not bristle at different distances, and the eyes of the bird are the same. We insert eyes into the holes and fix with glue. Purchased eyes can be replaced with matching buttons.
- We glue several identical twigs to the cardboard from the seamy side... As soon as the branches grab, we fix the eyes at the top of the cone.
- Cut out a triangle with a sharp top from felt. We bend it in the middle and glue it just below the eyes. The sharp beak is ready.
- At the bottom of the cone, we outline a place for the tail. Glue thin branches of 6-10 pieces one at a time, into a cone between the scales. As soon as the twigs are dry, we trim them with a pruner, giving the shape of the tail.
- Wing branches glue in the same way symmetrically from each side of the bird.
- The owl will sit on the branch. We take a thicker stick and make three skeins of rope for each paw. We glue the branch between the scales.
- The owl is ready and worthy will decorate any school exhibition.


Making a snail
To create crafts you will need:
- plasticine;
- stack and sculpting board;
- chestnut;
- autumn leaf.


Let's get to work.
- Take half a bar of bright plasticine, roll a sausage out of it. Its upper part will be larger. This is the head of a snail. Leave the lower part of the sausage - the tail - narrow.
- Making a downward curl from a large portion of the sausage... This is the snail's face. On it, carefully draw a mouth and a nose with a stack.
- We attach a chestnut to the back - sink.
- From the same plasticine we form 2 thin cone sausages.
- We turn their upper ends into rings, and the lower ones are fastened at the back of the head.
- We make a snail from peas of black plasticine eyes on the horns.
- Now we decorate the sink house. We make a thin plasticine flagellum and gently glue it with a spiral onto the chestnut from the middle.
- Cheerful snail is ready to go to kindergarten... It remains to plant it on a beautiful autumn leaf.


More ideas
Fashionable and original things can be made with your own hands from what autumn gives us. Simple eco-style decorations, for example, an autumn wreath or a beautiful applique made of leaves, will decorate the interior of a class or group in a kindergarten.
Wreath
To create a wreath you will need:
- birch or willow branches;
- autumn leaves;
- acorns;
- cones;
- nuts;
- plants' seeds;
- glue gun;
- dense threads;
- red satin ribbon or wide burlap braid;
- physalis flowers, statice, rowan twigs.


Consider the progress of the work.
- Clean the branches of dust and leaves, roll into a tight ring, tie in several places. Leave to dry for a couple of days.
- The wreath is dry - we proceed to decorate it. On the upper part of the future wreath from the prepared ribbon, we make a loop for hanging the work and tie a beautiful bow.
- With hot glue we fix our decor to the base.
- First, we fix the large parts: big cones, chestnuts, physalis, walnut shells, and after small - small acorns, berries, seeds.
- Alternate decor with each other to make it beautiful. Do not glue cones or nuts in a row.
- Lastly, we glue light autumn leaves on the wreath, small tassels of rowan and dried flowers.
- Bright autumn wreath ready.


Frame
Making a frame for a photo with your own hands is quick and easy.
Prepare:
- an ordinary wooden photo frame;
- PVA glue;
- titanium glue or glue gun;
- brush;
- natural material - small cones, acorns, nuts, twigs, shells, pebbles, moss.


Let's get to work.
- Think ahead what pattern will create on the frame.
- Thoroughly glue the decor to the frame, How do you like.
- Dissolve the PVA glue with water 1x1, use a brush to cover your work with the composition. This will protect the natural decor from dust and insect infestation.
- Give work dry completely, and feel free to insert a photo into the frame.
The kids will be happy to do the simplest autumn crafts on their own. Here is a whole list of simple and beautiful things for young craftsmen to embody.


Mushrooms
A family of appetizing mushrooms nestled in a forest clearing is very easy and quick to make:
- we sculpt mushroom legs from brown plasticine;
- we make hats from walnut shells and acorn caps, paint them with gouache in the desired color;
- we make out the autumn meadow on a piece of cardboard - with the help of plasticine we glue twigs and leaves, pieces of bark.

Spider
A large chestnut will make a wonderful spider:
- in a young chestnut, make 8 holes for the feet, 4 on each side, and insert toothpicks there;
- on the upper side of the fruit, make eyes from peas of black and white plasticine;
- the spider is ready.


Hen
An excellent chicken will be made from a large spruce cone. Its opened scales look like ruffled feathers:
- glue a yellow ball - the bird's head to the upper smooth side of the cone;
- glue a red plasticine comb, beak and black eye beads to it;
- glue the red plasticine legs on the abdomen of the brooding hen.
The chicken is ready. To keep her from getting bored, create chickens for her:
- paint the small cones thoroughly with yellow gouache;
- in a manner known to you, make chickens' heads, eyes and beaks, paws;
- we fix the legs of the chickens on the edge of the smooth side of the cones so that they are visible;
- we attach the heads of the chickens to the uppermost scales of the cone.
The cheerful family is ready.


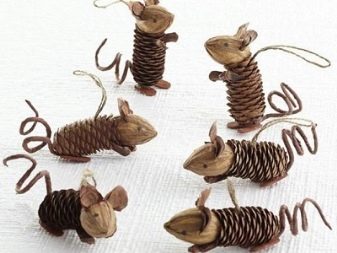
Mouse
The closed cones will make cute little mice.
- Before work, dip the cones in PVA glue, leave them to dry in a cool place. The cone scales will stick together firmly and will no longer open.
- We turn the sharp end of the cone into a muzzle. We make a black nose and eyes from plasticine, glue white ears and a mustache from a thin wire.
- Paws we make mice from white plasticine, and tail from the usual gray lace.


Teapot and cups
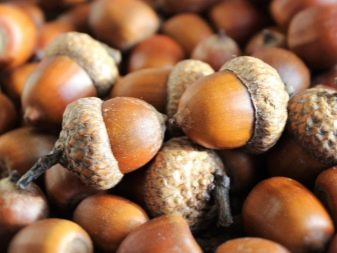
A miniature tea set is made from acorns. We turn the hats into adorable little cups - we glue saucers and plasticine handles to them, and a large acorn into a teapot. We attach a nose and a plasticine handle to it.


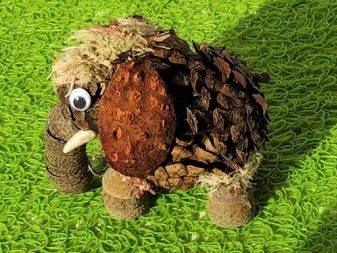
Elephant
Here's how to make an elephant.
- Connect 3 small pine cones with scales.
- Hot glue the joints. The elephant's body is ready.
- From the acorn caps glued together, we make the elephant a long trunk and shorter legs.
- We make the fangs and eyes of the animal from plasticine.
- For the ears, take the chestnut peel.


Bear
A club-toed bear can be easily made from two chestnuts and plasticine. A large chestnut will serve as a belly for a bear, and a small one will become its head:
- glue the head and body together with brown plasticine;
- from it we roll 4 balls - 2 large for the hind legs, a couple of smaller ones for the front legs;
- we make brown ears from 2 small plasticine cakes;
- the look will be completed by a white round plasticine muzzle, a black nose and yellow eyes.


A pineapple
A ripe pineapple, just like a real one, comes from a pine cone:
- paint the cone scales orange;
- cut out oblong leaves for the top of the pineapple from green double-sided paper;
- glue the leaves to the top of the cone with yellow plasticine.
The exotic fruit is ready.


Ship
A fabulous bark frigate with maple leaf sails or a real pirate schooner made from half a squash or pumpkin looks amazing. Small ships made of nutshells with sails made of aspen or birch leaves look no less interesting. Toothpicks serve as the mast for sailboats.
Any kid can build such a flotilla.


For how easy it is to make a deer from cones, see the next video.


