Making baskets from cones
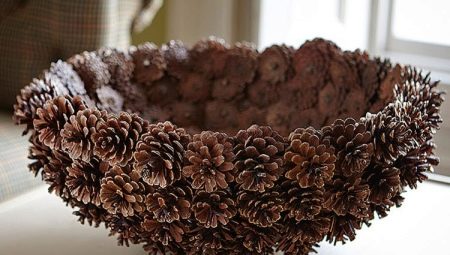
Crafts made from natural materials are good not only for children's contests. Much that can be considered eco-design perfectly takes root in the interior, decorates it, and makes it unique. If you don't know where to start, you can take the buds. The simplest ones, which are literally lying underfoot. They will be an excellent material for a stylish eco-style basket.


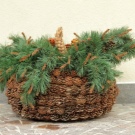


Preparation
The cones that have just been collected are not suitable for crafts - they are not only wet, they have not yet been opened. And if you glue them directly like this, then as you use it (especially in heat, dry air), the craft will quickly deform. You just need to spread the newspapers, put cones on them, and let them dry. And they will dry for a long time, two weeks.
Only after this period, dry and open cones can be used in crafts.


And the cones are also bleached, and this is a very frequent request, because the decorative effect of the cones increases with this procedure. To whiten buds, you need to take a simple bleach or bleach, dilute it at a concentration of 10%. And the cones are immersed in such a solution for 8 hours, no less. All the dirt will be washed out of them, and the main pigment will also leave. But then the buds need to be dried again for a long time.


And also the following procedure will help prepare the bumps. - you need to wash them thoroughly under running water, so you can get rid of the unpleasant odor. Then the cones are laid out on a baking sheet and sent to the oven at 60 degrees, where they should "warm" for 2 hours. All the water from them will evaporate, they will brighten, and will be ready to go. This will save 2 weeks on drying.
But if the buds are very dirty, spoiled by pests, too dark, this procedure is not suitable.

Craft on a wire base
Very often, it is the wire that helps to form the frame; moreover, this method is cheap and affordable. In addition to wire, you also need cardboard, you need to cut a ring out of it. And around the perimeter of this ring, cones are fixed on hot glue. When the first row is formed, a new overlap is glued.
Master class with wire for a basket of cones.
- Next, a wire comes into play, as a rule, copper rod. First you need to pass it through the center of the bump, and then align the edges. Another bump is fixed to the tip of the wire - it will be wrapped in the middle area. And so it is necessary to progressively connect 12 cones. The outer zone should be closed, the bumps are located with the bottom up.
- For a new circle, you need 2 pieces less. So you can form 3 or 4 rows, and each time the number of cones is reduced by 2. You get a structure comparable to a piece of pipe. Next, the bottom of the basket is drawn up. It is usually made from cardboard glued to the bottom row of cones.
- The manufacturing technology of the handles is the same as for the rows, but instead of a ring - a semicircle. It is attached to the base with wire. After that, the finished product can be decorated, and here everything depends on the author's imagination. Various stationery can be used for an exhibition at school - pencils and brushes, for example. For crafts on an autumn theme in kindergarten - maple leaves from foamiran or something else.

You can put moss in the bottom of such a basket. Or maybe it will just be a candy bowl, and inside it will be completely filled with sweets. You can also line the bottom of the basket with soft chintz with a seasonal print, or even better - a chintz “blanket” with a filler inside to make it softer and more tactile.
How to make a basket planter?
A cache-pot is a system inside which you can place a flowerpot with fresh flowers (more often curly or ampelous). And initially you need to decide on the pot, which will then be in the basket. Cones between themselves in this autumn craft must be fastened with glue, you can just with each other, or you can immediately paste over the pot with them - but then it will be impossible to get more. If it is a pots with handles, they should be longer than those of a regular basket, because the flower is going to grow tall. By the way, the bottom does not need to be laid out with cones at all, it can be plywood, or made of very durable cardboard.
If the planter is suspended, the principle of its manufacture changes slightly: the bottom in it is necessarily strong, because the object will not stand on anything, and the risk of the pot flying out must be excluded. All elements should be fastened with wire, which matches the cones as much as possible in color. An inconspicuous wire frame attaches to the pot, hook, and hides under the handle structure.
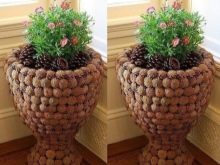


Often they decorate a barrel or something similar located on the street with cones. But then the cones will have to be impregnated with the composition, which will improve their performance. These are the usual impregnations for wood, which scare away bugs, prevent the material from rotting and suffering from precipitation. For outdoor pots, such an impregnation is required.
If you decompose the plan in steps, it will turn out like this (averaged version of the instructions).
- For a hanging planter, the bottom must be very strong, at least plywood. Plywood should either be painted over to match the cones, or glue them with heads (halves), which are fixed to the bottom with hot glue with the flat side.
- Next, a wire frame is created that will hold the entire structure. Cones are strung on the wire in stages. The planter should be neither large nor small, but exactly such that a pot with a plant sits well in it.
- The handles can be formed with wire, and then decorated with a decorative thick rope to match the color of the cones or to match the interior. You can use a braid from a cord.
If it is a basket-pots in the nursery, the cones can initially be painted from spray cans.Make some flowers, and then lay them out beautifully around the frame. The cache-pot will be a bright, charming element of the interior of a child's room. Such things are usually remembered for a lifetime as something cute and unusual from childhood.


Creating a square basket
The basis for such a craft will be a plywood box (they are easy to find in fixed-price stores). Thin plywood is used for it, therefore the basket will not weigh much. And also for work you will need hot glue, a wooden handle, a construction stapler.
Making a square basket step by step.
- The box itself (box) must be placed on a flat surface. It is to be pasted from the bottom up. Details can be placed at your discretion: someone makes a strict pattern, someone spreads it out chaotically. These can be elements of the same (in color and size), you can use colored cones, and alternate colors.
- The top row of cones should extend slightly beyond the edges of the box, the interior of which is usually tinted to match the color of the cones.
- A thin vine handle (or carved from wood), fixed to the basket with a stapler. It can be wrapped with beautiful yarn to match, pasted over with pumpkin seeds, cereals, or simply sprayed with glitter hairspray.
All is ready! Both pine and spruce cones are suitable for work. If you understand the principle, everything will go easy.


Design Tips
Often it is the design that creates the work, distinguishes it from many similar ones.
How to decorate a pine cone basket - 12 ideas.
- Artificial autumn leaves. If this is a craft for school, and even on the theme of "Autumn", it will be appropriate. The leaves are sold in garlands, so it is very easy to braid the basket with them. It looks beautiful, elegant, and the main thing is that the leaves will definitely not deteriorate at the time of the exhibition - you can put such a basket at home, it is a great option for seasonal decor.

- Golden chestnuts. You need to take them, dry them, then either cover them with paint from a spray can, or simply sprinkle them thickly with sparkles (you can take a special hairspray).
Golden chestnuts inside a basket of cones look fabulous.

- Textile liners. They line the inside of the basket, making it more comfortable. And besides, it immediately becomes as practical as possible - you can fill it with anything.

- A bouquet of paper flowers. The latter are in themselves quite an art object, but they can be beautifully put in a basket, imitating a forest gift.


- Various nuts. They will be logical with the theme of pine or spruce cones, because they are perceived as related. A few walnuts (not all) can be wrapped in golden foil for brighter colors.

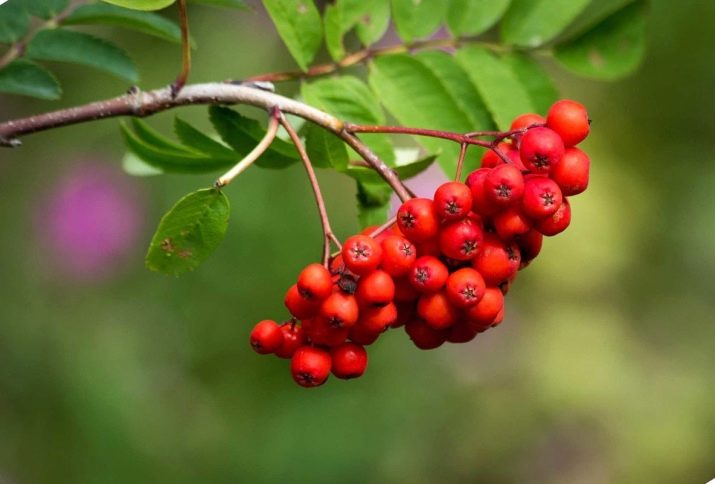
- Rowan twigs. It will also turn out to be an uncomplicated seasonal decor.
The twigs can take any position in the basket, it is important that it is aesthetically pleasing, let them hang a little from it.
- Textile fungi. And you can make them with your own hands: sew from shreds, fill with padding polyester or its analogue.
A very interesting autumn composition will turn out: both for the competition and for the home interior.

- Dried citrus fruits. Such a craft is more suitable for the winter theme, because it is associated with the New Year's holidays. But bumps are an all-season decor. And the aroma will also be pleasant.
To enhance it, a couple of drops of orange essential oil can be spilled on the basket.

- Buttons. They can be attached with hot glue directly to the cones, but so that some kind of pattern is created, the idea is visible.

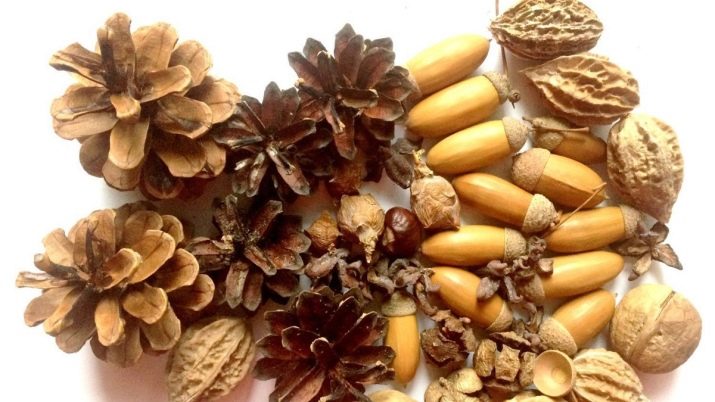
- A mixture of natural materials. Thuja twigs, acorns, mountain ash (you can also red and black), nuts - everything that suits the theme of natural resources can be formed into one composition.
- Satin ribbons. They do not need to be tied with a bow; on the contrary, the "tails" of long ribbons should be let out outside the basket - you can tie them on the handle.
If the decor is autumn, yellow and orange ribbons will be used, if spring - blue and light green, if winter - white and silver, summer - the most colorful and bright.

- Dried flowers. You can dry the same roses not just with petals, but with whole buds.Flowers are often dried in semolina - this is convenient and effective. If the basket is tiny, you can fill it almost to the top - it looks unusual, keeps memories of the summer.

The main thing is to make the craft become a part of the house, carry some information about it, give pleasant associations. Joyful creativity!
For information on how to make a basket of cones, see the next video.


