Crafts from cones and acorns

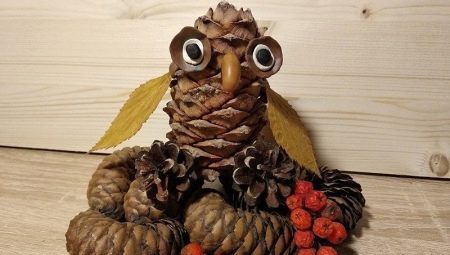
Nature is very generous with materials from which you can make a huge variety of crafts for school and kindergarten contests, or just for home decor. The most popular are cones and acorns, it is for them that parents hunt every September, in the hope of collecting as much as possible so that it is their craft that stands out against the general background. In this article, we will look at interesting options for crafts that can be easily made from cones, acorns and other materials at hand.


How to make a panel?
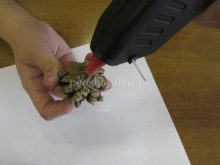
With the help of autumn panels, you can tastefully decorate your house. For any craft, you will definitely need a glue gun, with which you can quickly and efficiently fix all the elements.


Floral panel of acorns
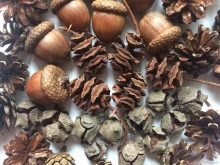
Collect acorns, dry leaves, and small buds. Separate the caps from the acorns - they will become a separate stroke in the picture. As a basis, you can take thick cardboard and give it an oval shape. Cut out paper or white cardboard according to the template and stick over the base.
To begin with, it is better to arrange the drawing without glue so that there is an opportunity to correct the shortcomings.
Take three acorns and glue them to the panel slightly apart from each other. Fix six more fruits around them to form a bud. For stems, you can use thin branches of trees or leaf legs. Attach them to flowers. Place three more branches diagonally in the upper right corner. At the end and along the branches, glue the acorn caps. Cut off the tops of the cones and glue them in random order. The panel is ready, you can hang it on the wall or put it on a stand to decorate a shelf in your kitchen or living room with it.


Panel for the front door
A small workshop on making a door panel, like in American films. For manufacturing you will need:
- small bumps;
- acorns;
- peanuts in shells;
- dried flowers;
- cardboard;
- foam or sponge;
- beads and thin rope for decoration.


Cut a circle out of the cardboard and stick on top of the foam or sponge. They will add volume to the panel and make it visually larger. If neither material was found at home, the base can be made independently by cutting a newspaper into small pieces and soaking it in PVA glue. Next, use a glue gun to fix the bumps and acorns in a random order, they should fill most of the panel.
Fill in the gaps with peanuts, try to do everything carefully, as they have fragile shells. Small gaps will remain between natural materials; dried flowers should be inserted into them. Place the beads in a circle and tie bows from the ropes, they should also be fixed with glue. The panel is ready, it remains only to make a loop at the back.


Making a basket "Gifts of Autumn"
This craft will be a great gift for Teacher's Day or any other holiday. She looks very rich and will decorate the interior of the room for a long time.
From chestnuts
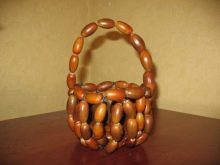
In this case, you will need a small basket or an unnecessary bowl, preferably without a handle. Stock up on a large number of chestnuts, set aside the largest for the holder. Rinse the fruit well, dry it and begin to fix it all over the bowl with a glue gun. Glue one chestnut to another, build a handle. This will create a real chestnut basket. If desired, the chestnuts can be replaced with cones.
For volume, fill the basket with a wad of paper, newspaper, or put a sponge inside. The best option would be a special flower sponge, which is used by florists to create flower baskets and installations. Start filling the containers with autumn gifts. Insert spruce twigs around the edges, put a couple of bunches of mountain ash, gooseberries in the middle, do not forget about acorns. For beauty, you can pre-insert large maple leaves.


With mushrooms
If your family has real mushroom pickers, they can help with this craft. Take a wicker basket, put some volume filler inside and start decorating. Insert maple leaves on the sides, fill the inside with cones and porcini mushrooms. Complete everything with rowan berries and beads scattered in random order. Decorate the handle of the basket with bows, yellow leaves and acorns. You will get a very beautiful basket with real gifts of autumn.


From acorns
Again, any basket available in the house is taken as a basis, you can take an ordinary cardboard box. In this case, you will need a lot of acorns. Begin to glue the body with oak fruits from the bottom up with a glue gun. Place the base inside the basket and start filling. Place pears and apples on skewers, and insert one at a time. Fill the gaps with flower buds, and decorate the edges with bunches of rowan with leaves.


More ideas
Crafts made from fir cones and acorns are most in demand for autumn contests in educational institutions. They can be supplemented with other natural materials, for example, leaves, chestnuts, moss, nuts. Consider a few simple master classes on the theme of autumn that children can do with their own hands.


To a kindergarten
For preschool children, there are many options for easy crafts that they can quickly cope with.
Hedgehogs
Children love to sculpt animals. The simplest cones are made from hedgehogs. You will need:
- cone;
- plasticine;
- eyes;
- gold spray.
Roll a ball out of beige or light brown plasticine. Pull it out slightly on one side, forming a snout. Roll up a small black ball and attach it to the tip, you get a spout. Place the eyes on your face and apply light pressure.Roll up four foot sausages and join all the pieces together. For a more dressy look, paint the bud with gold paint or spray.


Turkey
Another interesting figurine for which you will need:
- cone;
- PVA glue;
- colored cardboard;
- leaves;
- eyes.
Cut a circle on a short leg from brown cardboard, and a triangle from yellow cardboard. Glue the nose to the face, on top - the eyes, if they are not there, you can draw them with a felt-tip pen. Insert the circle into the bump with the leg down, after having greased it with glue. Glue the leaves on the back, starting with the smallest and ending with the large maple leaf.


Forest Glade
Children from the older group will be interested in making something more difficult. Such a clearing will be a wonderful decoration of the competition table. To do this, you will need:
- shoe box lid;
- leaves;
- White paper;
- branches with leaves;
- bunches of rowan;
- cones;
- acorns;
- white and red floss threads;
- white cardboard.


First you need to make a mushroom. Cut the cardboard crosswise into two parts. Twist one into a roll and glue it, this will be a leg. Cut out a large circle from the second, make an incision to the middle, apply glue on one side, and put the other on top, you get a hat. Apply plasticine to the edges of the leg, this action will help to install the ready-made mushroom in the clearing and fix the hat.


With glue, glue the tip of the white thread at the base of the leg, apply a little of the composition in strips in several places, and start wrapping the thread in a circle, moving up. Carry out similar actions with the hat, wrapping it with red thread. Decorate the leg with eyes and a smile, the hat with white circles and rowan berries. Put both pieces together and the center piece is complete.
Line the shoebox lid with leaves, leaving some room for the mushroom. Install it in the upper left corner. Place a spruce branch in the foreground, put some moss at the base of the mushroom, and secure the maple leaf to the stem. Arrange the rowan bunches on the left side, put a branch with leaves in the corner, and place cones and acorns in the middle.


To school
For schoolchildren, you can choose more complicated options.
A pineapple
Juicy pineapple can be made not only from plasticine or drawn on paper, but also using a cone. You will need:
- cone;
- green paper;
- yellow paint and brush;
- scissors;
- PVA glue.
First, paint the tip of the bud with yellow paint and let it dry. In the meantime, cut out a thick strip of paper, make transverse cuts in it, giving each a sheet-like shape. Twist the strips slightly and wrap the shape in a roll, securing the tip with glue. Insert the resulting shape into the bump and fix it. It turns out the original tropical fruit.


Deer
A very interesting craft that will delight any student. To create it you will need:
- two bumps;
- acorn;
- branches;
- plasticine;
- glue gun;
- stand;
- moss.
You will need a large bump for the body and a small one for the neck. Glue them together to form the letter "L". To make the head, take an acorn, roll up the nose and eyes from plasticine, attach them to your face. Make horns from branches and also glue them with a glue gun. Place your head on your neck, insert your legs from branches with plasticine circles at the end into the body for greater stability.
Prepare the stand. To do this, take a thick cardboard, divide it into 2-3 parts and glue them together. Glue white paper on the top side, decorate the sides with tree bark. When everything is dry, use moss to make an imitation of grass, and place the finished deer on top of it.

Spruce forest
The main feature of this craft is that it uses real tree bark as a base. Required components:
- three big bumps;
- PVA glue;
- green paint;
- a large piece of bark;
- moss;
- plasticine;
- seeds;
- rowan berries.
Lubricate the bark surface with a thin layer of glue and lay on top of the moss that simulates grass. Turn the cones upside down and paint with green paint. Leave everything to dry, in the meantime, do some plasticine crafts. Roll two short sausages from the white mass, make amanita caps from the red mass, decorate them with white dots.
Let's make a hedgehog. Roll an oval out of brown plasticine and slightly extend one end. Stick a small black circle on the tip, and eyes on the face. Fill the body with seeds. It remains only to distribute all the resulting figures around the perimeter of the base.

Next, see a master class on making a Christmas tree from cones and acorns.


