Crafts from straw and hay

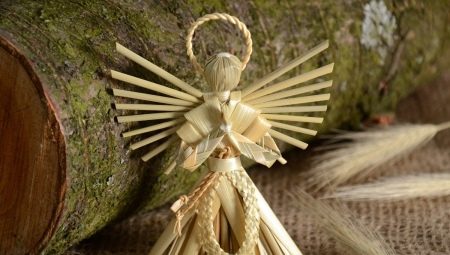
Crafts made from hay and straw have been known since the times of Ancient Rus. At that time, this material was one of the most accessible, so there were no questions about where to get it. Several centuries have passed, but straw has not lost its relevance - crafts from such raw materials are available for production, while it looks very aesthetically pleasing and non-trivial.


Features and material procurement
Straws are obtained as a result of threshing the stalks of cereals and legumes. It is an excellent raw material for making all kinds of handicrafts and handicrafts. The reasons for its popularity are easily explainable; it combines:
- decorative look;
- increased density;
- flexibility;
- porous structure;
- ease of processing;
- good adhesion to any adhesives and dyes.


Plus straw is available. Residents of rural areas can harvest it in the fields or on farms where legumes and cereals were grown immediately after the end of the harvest in the fall. Citizens can buy it in specialized stores for handicrafts and creativity or on Internet sites. It is also sold in pet stores as food for rabbits.
However, freshly cut stems of cereal plants are not suitable for making crafts. They contain too much moisture; at home, the material begins to rot. This makes it impossible to use them in needlework. Therefore, the straw must be processed before use.
To begin with, it is dried. For this, the workpieces are collected in small bunches and hung in a dry, ventilated place, away from direct ultraviolet rays. Drying time is 2-4 weeks.
The process can be accelerated by ironing the natural material with an iron, but this method is convenient only in cases where a small volume of workpieces is needed for work.

To make the straw more flexible, it is additionally soaked. So, in the days of Tsarist Russia, the peasants, after soaking, wove ropes from straw and subsequently used them to make roofs. The length of one stalk of straw can vary from 10 to 50 cm or more, so the straw has to be cut into pieces of the required length for work.
To change the color of the raw materials, you can use any natural dyes. So, if you boil the straw in a concentrated beet broth, it will turn brown-violet. And if you use a decoction of onion peels, then the straw will acquire a pleasant honey tint.


Ideas for kids
You can make a variety of crafts from straw, from the simplest flower bouquets to dolls, which in previous years in Russia were woven for the Harvest Festival.
Straw is used to make complex panels, figures of birds and animals, baskets, mirror frames and other crafts for school and kindergarten on the theme of autumn.


Application
One of the simplest and most popular techniques for working with straw is applique. It allows you to make flat paintings that give the impression of three-dimensional. It is not difficult to master it on your own, despite the fact that it is a very laborious process that requires a scrupulous approach and accuracy. To create a painting, you will need straw, paper, as well as pencils, brushes, glue and scissors.


The step-by-step process of creating a straw applique includes several stages.
- The stalks of the straws are steamed in a saucepan / deep basin with boiling water, covered with a lid and kept for 3-5 hours. They should become soft elastic.
- From the entire volume, the amount of material is chosen, which is enough for one day of work. Any remaining straw is wrapped in plastic wrap or thick cloth and removed.
- To create an applique, you will need long strips of straw blanks. To do this, the stalks are cut with a knife or nail scissors, and the resulting ribbons are smoothed with a hot iron each separately.
- Then, on a sheet of paper, they create the outlines of the future applique or a stencil of the picture.
- Then you can go directly to the creation of the pattern - the strips are selected by color and planted on PVA. Straw belts are attached close to each other so that there is not the slightest gap.
- When the applique is ready, it should be carefully ironed and placed under a press, for example, under a thick book.


Panel
Panels come out quite spectacularly from straws. However, their creation is a complex process, so children may need help from adults. To make a flower panel from straw, you need to prepare a wire 2 mm thick, a linen cloth, cotton threads of the appropriate shade, thin braid and a basin or other container for bleaching natural material.
To make one flower, 10-12 straw tubes are cut with thin scissors along the stem, carefully unfolded and ironed. The strips are glued onto tracing paper or thin white paper with a continuous web using PVA glue. The remnants of the glue are removed, rolled with an effort with a rolling pin, ironed again and placed under a heavy press for 5-10 hours.
While the straw is cooking, a stencil is formed from the cardboard for the flower. It is laid out on the resulting straw cloth, outlined and cut out. The resulting petals are attached with glue to a cotton or linen fabric of a contrasting color. A dense thread twisted with a tourniquet is glued around the petal, while the tails are left below.


Next, you need to wait until the glue is completely dry and cut out all the blanks again. A circle with a diameter of 1 cm is cut out of the cardboard.From the outside, half of the petals are glued to it, the other half is glued from the back side so that they are, as it were, between the petals of the first row.
After waiting for it to dry completely, you need to make a puncture at two points - this will allow you to tie the prepared flower with threads to the wire. The work is almost complete - all that remains is to bend the flower and close the wire with tape.
Thus, you need to prepare several flowers. They are attached to a decorative mesh or linen fabric, a ribbon is tied or spirals are twisted for decoration.


Ship
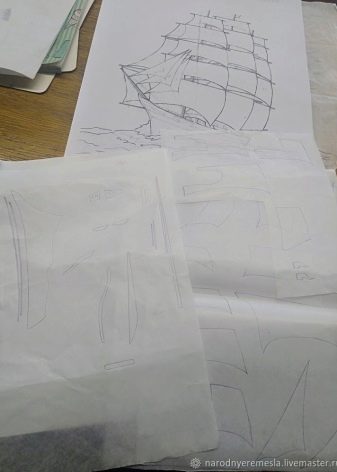
For children, the easiest way is to make a ship out of straw using the applique technique. First you need to draw up a sketch - this is a creative and scrupulous work, it requires maximum accuracy and concentration. The sketch represents the outlines of the ship. Its appearance resembles an ordinary children's coloring book.
The straws should be cleaned into strip shavings. This process requires a lot of patience and slowness, otherwise the material will break. Straw tape is glued to the sketch.
Usually the work takes several days, but the output is such a beautiful ship.


Small house
Very interesting fairy-tale houses can be built from straw. Making such a craft with your own hands is quite simple - for this you need a box, scissors, a simple pencil, PVA and all kinds of decor items (beads or ribbons).
First you need to make the frame of the building. To do this, the windows and doors of the fairy house are marked on the walls of the box, and then they are carefully cut out with a sharp knife. Then you can proceed to the main part of the work - directly pasting the box with straw. To do this, you need to measure the length of the walls so that the straws are not shorter or longer.
The roof is made from several bundles of straw. They are tied together and connected to the walls. Thus, you will get an unusual house. To make the gnome's dwelling look more decorative, you can use decorations, it can be ribbons, feathers or branches. Window and door openings can be decorated with wooden plates or cloth.

Hare
In recent years, it has become very popular to make the Easter bunny. Try to make it yourself with your child - rest assured that this work will definitely appeal to children.
To implement this idea, you need to prepare straw or hay. You can buy it at any pet store - briquettes of dried grass can be found as food for rodents.
Also you need to prepare:
- jute or any coarse thread;
- hot glue / super glue;
- black buttons or artificial eyes;
- ribbons.


If you want to give the bunny a carrot, then green felt will come in handy. To begin with, two balls are made from dry grass. The small one will go to create the head of the animal, the large one - for the calf. To fix the shape, use twine or green thread.
Fold long ears in the same way. Five more lumps are needed for the tail and legs. Next, you need to connect the blanks. To do this, recesses are made in the balls, parts are inserted into them and fixed. The bunny is ready.
All that remains is to glue his eyes, a couple of teeth, a nose, decorate with a bow of ribbons and hand a carrot in his paws.


Other
Our ancestors were very fond of making dolls out of straw, most often they were used in rituals and ceremonies or as amulets. To make such an unusual decor item, you will need straw, toothpicks or wooden sticks, scissors, metal wire and cloth.
- In this case, the straw is handled without any preparation. You do not need to straighten it or smooth it with an iron. The straws just need to be trimmed so that they are all the same length. The prepared material is folded in half to keep the ends aligned.
- Determine where the head of your future doll will end and separate this section with a wire.Shape the waist in the same way - it is also tied with wire. If the toy begins to break, then insert a toothpick or wooden stick between the head and body, they will act as a spine.
- Hands can be done with simple dry grass braids. Alternatively, insert a thin stick and wrap the grass around it. The resulting limbs are attached to the body on a wire. The toy is ready.


Interior products
Very stylish crafts can be made from straw, which have every chance of becoming an interior decoration. Most often they are used to create paintings. Flower vases and figurines are very beautiful.


Many people use straw to make home amulets. Autumn straw makes spectacular decorations for gardens and backyards. They make a goblin, a bull, a bunny from it. The most experienced craftsmen can make a donkey with a cart.


Straw is a beautiful and affordable material. Crafts with him are especially relevant in interiors decorated in Provence and country styles. Making them is easy.
There are many master classes on the Internet that explain how to make a stylish thing step by step.


For information on how to make hay crafts, see the next video.


