Crafts from pumpkin seeds
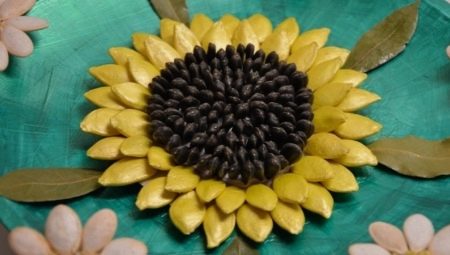
Natural materials are often used to make children's crafts. Pumpkin seeds are very popular among young craftsmen and women - they have the correct drop shape, therefore, they allow you to create both a voluminous figure and a colorful autumn picture... Let's get acquainted with the most interesting ideas.


Material preparation
There are many ideas for making unusual crafts from natural materials. These can be simple applications or more voluminous ideas in the form of plants and animals. Taking pumpkin seeds as a basic working material, first you need to prepare them for subsequent use in needlework. To do this, follow these steps.
- Strong seeds are selected first. - they must be whole and strong, without signs of decay.
- Stuff well cleaned, washed and left to dry.
- When the sunflower seeds dry out, you can paint.
Tinting of blanks is performed in two ways. The first involves applying a dye to each seed separately. This is a very time consuming technique that will take a lot of time. It is usually used in situations where a small amount of colored seeds is needed for the job. For large-scale crafts, you can resort to a simpler method - toning a handful of seeds. This will require polyethylene bags, dye is poured into them and the required volume of seeds is poured into them.
The bag is sealed and the materials inside are mixed - if this is not done, the color will turn out to be uneven.


The dyeing time depends on what effect you want to get. If you need a shade, then 10-15 minutes will be enough, and if you want to get bright juicy colors, it will take about 40-60 minutes to paint the seeds. After toning, the workpieces should be thoroughly dried, while it is advisable to avoid their contact with each other. This technique is convenient because it allows you to make blanks of different shades at the same time. In this case, a minimum of effort is required from you. In addition, you will avoid contamination of the dishes.
Depending on the characteristics of the intended product, additionally, you may need a mass for modeling, PVA glue or a glue gun... Of course, you can't do without basic stationery - cardboard, scissors, as well as pencils and paints.
Crafts are especially beautiful in which pumpkin seeds are combined with other types of natural materials - sunflower seeds, leaves or flowers.


How to make a tree?
When working with pumpkin seeds, applications are especially successful. It is this type of work that is recommended for young children as the initial stage of acquaintance with the technique. Parents together with their kids can create an interesting craft on the theme of "Autumn".
To do this, you need to prepare:
- thick sheet of light cardboard;
- thin brown paper;
- brush and paints;
- PVA;
- pencil;
- tree template;
- scissors;
- the seeds themselves.
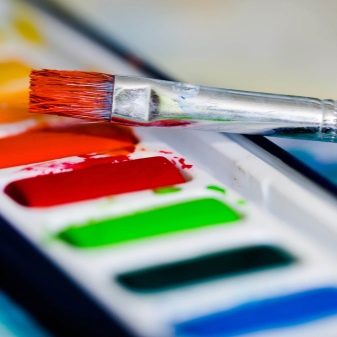

First you need to prepare the pumpkin seeds. To do this, they are placed on a film or oilcloth and covered with gouache. It is better to take autumn colors - bright red, orange and yellow. Set them aside to dry completely.
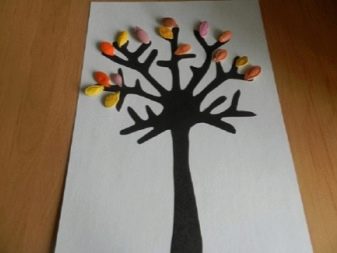
While the seeds are drying, prepare the base of your future painting. To do this, using a template on brown paper, draw the outline of a tree trunk. Then they carefully cut it out with scissors and use glue to fix the workpiece on a light cardboard base.


After that, you can proceed to filling the tree branches with improvised leaves, the role of which will be played by seeds. Each of them is generously greased with glue and attached to a tree in a chaotic manner. In this case, it is desirable to alternate colors.
Do not forget to glue a few falling leaves, as well as make an already flown fall off near the tree trunk. You should get such a funny applique craft.

Making flowers
Pumpkin seeds are a good material for making flower crafts. These can be single flowers, bouquets or even topiary. This technique is often used to create works for a creative competition in a school or kindergarten. Rest assured, such work will undoubtedly attract attention.
To create a flower bouquet you will need:
- white cardboard;
- pumpkin seeds;
- hot glue gun;
- PVA;
- sackcloth;
- wooden sticks;
- green tape tape;
- peas;
- gouache;
- brush.


The work step by step includes a few simple steps. A round-shaped blank is fixed on a cardboard, depending on the dimensions of your future flower, its diameter may be 5-10 cm.
Pumpkin seeds are glued onto it in rows, moving from the circle to the center. In this way, four rows are filled. Be sure to leave room for the core. Flip the workpiece over with the back side and glue another row in a circle.


With the help of gouache and a brush, the flower is painted in any desired color. The place left under the core is poured with PVA glue and sprinkled with ground peas or millet.
A blank in the shape of a circle is formed from burlap.


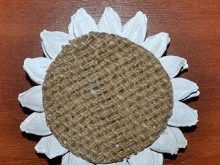
The fabric blank is glued to the back of the flower. Then you need to glue a wooden skewer or wire with a green tape - this will be a stalk.
The flower is almost ready. It remains only to collect its individual elements.


In this way, you need to make several flowers, and then make a bright autumn bouquet of them and put them in a vase.... Another unusual flower that can be made from pumpkin seeds is a sunflower.To create such a craft, you need to prepare a base circle and glue the seeds around the circumference, they will act as flower petals.
The seeds are colored in a deep yellow hue. Then glue is applied to the center of the sunflower and generously sprinkled with any black bulk material - most often it is poppy, tea, colored semolina and even lumps of dark paper. Spectacular sunflowers are ready. Even kids 3-5 years old can do such a craft.


Older children can be invited to make a topiary with their own hands. It will become a real decoration of your kitchen. For work you need to prepare:
- cardboard;
- double sided tape;
- any plastic or wooden stick;
- small tin can;
- PVA;
- pencil glue;
- gypsum;
- jute twine;
- colorless varnish;
- any decorative elements (ribbon, beads, beads or bow).

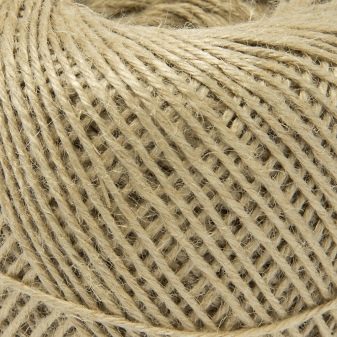
Topiary production includes several stages.
- A base is formed from cardboard. To do this, you need to crumple it, form a ball, fix the resulting shape with threads, and then paste over it with masking tape on top.
- A hole is formed with a sharp pencil and a stick is carefully inserted into it... For greater stability, it is desirable to fix it with glue.
- The resulting spherical blank is pasted over with pumpkin seeds, if desired, they can be pre-painted... Fill in the gaps with beads or glitter. For a more reliable fixation, the craft is varnished on top.
- Next, you need to prepare a stand, for this you need a jar... It is wrapped with twine and liquid gypsum is poured inside, if it is not there, ordinary putty will do. When the composition slightly grabs, the leg of your topiary should be placed in it.
The stylish decor item is ready. All that remains is to decorate it with ribbons and bows.

More ideas
Quite an interesting creative work can be obtained from ordinary pumpkin seeds, if an enthusiastic home craftsman takes up the task. Experienced craftsmen are advised to start with simple products and only after mastering the basic skills, move on to more labor-intensive crafts.
This is especially important when it comes to children - after all, it is extremely important for them not to be disappointed in their abilities at the first stages of their creative path.


Birds
All children love the fairy tale about Ryaba Chicken. That is why you can invite kids to create this bird with their own hands from pumpkin seeds and plasticine. By the way, such a craft can become a good idea for primary school and kindergarten. You need to prepare pumpkin seeds, a modeling mass, a light wicker basket, as well as any natural material - these can be small branches, dry grass and leaves. Additionally, you need sunflower seeds.
First you need to sculpt the body of your future hen from plasticine. Then the wings and tail of the chicken are made from the pumpkin seeds. To do this, you just need to stick them into a soft plasticine base.


All other areas are filled with dark sunflower seeds. Like pumpkin seeds, they are inserted with the tip down and pressed tightly against each other. A scallop, catkins and a beak are formed from red plasticine, and a chicken's eyes are formed from a mass of blue or green color.
To make the craft come out complete, it is placed in a small basket. The bottom is lined with grass, hay and decorated with flowers.


Quite good birds can be made using the applique technique, the easiest way is to make an owl from pumpkin seeds. The subject of such a picture will be a spreading tree standing under the sun. Then everything is simple.
A cut out silhouette of a brown tree is glued to a sheet of paper. Then, over one of the branches with a simple pencil, draw the contours of an owl and begin to gently glue pumpkin seeds there. They should adjoin each other as tightly as possible in order to leave a minimum of space for the cracks.
In a similar technique, you can make other birds - stork, crow, peacock and even a firebird.


Animals
Due to their drop-like shape, seeds have become the ideal material for making a funny hedgehog. The process of creating such a craft is very popular with young children, so it is advisable to use only soft materials for work. Using a combination of several types of seeds, cereals, whole grains, as well as fallen leaves with a pliable mass for modeling, you can create a beautiful autumn composition "Hedgehog in the forest".
There are several jobs you need to do.
- First, a shape is formed from plasticine, which resembles a drop in outlines.
- Then, the nose of the rodent and the eyes are made from black pepper with peas.
- After that, it remains only to insert the seeds, which will represent the needles. They are placed with the pointed side up.
The hedgehog is almost ready. It remains only to decorate it with leaves, grass, a small decorative mushroom or apple.


Fishes
If desired, you can make colorful rainbow fish from the seeds. They are especially beautiful using the applique technique. The master class involves several steps.
- To begin with, on paper with a simple pencil fish silhouette... You can trace it around a pattern or draw it yourself. Draw the eyes.
- Apply PVA glue to the contours of the fish. Do not immediately cover the entire figure of the fish with abundant glue, otherwise you risk accidentally smearing the sticky composition all over the sheet.
- Then everything is simple. The seeds are glued along the contours, and then they fill the inside of the fish.
- Let the glue dry completely. While you wait, draw small circles around the fish with a wax pencil - they will represent air bubbles.
- At the final stage, create a watery background using paints and a brush.
- This applique can be framed and hung on the wall in the nursery. In the cold season, it will remind the baby of the sea, warm summer days and other delights of the hot season.


Crafts from pumpkin seeds are not difficult to make. At the same time, there are many ideas for creating crafts from this natural material, each of them is easy to do with your own hands. We hope that one of the works described by us will be an excellent solution for performing for a competition in a kindergarten or school.


In the next video, you will find an autumn pumpkin seed craft for children.


