Crafts from cotton pads

Crafts from cotton pads - flowers, snowmen and trees, other children's works in the form of panels, applications - can become a wonderful interior decoration or a source of pride for parents when participating in various competitions, exhibitions at school or preschool institutions. The material is very easy to work with, lends itself well to fixing on different types of bases, and you can buy it at any store with cosmetics or care products. When deciding what can be done for children 3-4, 5-6 and 10 years old from cotton pads, you should pay attention to master classes that allow you to make thematic autumn, winter compositions with your own hands.


Rules for working with the material
In everyday life, cotton pads are hygienic items used for makeup removal and face care. Disposable sponges are easy to use and do not contain hazardous chemical compounds. Their surface lends itself well to coloring, gluing, cutting with scissors, they keep the desired shape after fixing.
The versatility of cotton pads as a material for crafts allows you to use them to create appliqués, volumetric figures and crafts.


Depending on what kind of creativity is chosen, the set of related tools and materials may also change. For example, bulky products are formed using:
- skewers and knitting needles;
- sewing needles and threads;
- stapler;
- cardboard, acting as a frame, stand;
- polyurethane foam;
- textiles;
- decorative rhinestones, beads, beads, sequins, sequins.
Flat applications are made on a paper basis. Also, cardboard can act in this capacity.In working with the material, glue, scissors, various types of paints, felt-tip pens, brushes, and sometimes plasticine are useful. With such a set, you can make various panels, postcards, combined crafts using natural raw materials - from shells to cereals.


When working with cotton pads, you have to take into account some recommendations to avoid possible errors. Among the important rules are the following.
- Using PVA glue. Bulk crafts are fastened with a liquid composition, flat ones - with a solid one, in the form of a stick or a pencil.
- Pre-staining. The process uses water-soluble pigments. A cotton pad is dipped in them, then dried. Individual workpieces are already cut from painted materials.
- Using markers. They are needed to highlight details, paint small areas, and draw lines.
- Various gluing methods. You can apply the fixing compound in a continuous layer over the entire surface of the sheet or pre-outline the areas on which the discs will be located. In this case, only them are lubricated with glue. You can also apply the liquid formulation to the back of the cotton sponge itself.


When working with cotton pads, you must observe the measure. Do not apply too much adhesives on them, choose toxic materials with a second hold or contain hazardous chemicals.
When preparing the workplace, it is important to reliably protect it with an oilcloth, provide the child with an apron and oversleeves so as not to stain clothes.


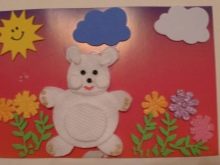
What kind of flowers can you make?
With the help of cotton pads, you can easily depict an applique of flowers - from tulips to lilies. But in this case, voluminous calla lilies, collected in an expressive white bouquet, look much more interesting. For it, you will need colored cardboard or wrapping paper, PVA in a tube, cotton swabs, yellow paint and the discs themselves - their number is selected based on the volume of the bouquet.
The process of making an original flower arrangement will look like this.
- Roll 5 prepared sponges into tight cones, fix the resulting shape with glue. Spread the resulting flower blanks, put a yellow bead or the tip of a cotton swab in the center of each bud.
- Lay out a sheet of double-sided cardboard, cut to a square, lay it in a rhombus. Fold the edges so that you get a sharp corner at the bottom. Bend them outward on the sides. The packaging for the "bouquet" is ready.
- Glue 4 flowers in the center around the circumference. Fifth - just below. Glue lancet leaves of green cardboard or other material between them.
- Secure the package of the bouquet with glue.
The resulting mini-bouquet can be decorated outside with beads, a satin ribbon bow.
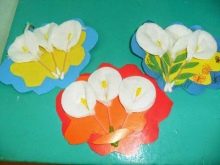


Also, delicate snowdrops, bright daisies are well obtained from sponges. But with children, it will be easiest to make a rose. At least 5 cotton sponges are needed for 1 flower, you will also need PVA, green single-sided paper and a skewer.
The procedure for making a rose will be as follows:
- roll a cotton pad in the form of a cone - this will be the middle of the flower;
- glue 2 more discs around 1 petal on 2 sides;
- complete the formation of the bud, stick 2 more petals on top of the rest;
- glue over a wooden skewer with strips of green colored paper, you can take a corrugated one;
- fix the rose to the stem.
A whole bouquet can be easily assembled from several flowers. If the petals are pre-painted, you get buds of different shades.


Making autumn crafts
Creating original compositions from cotton pads on the theme of autumn can bring a lot of pleasure to both children and adults. Natural cotton sponges can be easily transformed into a lush wood or applique-landscape element. You just need to put in a little imagination and effort.
A simple fall tree can be made even with toddlers. The procedure for making crafts will be as follows.
- Draw a tree trunk on brown cardboard. You can show imagination, make it winding and wide.Cut. Stick on a sheet of white paper in the center.
- Color the cotton pads for the crown in autumn colors. Yellow, orange, green, burgundy, red shades are suitable. It is worth diversifying the color, mixing several colors in 1 disc at random. Dry.
- Form a crown from the "leaves". The discs are glued over the barrel, overlapping each other. Can be fixed somewhat at the base, depicting the fall of leaves.
The craft can be supplemented with other details as desired. Depict the sky with white clouds or gray clouds, add birds. If you take corrugated cardboard for the trunk, the panel will turn out to be more embossed and picturesque.


Winter crafts
The snow that has fallen is a good reason to bring a little winter motives into children's creativity. Snow-white cotton pads are perfect for these purposes. They make beautiful volumetric compositions, as well as the simplest applications that even kids can master. The most interesting crafts are worth considering in more detail.


Christmas tree
Preparing for the New Year in kindergartens and schools often involves the creation of thematic crafts. This is a good reason to create an original project with your child. For example, to make a New Year tree, which in the future it is quite possible to decorate the interior of a house or apartment. To make such work, you will need a certain set of materials:
- square cardboard sheet;
- a stick made of natural wood;
- large packing of cotton pads;
- container with PVA glue;
- Scotch;
- stapler with staples;
- water-based paints;
- cardboard for the tops;
- decorative tape in white;
- sparkles, tinsel, beads.
After all the materials have been selected, you can proceed to work. First you have to turn all cotton pads into blanks for the Christmas tree. They are folded in half, then bent again, getting a "petal" with a triangular base and a rounded edge. They are tacked with a stapler, stepping back about 20 mm from the top. In this way, absolutely all discs are fixed - 400 pieces or more, depending on the size of the future Christmas tree.


Subsequent work order.
- Draw a circle with the largest possible diameter on the cardboard. Cut it out. Divide the entire circle into 4 equal sectors. Cut 1 of them.
- Roll the rest into a tight cone with a small hole at the top. Fasten with adhesive tape, paint white, dry well.
- Glue a flat circle of a slightly larger diameter than its base on the bottom of the cone. Place on an impromptu "clearing" in the form of cardboard with cotton wool on it. Stick it on. You can also decorate the base with white tape.
- Starting from the bottom of the base, stick cotton pads in a circle. Each part is coated in the end part, applied to the surface of the cone. Continue in a spiral motion, climbing higher and higher. The discs should fit snugly against each other, leaving no gaps. The finished Christmas tree is well dried.
- Cut 2 blanks-stars with a fold for gluing from cardboard. Form folds from the corners to the center to make the shape three-dimensional. Place a skewer inside, glue. Paint it silver, gold, or any other vibrant color.
- Place the stick-holder in the hole in the cone of the tree.
All that remains is to decorate the New Year tree with tinsel and beads, sparkles, giving it a festive look.
The appearance of the craft can be changed by fixing the disks not with their end but with their side, with the triangular part up. This tree will be more compact.


snowman
A winter craft available for making with toddlers is a simple cotton snowman. It is made on a white cardboard base, from 3 cotton sponges. Additionally you will need: a wooden ice cream stick, orange colored paper, fluffy wire, black peppercorns, ready-made eyes.
The procedure for making crafts will be as follows.
- Stick the cotton pads onto the cardboard.Cut the workpieces, reducing the diameter of each subsequent one.
- Fasten the resulting circles on a wooden stick. Glue 3 more sponges on the reverse side.
- Cut out a carrot nose and a hat or a bucket on your head from orange colored paper. Stick it on.
- Attach the eyes above the nose. Stick the black peppercorns in the form of buttons in front.
The craft will be decorated with a bright scarf made of fluffy wire.


Animals made of cotton pads
Original applications can interest children of all ages. Crafts from cotton pads for an age audience of 3-4 years old will be the simplest. By the age of 5-6, kids will be able to create a full-fledged panel with animals. Schoolchildren from 7 to 10 years old will be interested in creating realistic thematic compositions with their own hands.
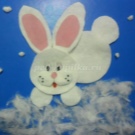
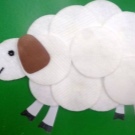
The simplest master classes allow you to step by step create a figurine of a chicken or a bunny, a caterpillar and a panda, as well as birds (goose, stork) and fish in the aquarium.



Swan Lake
Crafts for schoolchildren are made of blue cardboard, cotton pads, white and colored paper (green, brown, blue, yellow). The order of work will be as follows.
- Cut a free-form white "lake" from a sheet of paper. Stick on cardboard.
- Cut the cotton pad into 2 pieces. Glue on "water" in the form of the lower part of the body for each of the 2 swans.
- Cut out the neck and head of a swan from another disk. Repeat for 2 birds. Stick it so that the swans look at each other. Mark with felt-tip pens a red beak with a black frame, eyes.
- Cut 3 sponges so that from each element 2 wings are obtained (by analogy with the symbols of yin and yang). Complement the composition with them, depicting the plumage and tail.
The "lambs" of waves, reeds, and the sun cut out of colored paper will help to turn the applique into a real swan lake.


Chick
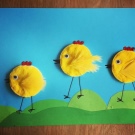
You can make a bright yellow chick from cotton pads painted in the appropriate color. Green cardboard is useful for the background of the applique. You can also make "grass" from dark malachite colored paper, and half of a shell will turn out from white discs.
The process of assembling crafts on the base.
- Prepare materials for 3 chicks. Stick the yellow discs in the selected places on the cardboard.
- In the lower part, glue white "shells" made of cotton sponges. Put paper grass on top of them.
- Cut tails, noses, bows and combs for chickens from cotton pads. Paint and glue on the applique.
- Mark the eyes with a felt-tip pen.
The craft is ready. Even a preschooler can easily cope with it.


Horse
The figurine of this noble animal looks spectacular on a sheet of thick cardboard, decorated with leaves made of colored paper or felt. In addition to cotton pads, the horse itself will need cotton swabs, black beads for the eyes and nostrils. The craft is created according to a simple scheme. First, a sketch is drawn on a sheet of paper, then it is cut out of cardboard element by element.
The subsequent work process looks like this step by step.
- Cover the template with cotton pads. Cut out all the details. You will get a large oval for the body, 2 smaller ones for the head and neck, a lush tail and mane, triangular ears.
- Stick the central element of the craft on the base. Place cotton swabs under the body - legs. They are trimmed to the desired length as needed.
- Complement the figure with eyes, a bead nose.
You can decorate the horse's mane with rhinestones or bows, paint it in advance in the desired shade. After the figure itself is ready, the space around it on the base is decorated with paper or felt leaves.

More ideas
Cotton pads are an amazing material from which you can create real volumetric masterpieces. With children of senior preschool or school age, it is quite possible to make a basket of apples out of them, which looks no worse than a still life created by the artist. For work you will need yellow, red, brown, green gouache, brushes, colored paper for the leaves.


The composition is done on a thick sheet of paper or cardboard. The order of work will be as follows.
- Lay out a trial version of the applique without glue. In the lower part, a basket of 4-5 layers of cotton pads is laid out in a semicircle. The future apples are placed on top. On average, you will need up to 25 of them per composition.
- Dilute the gouache in containers with water. Each color has its own capacity. Dip discs in them. Dry, tint the sides with red or yellow, add a brown dot on the “tail” of each fruit.
- Stick the basket onto the sheet. Dry. Gently apply strokes of yellow and brown paint with a brush, imitating weaving from a vine. Dry.
- Glue the apples, spreading them in a picturesque disorder on top of the "basket".
It remains to supplement the finished composition with green sheets of colored paper. The apple basket is ready. In addition, you can perform other work in the form of voluminous crafts or appliques, create a postcard for the holiday or topiary.

For information on how to make a rose from cotton pads, see the next video.


