Crafts from cotton swabs

Wishing to add variety to the manufacture of handicrafts, it makes sense to pay attention to the material available in every home - cotton swabs. Master classes of varying difficulty will surely please any child.


What to do with the kids?
It is recommended to get acquainted with new material by creating simple products: animals, insects or houses.
Animals
Small children 3-4 years old, or even 2 years old, work with cotton swabs better to start with a master class on designing a funny hedgehog. The work begins with sculpting the body and head of the animal from plasticine or salt dough. In fact, it can turn out to be a single rounded piece, one side of which stretches out in the form of a muzzle. Cotton swabs, previously cut in half by the parents, are immersed in the back in a free order while maintaining gaps. The eyes and nose of the animal are made of black plasticine.
To make the craft more original, cotton swabs can be pre-painted in different colors.

For children 5-6 years old, a master class on creating a panda is ideal. By following the instructions step by step, you will be able to get a job worthy of even being sent to a kindergarten competition. In addition to a whole package of cotton swabs, you will need thick cardboard and plain paper, felt-tip pens and glue. First of all, an oval is cut out of a black sheet - the future body, as well as four circles, which are to become paws. On a piece of white paper, the eyes of an animal and a triangular nose are drawn - they will also need to be cut out.
The cut-off sticks are glued to the base, filling the entire head and torso area. The muzzle of the animal is decorated with eyes and nose.Some of the sticks can be additionally stained with a marker so that a stain is obtained. In a similar way, it will be possible to perform a brown bear, only the legs and ears of the animal will already be cut out of brown cardboard.


It is a little more difficult to create a lamb - a similar master class is more suitable for a child of 10 years old. The creative process will require the use of glue, scissors, and a pencil. First of all, the contours of the future animal are drawn on thick paper. It is better to slightly increase the size of the animal's forehead in order to fix the forelock. The shortened ear sticks are glued in rows on the body.
A piece of cotton wool is fixed on the forehead of the animal, as well as the tips of the sticks that form the ears. The muzzle of the animal is painted with felt-tip pens or pencils. Wooden clothespins or four cotton swabs are suitable as sheep legs.
It is worth mentioning that almost any animal is obtained in this way. It is enough just to cut out the base of the corresponding shape from the cardboard and fill the “woolen” areas with cotton swabs or their soft tips.


ladybug
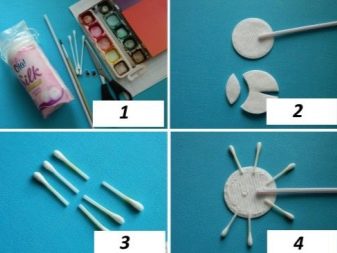
When making a ladybug, the first thing to do is cut out a circle of cardboard, the size of which corresponds to a cotton pad. To form the paws, 6 full-fledged cotton swabs are involved, or 3, but cut in half. On one of the two white "pancakes" a slit for the wings is cut, and the outline of the head is marked. The cardboard circle is abundantly coated with glue, and first the paws are laid on it in layers, and then the prepared disc. The second fleece is glued on the back.
The top pancake has a black head and red speckled wings. On the dried craft, plastic eyes are fixed with hot glue.


Small house
A cotton swab house can be made in two ways. The first involves creating an applique. For work, you will need blue cardboard, cotton swabs, cotton wool and PVA glue. The cross grille of the building is glued to the paper using PVA. From pieces of cotton wool soaked in glue, they form a snow cloud, falling snow and drifts on the roof.


Having mastered a simple master class, you can move on to a more complex volumetric structure. The house is laid out of cotton swabs according to the type of installation of a timber frame, that is, two parts on each side. Each layer is fixed with silicate glue. If everything is done correctly, then each log house should have 12 "logs". A rectangle is cut out of a piece of cardboard, the length of which corresponds to the length of the house. By bending it in half, it will be possible to build a roof, which then only needs to be covered with cotton swabs.
The finished product is fixed on a thick cardboard sprinkled with artificial snow or sparkles. Around the house, you can place a tree and a snowman, collected from the cut ends of cotton swabs.


Making flowers
Ear sticks in combination with cosmetic discs or hair bands produce very beautiful flowers. One of the master classes requires the additional use of foam balls, wooden skewers, green thread and gouache. The ear sticks, cut in half, are inserted into the ball at a short distance from each other. A wooden skewer is either painted green or wrapped with a thread of the same shade - this is how the stem will turn out. Putting the ball on a stick, all that remains is to paint all the soft edges of the bud in the chosen color.


Calla lilies are made even easier, requiring, in addition to sticks, cosmetic discs, glue and gouache. One of the tips of the ear stick is painted yellow with paint. It is wrapped with a cotton pad to form a bud and fixed with glue. Ready-made calla lilies are used for application or are "put" on green plastic tubes. In another unusual craft, the centers of the flowers become halves of foam balls, painted orange and fixed on paper.Cotton buds again act as petals.
By the way, the original core can also be obtained from several elastic bands for hair, interconnected with threads.


Winter products
For the New Year holidays, the kid can make a funny snowman with his own hands. As the basis of the design, three balls of different diameters are required: either foam or made of plasticine. In addition, stationery glue, colored paper, cotton swabs, fluffy wire, as well as knitted and lace fabric are useful. By the way, felt can also become an alternative to the latter. The base balls are fixed to each other using a thin ear stick, pre-impregnated with glue. In addition, it is worth using hot glue. Naturally, plasticine blanks are easy enough to mold together.
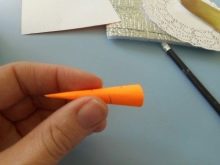
The lower level is filled with halves of cotton swabs so that they are as close to each other as possible. The remaining two balls are handled similarly. A small cone is twisted from a piece of orange paper, which is then glued between the inserted sticks. The eyes are cut out of cardboard, although it is not forbidden to use ready-made plastic parts from handicraft stores. They are fixed on the upper ball. Fluffy wire is used to create hands, and fabric or felt is used to dress a snowman in a hat, mittens and a scarf.


Graceful snowflakes based on ear sticks can be used to decorate a Christmas tree or decorate walls. It is better to use white plasticine balls as a base, although foam blanks are also suitable as an alternative. Each snowflake takes about 15 sticks of different lengths. It is reasonable to prepare a hot gun, scissors, beads and transparent plastic from tools and materials. Six sticks remain intact, and three are cut in two.
A small circle is cut out of plastic, in the middle of which a bead is glued. Six whole sticks and the same number of halves are glued to the base with "sunbeams". Heads are cut off the remaining blanks, which fill the gaps between the beams. When the snowflake dries up, a loop of tape is glued to it.
By fixing a piece of double-sided tape on the decoration, it will be possible to fix it on the window.


More ideas
In principle, crafts made from cotton swabs can be created on any theme: from "autumn" to "summer vacation", especially when it comes to applications. It is customary to combine the main material with cotton pads, buttons, beads, plasticine, ribbons, twigs and even matches. The landscape will always be relevant: autumn, depicting a hedgehog hurrying home with the harvest, or winter with flying snow and snowdrifts on the trees. First, the planned objects are marked on a cardboard base: buildings, trees, sun or moon, clouds or snow, raindrops or snowflakes. Further, with the help of the gifts of nature, decorative elements and the same plasticine, they are given a small volume and color.
During work, you should not be limited to one material: for the house, you can use cotton swabs and colored paper, and for the sun - a cosmetic disc and thin twigs.


Not only fantasy flowers are obtained from ear sticks, but also bushes, spikelets, herringbones, willow twigs and other plants. An applique with a willow twig, by the way, can be an excellent craft for kindergarten for Easter. To create it, you only need a cardboard base, plasticine, cotton heads and paints. The dyed cotton wool will symbolize the contents of the opening buds, and thin plasticine flagella will be useful to indicate the vase and the branches themselves.

A homemade peacock on a cardboard base looks very unusual. Its tail is formed from multi-colored plastic spoons, and the body of a bird is laid out from cotton-tinted heads, tinted in blue.A fluffy bunny with a styrofoam body covered with clipped ear sticks can be not just a craft for school, but also a great toy that can be placed in a dollhouse. Its ears and legs are made of fluffy wire. An applique depicting an owl, or a voluminous figure of a hedgehog hurrying about his business with a harvest on his back, will look beautiful.


For information on how to make crafts from cotton swabs, see the next video.


