Variety of crafts from branches

Branches can be called one of the most affordable and simple materials for creating various crafts. Using these raw materials, you can usefully spend time with children by making unusual products. Such work will not only bring a lot of pleasure, but also allow developing creativity, imagination.... The resulting products will help to decorate the interior, make it more interesting and unusual. Such a craft can be presented as a gift for any celebration. How to start making crafts from tree branches, as well as interesting ideas for the interior, will be discussed in the article.

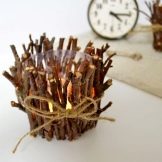


Material preparation
Using the gifts of nature is a simple and economical way to create unusual crafts. Walking in a park or square, it is not difficult to collect suitable sticks, rods, cones, acorns. Branches of trees and shrubs are a popular material in the manufacture of original natural compositions. Such crafts become interior decoration, complementing it.
It is better to stock up material for crafts in the spring; branches are also collected in the fall.
When choosing them, you should pay attention to the following points.
- More suitable for work twigs and branches that have an even shape, since it will be more convenient to work with them. In some cases, branches with bends and bizarre shapes are used.
- You should get rid of the rods with signs of deterioration. Rotten branches damaged by pests are not suitable for the job.
- When choosing, they give preference to branches of apple, alder, oak... A good option would be alder and birch twigs, willow, grapevine.Pine feet can also be used, but it must be borne in mind that they are quite resinous, and this greatly complicates the work. The resin will stain your hands and tools and can be difficult to clean.


Having brought home the collected material, you should carefully examine it and dispose of the rods with traces of damage by bugs or diseases. The selected rods are washed, dried and sanded to level.
The workpieces require drying. It is better to do this immediately after collection. If you do not dry the twigs, over time they can crack, deform, which will negatively affect the appearance of the finished product.
- It is recommended to dry the workpieces at room temperature... In this case, the drying time of the material will be long (10-14 days).
- You can speed up drying by decomposing the material on battery... This will allow you to start working with him in a week.
- If it is necessary to dry the material very quickly, do it using the oven... At the same time, the blanks are laid out on a baking sheet, the oven is put on a small fire and the door is slightly opened. After a couple of hours, you can start working with the dried material.


Having dried the workpieces, if necessary, they are varnished, painted, treated with stain.
What should the children do?
Using blanks, you can conduct educational activities with children. From tree branches it will turn out to make a simple craft for school or kindergarten.
Fall-themed crafts are one of the more popular options. Using dry twigs, children can make a nest, fence, or raft.

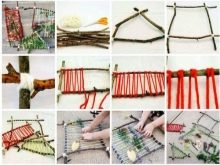

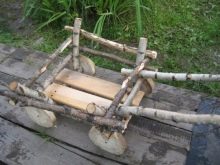
Thin rods will make an original basket, cart or photo frame. You can even make fairy-tale characters or animals from twigs. A deer, bear or hedgehog made of natural materials can take pride of place on the shelf with children's creations.


Using twigs and twigs, children can easily build an interesting product, for example, an asterisk. To make a star from natural materials, you need certain materials and tools.
When constructing a star from natural materials, you should prepare:
- even branches of the same length - 5 pcs.;
- wire;
- clear nail polish;
- tape or cord;
- decor elements.
To create an asterisk, you need to pick up five branches of equal length. It is desirable that they also have the same texture. Branches for crafts must first be dried and examined for defects. To give them strength, coating with a colorless varnish will allow.


To make an asterisk out of blanks, you need:
- spread the twigs on a flat surface, giving them the shape of a star;
- at the joints, fix the ends with wire, twine or ribbons, or fasten the joints with clerical rubber bands;
- decorate the craft.
As a decoration, you can use various elements in the form of beads, buttons, bows.
Such a product, decorated with dried, natural or artificial flowers and berries, will look good.

In a similar way, you can make snowflakes from twigs. In this case, they need to be fastened not in the corners, but in the middle. Coloring the finished product white will give the snowflakes a more natural look. Beads, rhinestones or other New Year's tinsel can be used as a decoration for a snowflake.


Interior ideas
Hand-made handicrafts from branches will be able to add variety to any interior. In this case, you can use birch, willow shoots or take a vine.
Frame
To carry out this idea, you need a large branch or a wooden base. Thin rods will also be needed. It is better to use a glue gun to attach them to the base. Photo frames made from twigs come in many different shapes or sizes. If you wish, you can give the craft the shape of a square, circle, oval, or make it in the shape of a heart.
In the classic version, a photo frame is made according to the following algorithm.
- To start from a thick branch the frame itself is created.
- Using ordinary glue or a heat gun, alternate fixing of twigs along the frame... Work continues until the frame is completely filled.
- Decorate the craft. Pieces of moss, rowan bunches, dried flowers are used as decorative elements. Various accessories are also used: pearls, beads or shells.


On the back side, a loop is attached, on which a frame is hung, if necessary. A similar method is also suitable for mirror decoration.
Flower pot
One of the simpler options for making twigs can be a flower pot. Such a product is not at all difficult to make. You will need to prepare:
- twigs;
- jigsaw or saw;
- twine;
- burlap.

Having prepared the necessary materials, they begin work:
- it is necessary to take several branches and, using a jigsaw or saw, give them the same size;
- prepared rods are interconnected with twine, fixing with knots;
- now you should take the pot and wrap it with a piece of burlap, then fix the material with twine or glue;
- over the burlap, the pot is wrapped with a blank of rods, tied with twine.


It is better to make several of these pots and arrange them in a certain order in the form of a cascade.... Such crafts will look especially organic in rooms decorated in an eco-style, in a rustic or country style.
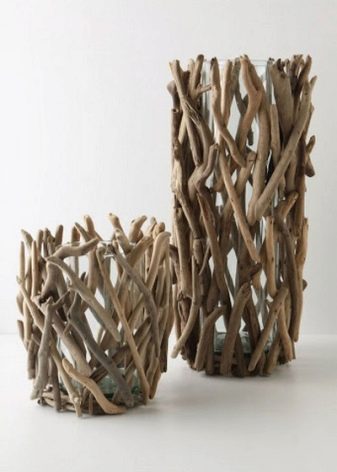
A flower vase made from natural materials looks very original. Such a product immediately attracts attention.

Wreath
Using natural material, you can easily make an unusual wreath and use it, for example, to decorate the front door.
In addition to the twigs, to create this craft, you should also prepare the wire.
Progress.
- It is necessary to decide on the size of the future craft. According to these parameters, a circle is cut out of the wire, corresponding to the size of the future wreath.
- Prepare the branches and tie them with wire in the form of bundles so that they coated the wire evenly. Fix the rods well.
- After completing the main work, the product is decorated. Various natural materials, accessories, ribbons or lace are used as decoration.


When making a Christmas wreath, it is advisable to decorate the craft with cones, miniature New Year's toys, figurines of bullfinches, deer and other characters. As an addition, use branches from a Christmas tree, New Year's tinsel.

An autumn arrangement of branches will look very beautiful. Such a wreath is decorated with colorful autumn leaves, twigs of grass, spikelets.
Hanger
Branches are also used for more complex structures, such as hangers, partitions or floor lamps.
A hanger with knotty sticks placed in the hallway will not only fulfill a functional role, but also become an important part of the interior.... When making a hanger, it should be remembered that the knots for the product must be strong and resemble hooks in shape. Hooks are attached to a special base, consisting of one or several chaotically placed planks. The hooks are fixed with self-tapping screws. The finished product can be painted or coated with wood stain or varnish. A similar white-painted hanger will look very interesting in a room decorated in Provence style.


Wood
This decorative tree made of natural materials will be a great gift for friends. Such a pleasant surprise in the form of a New Year tree will add a festive atmosphere, give a special comfort and solemnity to the atmosphere.
Twisting the vine in the form of a pyramid, you can make the product look like a Christmas tree. It remains only to decorate the winter beauty, complementing the craft with beads, bright toys, cinnamon sticks and other tinsel.
A tree made of thin twigs will become an interior decoration.

To implement the idea, you should prepare the necessary materials:
- twigs and branches:
- glue gun;
- flower pot or any other base;
- Styrofoam;
- pebbles;
- decor.


To make a miniature tree, you need:
- take a flower pot and fill it almost half with pebbles - this will give stability to the craft;
- cut out a piece of foam that is suitable in size for the pot - it will act as the basis for the future tree;
- holes are made in the foam, according to the number of branches used;
- branches are inserted into the foam, pebbles are poured on top of the foam, pieces of moss or sisal are laid;
- decorate the tree.
If desired, the tree can be painted, balls, beads or flowers can be glued to it.

Garden options
Using vines, branches and twigs, you can make truly unique things that will find a worthy place in the garden, in the country.
There are many interesting options for handicrafts for a summer residence, allowing you to make this green corner homey and cozy.
Floral arrangements are one of the options. Just a few dry branches, placed in a vase along with natural or artificial flowers, will instantly refresh the interior.


In a more complex version, the branches are used in the form of a flower vase.
To create an original composition you will need:
- twigs (possible with leaves);
- bouquet of flowers;
- nippers;
- wire;
- decorative ribbon.
Algorithm of actions.
- Cut off the branches. It is desirable that they are of the same length. Their height should be equal to the height of the future vase for the flower arrangement.
- Cut a piece of wire and fold it in half.
- Sticks are laid out between the wire and fixed with coils of wire. It is best to use two pieces of wire, securing the branches on both sides.
- As a result, you should get a track of sticks, which is then rolled into a roll. In the process of twisting, twigs with flowers and leaves are alternately laid in it.
The resulting roll is tied with a decorative ribbon and placed in a container with water.
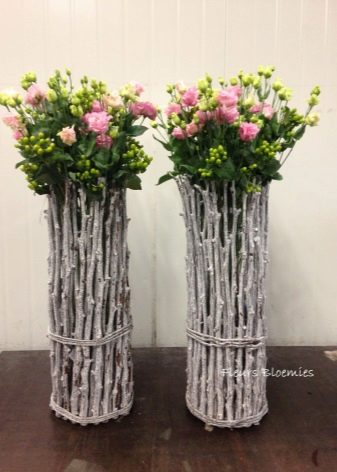
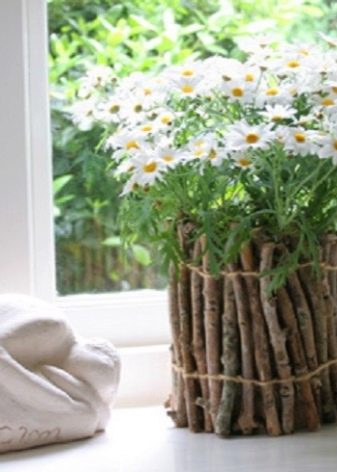
Balls made of willow branches of different diameters look very interesting on a summer cottage or garden plot.
Stages of work.
- We create a wireframe. To make it, take a branch and bend it several times in a circle. The ends are fixed with wire.
- The second and third ball are made in a similar way, taking into account that their dimensions should be slightly less than the first ball.
- Circles are inserted into each other and the branches are straightened at an angle of 90 degrees, fixed with wire.
- The frame is ready. It remains to wrap it with twigs, giving the shape of a ball. The branches are put on top and intertwined inside - this will give the structure its rigidity.
You can make several balls of different sizes and place them on a flower bed, hang them on a tree, or simply put them on the ground. Such installations will make the site more original.


After decorating the hanging balls with garlands, you can use them to illuminate the garden at dusk.
A fence or fence can be formed from the vine. It is enough to pick up a vine that does not have any flaws, cut it off with a pruner and intertwine the branches. Immediately before starting work, it is recommended to steam the vine so that it becomes more pliable and flexible. To fix the vines, supports are used, which are placed at a distance of about 50 cm from each other. The vine between the supports is fixed in different ways. You can do this with a lumen or rather tightly, fasten in pairs or one at a time. With traditional horizontal weaving, work is done from the bottom. The edges of the vine are masked by connecting with a wire. The top row is firmly reinforced with wire. The finished fence is treated with stain or spray paint.


Wood is a unique material, which is why it is used to create amazing things.... Original chandeliers and lamps, as well as candlesticks and sconces can decorate a country house or summer cottage.


Even an ordinary snag with loose branches in a garden or summer cottage can be turned into an art object.


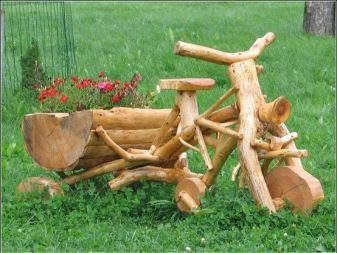
How to make a tree from branches, see below.


