Variety of grommet crafts

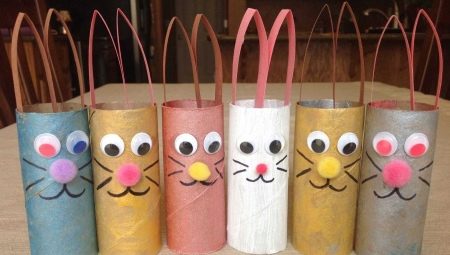
Making various crafts with children is quite fun and interesting. Toilet rolls are often just thrown away, but they can actually make interesting things. Crafts can be purely decorative or useful. For manufacturing, you will need simple and affordable materials.


What kind of animals can you make?
Crafts from toilet paper rolls for children are very popular. This activity allows you to spend your free time with benefit. When making with your own hands, it is not necessary to strictly follow the instructions, you can give free rein to the creative process. The sleeves can be used not only for toilet paper, but also for paper towels. The production of animals goes like this.
- Mouse... Cover the sleeve with gray paper or cardboard. Make all small parts. Glue ears from gray large circles and small pink ones. Do the same for the front and hind legs. You can make 4 parts or a total of 2. In the latter case, the paws are inserted into the slots in the sleeve. Make a pink oval for the belly and a small blank for the nose. Teeth, whiskers and eyes are also made. The tail in the form of a thin strip can be twisted slightly with a pencil. All parts are glued together using PVA glue.

- Squirrel... The sleeve is pasted over with brown paper. To form the ears, one part of the workpiece should be bent inward. It remains to make blanks of the tail and paws from brown paper. A rounded heart made of a lighter material is used as a muzzle. The teeth are made of white paper and the nose is made of black. Eyes can be made out of paper, or you can use blanks for toys. Eyelashes and mustaches are easy to draw with a black marker.
All parts are glued together using PVA.

- Tiger... Cover the sleeve with orange paper. Making blanks will not take much time. Make orange ears and white details for the inside. The tail and paws are also made of paper in the main color. White will be needed for the eyes, the oval of the muzzle, and the abdomen. Black paper or cardboard is used to make a nose and a thin mustache. All parts are glued together.

- Dog... Cover the sleeve with yellow cardboard or paper. Make a rounded head from the base color, a brown oval for the muzzle. Also make blanks for ears, paws and tail from an additional color. You can combine colors in different ways. The front legs should be oblong, but the hind legs should be oval. All parts are glued together with a glue stick.

- Cat... First, prepare the bushing. Bend both edges of the part inward on one side. Now glue the sleeve with orange paper. From the main color, make 2 circles for the muzzle, 2 rounded hearts for the paws, and a tail. Make a nose and a bow with a belt out of pink paper. White paper is needed for the eyes and black paper for the pupils. All parts are glued together.

Making insect figurines
Many interesting figures can be made from rolls. It is convenient to make insects from large blanks. In this case, the figures themselves turn out to be large and interesting. Manufacturing workshop.
- Bee... The base is made from the tube. Glue the blank with yellow paper. Cut the black stripes and glue to the torso. The wings are made of blue material, also fixed to the base. The eyes can be used self-adhesive or made of white, black paper. Glue black stripes on the top of the sleeve; they play the role of a mustache.

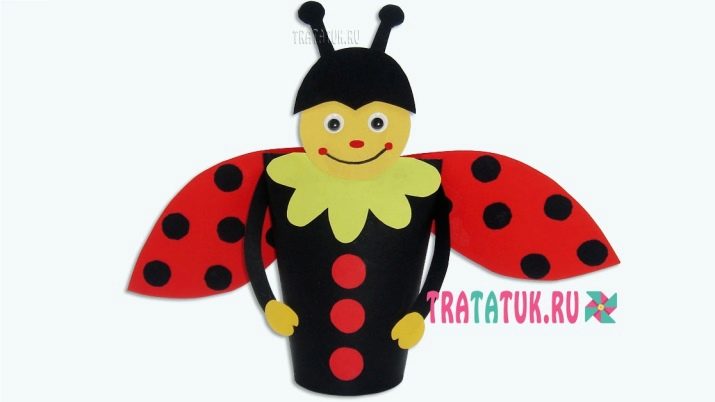
- Ladybug. Wrap the sleeve in black paper. Flatten the top of the workpiece. Cut a circle out of yellow cardboard for the head. Make a blank with antennae from black material, which will be glued to the previous one. Make many small black circles for the wings and 2 red circles for the buttons. Cut out a ladybug neck decoration. It resembles half a flower. The collar width corresponds to the length of the flattened edge of the sleeve. For decoration, you can use yellow paper a shade brighter than the head.
All elements are glued together.

- Caterpillar... Better to use a large paper towel roll. It is cut into small circles that form the body of the caterpillar. Paint the middle with yellow paint. Cover the outer part of the cut sleeve with green paper. Use the smoothest workpiece for the head. Prepare a small red piece for the mouth, make the eyes out of white and black material. Take yellow paper to make horns on your head. Glue all the details to the head. The body itself is glued so that the main part is higher than the rest.

Making an insect is not difficult. The work will be much easier if you use special self-adhesive eyes. The same is used in the manufacture of toys. You can make a blank out of paper and glue it with tape so that it is as durable as possible.


More ideas
Kids home crafts can be used as decor or toys. Some even have a functional purpose. In the manufacture, you can use PVA glue or double-sided tape, glue gun. It is better to take double-sided paper or cardboard. Any master class can be modified and adapted depending on desires.


Organizer
There are several ways to make a useful tool. Pretty practical organizer for pens and pencils. For manufacturing, you should prepare several bushings, a plastic board, scissors, rhinestones, PVA glue and colored paper.
- Place the bushings on the board. Everything should be arranged as comfortably as possible. This is how the organizer will look like in the end.
- Shorten some of the bushings for ease of use.
- Glue the blanks with colored paper.
- Decorate the elements with rhinestones or in any other way.
- Glue each sleeve to the plastic base, form the organizer itself.


There is also another option. This organizer can be used to store small items. It looks more elegant, but other materials are needed for its manufacture. You should prepare a sleeve, a glue gun, a cloth with a suitable design, a plastic cover with a sleeve diameter, stationery buttons.
- Cover the sleeve with a cloth. In this case, only one side of the circle should remain open.
- Stick the cloth onto the plastic cover. Close one part of the sleeve.
- Insert the office buttons into the lower part. They play the role of legs for the stability of the structure.
- Make the required number of such elements and combine them into one organizer. You can simply tie all the pieces with tape.
Such an organizer can be reshaped at any time.


Mermaid
Making a fairy-tale character is pretty simple. You should prepare scissors, colored paper, glue, paints, felt-tip pens, glitter. You can pick up other decorative materials as well. The manufacturing method is as follows.
- Paint the bushings flesh.
- Draw a face with a thin brush.
- Make hair out of strips of colored paper. Also prepare a bra, skirt and starfish. The latter is needed to decorate the hair. Make a tail out of paper.
- Twist the hair blanks in any convenient way. Easier to use a pencil.
- Glue all paper parts to the base of the mermaid.
- Cover the tail with sequins or other decor.


Unicorn
The craft turns out to be bright and interesting, suitable for the decor of a girl's room. You will need a sleeve, rainbow knitting thread, cardboard and paper, pink lipstick or pencil, glitter. You can take other decor. The step-by-step instruction looks like this.
- Glue the cylindrical blank with colored paper of a suitable color. You can take shades of pink.
- Cut the yarn and make a hairstyle out of it, a lush ponytail. Bangs can be combined with a mane, you can braid a braid. Glue the parts to the workpiece.
- Cut a triangle out of shiny cardboard to form a horn. You can take ordinary material, and decorate on top in any convenient way. It is enough to coat the cardboard horn with glue and dip it in glitter.
- Make ears. For this, 2 large triangular blanks and the same number of small ones are cut out. The latter play the role of the inner part of the ear.
- Glue the horn and ears to the base of the workpiece.
- Use a black marker to make the eyes and eyelashes. Draw ruddy cheeks with lipstick.


Rainbow
Simple and effective craft. You need to prepare white and corrugated paper of rainbow colors, paint, pink pencil and black marker, rope, sleeve. You also need to take a hole punch, paintbrush, scissors and glue.
- Paint the bushing in the color of the sky. Wait for the paint to dry.
- Attach the rope to hang the craft. To do this, you need to make holes with a hole punch.
- Make a cloud out of white paper.
- Use a black marker to draw the eyes, mouth and eyelashes. Also make a cloud of ruddy cheeks with a pink pencil.
- Glue the white blank to the painted sleeve.
- Cut corrugated paper into even long strips.
Glue them to the sleeve inside.


Christmas tree
For the manufacture of this decoration, you can take large sleeves. You should also prepare different decor, for example, ribbons, rhinestones. Making festive crafts takes very little time.
- The bushings must be cut so that they form a tree from 4 parts, and from one more - a trunk.
- Paint the blanks. As a result, 4 pieces should be green and 1 should be brown. Leave to dry completely.
- Glue the blanks, form a Christmas tree.
- Cut the ribbon, decorate the workpiece with zigzags.
- Decorate the Christmas tree with rhinestones and sparkles.


snowman
A winter craft can even serve as a New Year's decor. Simple materials are needed: shiny balls, orange tic-tac, a piece of felt or other fabric, paint, small buttons, eyes for toys, glitter. You should also take a glue gun for joining parts and soft wire. You can make a snowman like this.
- Coat the blank from the cylinder with a suitable paint and let it dry.
- Glue eyes, 3 small buttons and tick-tock nose.
- Cut the scarf out of the wind.
- Make headphones out of wire and bright balls.
- Apply sparkles for decoration, paint on the elements of the face.


Octopus
Making such a craft will take very little time. You should take a sleeve, glue, eyes for toys, colored paper. The octopus can be of any color. Step by step manufacturing.
- Cut 8 identical strips of paper of the selected color.
- Twist the blanks with a pencil.
- Tape the sleeve with the selected paper color.
- Glue the strips-legs along the bottom of the workpiece.
- Attach the eyes and make the mouth. You can draw a smile.


Binoculars
An interesting toy will delight any child. You need to take cellophane, scissors, scotch tape, a brush and black paint, colored paper, rope, wine cork, glue and sleeves. You can additionally use decor. The manufacturing method is as follows.
- Cut 2 circles out of yellow thin plastic... You can take a film or a bag. Glue the round blanks to the sleeve like glasses of binoculars.
- Paint the cork black on the sides. Also glue the blank with paper. You can use green or choose a different base color.
- Decorate the bushings. Glue over from green paper and fix black strips.
- Glue two pieces of binoculars.
- A cork blank is necessary place between bushings... The element is glued on top.
- In any convenient way fasten the lacethat will allow you to wear binoculars around your neck.
It can be simply glued or inserted into the holes.


Autumn crafts
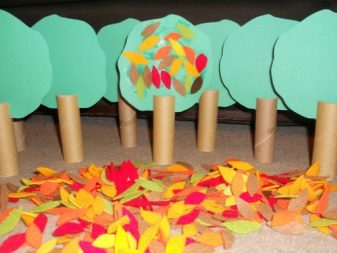
Many interesting crafts can be made from cardboard sleeves. The easiest way is to use the applique technique. It's easy to create a forest on the theme of autumn. The sleeves themselves are colored brown, and various natural gifts, for example, leaves and acorns, should be fixed on top.


Butterfly
For manufacturing, you need to prepare colored cardboard or paper, a sleeve, glue and scissors. Any colors can be used, depending on the flight of imagination. It is possible to experiment with the shape of the wings. Manufacturing in stages looks like this.
- Cover the sleeve with yellow paper. Make antennae from the same color.
- Cut the wings out of red paper. Cut out 3 buttons for a butterfly from it.
- Make small colored circles for decorating the wings.
- Glue all the details.


Amanita family
Prepare a sleeve, colored paper, glue or double-sided tape, pencil, scissors. Mushrooms come in a variety of sizes. Any size grommet will work, but white grommets are best. Otherwise, you must first paint or glue the workpiece.
- Cut out a red circle with a diameter of 13-14 cm. You also need to make white spots for the fly agaric. Prepare 2 black circles for the eyes, palms, 2 white stripes about 5 cm and one large rectangle 20 cm long and 4 cm wide. A mouthpiece can be made with brown paper.
- Cut a large white stripe, make an imitation of a fringe. Twist with a pencil.
- Cut the red circle to the center, form a cone. Glue the ends.
- On the hat attach white circles, eyes and mouth.
- Glue fringe onto the sleeve.
- Connect white stripes and palms... Glue your hands to the fly agaric just below the fringe.
- Make 2 thin strips of white paper and use them attach the cap to the leg.


How you can make a kitten out of a sleeve with your own hands, see the next video.


