Crafts from acorns

Most children love to make beautiful and original crafts from various natural materials. Acorns are often used for this. Today we will look at several interesting master classes on creating products from such material.


How do I collect and save material?
The most suitable period for harvesting such fruits is late September-early October. The gathering place can be oak groves, forests, parks. It is recommended to collect acorns away from the roadway. Most often, these fruits are placed around the trunks of oak trees. When collecting, it is better to select specimens of different sizes and shapes. The collected acorns are best placed in a jar or in a plastic container. Before you send them for storage, you need to dry them. For this, the acorns must be thoroughly rinsed with running water. It is better to additionally use a brush. After that, they are carefully transferred to a dry cloth.
In this form, everything is placed closer to the heating equipment. When the fruits are completely dry, they should be carefully examined and specimens with holes, cracks and other damage should be removed. At the same time, you need to preheat the oven to 80 degrees. Place the acorns on a baking sheet and place them in the oven for a couple of hours. So that they can dry out as efficiently as possible, the door should be slightly opened.
The fruits will need to be mixed every 30 minutes. Next, you need to remove those that are burnt or just deteriorated during the drying process.


What can be done for kindergarten?
To begin with, consider the simplest options for making crafts that are suitable for kindergarten.
The product in the form of a small dog will look interesting. To do this, you need only a couple of dried acorns and a little plasticine.
- First, fruits are connected to each other with the help of plasticine. They will act as the torso and head of the dog.
- Next, prepare a small piece of black plasticine. Three small balls are rolled out of it. One of them is placed at the end of the "head" - it will be the spout.
- The other two balls are slightly flattened and also placed on the acorn - they will become eyes.
- Then the brown material is prepared. Two oval-shaped blanks are carefully made from it, they are also flattened and attached to the product - they will be the dog's ears.
- Four legs and a tail are formed from the same material. The latter is better to bend up a little. This option is suitable for kids.


A craft in the form of a boat can also be suitable for a kindergarten. To make it yourself, you need to prepare the following:
- threads;
- a needle;
- scissors;
- dried leaves;
- toothpicks;
- glue gun;


Work algorithm.
- First you need to install the mast. To do this, take one large fruit, pierce it from the side with a needle. One toothpick is inserted into the resulting hole, gradually moving it deep into the acorn.
- Next, several hats are prepared separately. (one whole, one half and one cap with a stalk). The half is fixed on the wide part of the acorn. She will become the stern of the future ship. A workpiece with a stalk is attached to a narrow part of the fruit. The whole workpiece is joined from the side.
- The boat is placed on a horizontal flat surface. At the same time, a dried oak leaf is prepared. It is carefully pierced and put on the mast. The result is a sail.
- To form a mast attachment, you need to take a thread, it is attached to the stern. After that, she wraps around the mast and tied to the bow of the boat. At the end, you can attach a small flag to its upper part.


You can also make a little man-shaped craft. To do this, you need to find and collect more green unripe acorns. You will also need matches (toothpicks), dried leaves.
- First you need to connect a couple of fruits together (one of them should be with a hat - it will become the head of a person). It is best to hold them together with a toothpick or a match. Sometimes plasticine or glue is simply used instead.
- After that, more toothpicks are taken, from which arms and legs are formed. They fit neatly into the acorn, which is the body. You can also attach individual hats down to your feet.
You can make many of these figures at once. The composition should be decorated. For this, multi-colored dried foliage is suitable.


Beautiful crafts in the form of sheep's faces are often made from acorns.
- To do this, take one dried oval fruit with a cap. You also need to prepare a piece of white cloth. Two identical oval blanks are cut out of it with the help of scissors. They will become ears. They are fixed with glue.
- The eyes of the lamb can be drawn with markers or cut separately from paper or cardboard. In the latter case, a white sheet is taken, two small round blanks need to be cut out of it, then a black sheet is taken, and two other smaller round pieces are also formed from it. They are glued on top of white blanks and in this form everything is fixed on the muzzle.


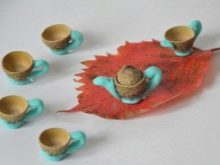
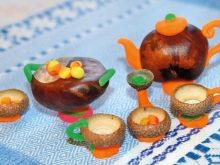
Sometimes, when creating decorative items, only acorn caps are used. They make a beautiful and interesting craft in the form of a tea set. To create it, you will also need plasticine (you can have any color).
- Several hats will need to be glued together to form a single oval, a few more hats are left, turning them upside down with their empty part.
- Plasticine is used to mold handles and coasters for cups and teapots. The resulting parts are neatly fixed on the caps.
- To make the composition look more beautiful, you can mold additional decorative elements in the form of fruits and leaves from plasticine of different colors.All finished parts should be placed on a horizontal flat surface.
This lightweight option is perfect for children aged 3-4 years.

School options
Next, we will look at several workshops that are suitable for schoolchildren. So, you can make various animals with your own hands.
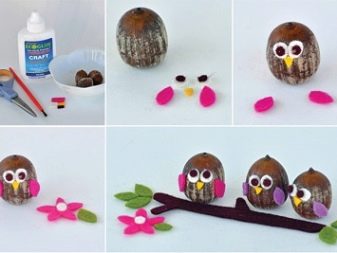
To make an owlet, you need the following:
- dried acorns;
- scissors;
- glue;
- beads;
- felt of different colors;


Step-by-step instruction.
- First, all the caps are removed from the fruits, since they are not useful. After that, felt or other similar fabric is taken. Wings and owl eyes are cut from the material. Sometimes small sparkling beads are simply used as a peephole.
- All cut out parts are glued to the acorn. At the same time, a dried thin twig is prepared. It can be cut separately from brown felt. At the end, this detail is fixed with an owlet. It is better to make several such crafts at once and combine them into one beautiful composition.

Crafts in the form of squirrels are also made from such natural material.
- First, plasticine is taken. Any color can be used, but most often orange, yellow and brown pieces are prepared. Then a torso with legs and ears is sculpted from them.
- A large oval acorn will act as a muzzle. It attaches to the body with paws. Ears are fixed on top. Later, the eyes and nose are drawn with markers. You can take ready-made eyes or cut them out of cardboard or paper.
- Squirrel tail can also be made from plasticine. It is often cut out of fluffy fabric and glued to the rest of the piece.


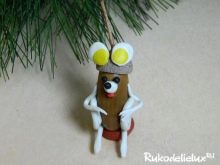
Crafts in the form of mice are also made from acorns. In this case, you will need the following:
- fruit with a cap;
- PVA glue;
- plasticine of different colors;


Work algorithm.
- To decorate the little mouse's face, a white plasticine piece is taken. A cone is formed from it, which is then slightly bent upward - this part will be the spout. Small balls are made of black material - they will become eyes. A mouth is cut out of the red material.
- The resulting elements are carefully attached to an oval dried acorn. Then another black even ball is additionally fixed on the finished spout.
- Next, proceed to the design of the legs. To do this, roll out two plasticine tubes on the board, then they roll up into a "snail", it is necessary to leave a small free end on each of them.
- The lower limbs are fixed on the lateral sides of the fetus. To make the front legs, two more tubes are rolled out of the same plasticine, at the ends of which cuts are made in the form of fingers. The finished elements are also attached to the acorn.
- Mouse ears are also formed from plasticine pieces. They are attached to the head of the acorn. It is recommended to additionally coat all parts with adhesive for a more reliable fixation.


Oak fruits make beautiful crafts in the form of caterpillars.
- To make them, you need to take several acorns without caps. They are connected to each other using pieces of plasticine. The details of the muzzle (eyes, nose, mouth) are also formed from the same material. All of them are fixed on the first acorn.
- To make the antennae, two matches (toothpicks) are taken. Rolled plasticine balls are attached to both ends of such parts; they can be of any color. In this form, the elements are also attached to the product from above. You can complete the composition with a few dried autumn leaves.


The product looks original in the form of ants.
- In order to make the craft, three acorns are taken. They are connected to each other with a toothpick. One of the fruits should be with a cap (this will be the muzzle). Then small eyes are formed from white and black plasticine, they are immediately attached to the first fruit.
- Legs should be made from matches. They fit neatly into the torso.
This instruction is perfect for children 5-6 years old and for schoolchildren.


Hedgehogs are often made from acorns.
- First, prepare a sheet of cardboard of any color - it will be the background.
- Next, brown paper is taken, a hedgehog figurine is cut out of it, this can be done using a template. Cut out the white muzzle separately.
- The cut parts are glued to cardboard. Later, the entire body of the hedgehog is pasted over with acorn caps. They will be needles.
- A ready-made decorative eye is glued to the face. The mouth and nose are drawn with a marker.
- Dried leaves should be glued to a cardboard sheet around the hedgehog, sometimes they are simply cut out of yellow, red and orange paper. From the same material, parts in the form of mushrooms, nuts are cut out and also fixed on cardboard. The result is an interesting application on the theme of "Autumn".
Many other animals (deer, cats, rabbits) can be made from such natural material.


Home ideas
Various home decorations are made from acorns.
A decorative item in the shape of a house.
- A small box is taken as a basis. Window and door openings are immediately cut out in it.
- The house is covered with brown paint. It is better to decorate windows and doors in white.
- Dried fruits are prepared at the same time. They gradually paste over the entire box. If desired, the product can be decorated with various decorative elements.


The decoration in the form of a vine of grapes looks beautiful.
- First, the acorns themselves are prepared. However, they should be fresh, not dry. A hole is formed in each of them with a pin.
- A thin wire is inserted into the holes made. At the end, it is twisted into a knot so that the acorns do not slip. The wire is wrapped in green corrugated paper.
- After that, the fruits are painted. To do this, use acrylic paint. When the composition is completely dry on the blanks, all the parts begin to be assembled into one composition.
- The workpieces are gradually rewound with each other by wire. When the bunch is completely assembled, its stem is cut to the desired size. At the end, it is wrapped with the same corrugated paper.
- Several grape leaves and tendrils are cut out of plain green paper according to templates. They are attached to the vine. In this form, everything can be laid out on beautiful dishes. This decoration is perfect for the kitchen.


Beautiful vases for the home are also made from acorns. Let's consider the simplest option.
- A plastic bottle or other container of any shape is taken as a basis. To create a vase, you will need a large number of fruits. However, some of them should be left with their hats.
- Acorns are completely pasted over in a chaotic manner the entire outer part of the prepared container. For this, it is better to use PVA glue.
- To make the product look more original, you can add some chestnuts or other decorative details.
A small artificial tree like a topiary can be placed in such a vase. It should also be made from acorns.


In the next video, the craftswoman will show how to make crafts from natural material with her own hands.


