Making keychains with your own hands
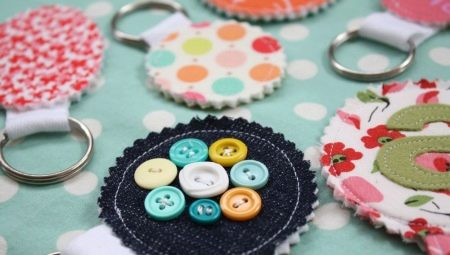
Keychains are now sold in many stores. They are attached to keys, flash drives and even to the straps of a backpack. The most valuable are jewelry that exists in a single copy. You can make such an original keychain yourself.


How to make from felt?
Most often, felt is used to create key rings for keys with your own hands. This soft material is inexpensive and sold in many craft stores. Crafts from it are bright and beautiful.
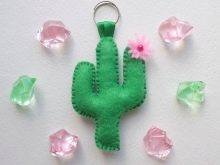

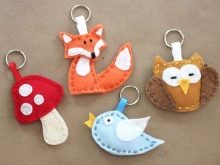
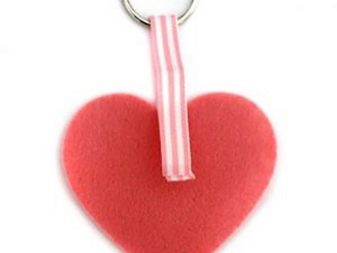
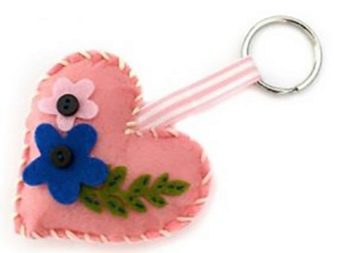
An excellent gift for a loved one will be a keychain made in the form of a small heart. The process of creating such a craft consists of the following stages.
- First, you need to cut two pieces of the same shape from a piece of pink felt.
- From colored scraps of material, you need to cut out flowers and leaves of a suitable size, sew these details to the front of the heart.
- Next, both halves of the heart must be carefully sewn. The craft can be flat or filled with cotton or padding polyester.
- A neat loop should be sewn to the finished keychain. It can be made from a satin ribbon or a narrow strip of fabric. The finished keychain can be immediately attached to the keys.
By the same principle, you can make products of any other shape. To create children's key rings, reflective parts are used, which are attached to the base of the craft.


Creation of leather
For many needlewomen, after sewing large bags or belts, scraps of natural or artificial leather remain. They can be used to create a simple key ring. Even a novice "creator" can cope with such a task.


The process of creating a leather pendant consists of the following steps.
- First, you need to decide what the shape of the product will be.Those who are just learning to create beautiful crafts at home should pay attention to something light. It can be a product in the shape of a heart or a circle.
- The template of the future key fob must be drawn on a sheet of paper. After that, the pattern can be transferred to the seamy side of the skin.
- From the prepared material, you need to cut 2 parts of the keychain and a wide strip.
- Join the two pieces of leather together. They can be glued together or sewn with small stitches.
- After that, a wide strip must be sewn to the workpiece. From it you need to make a convenient loop, which will be attached to the key ring.
The finished keychain can be decorated with a rivet, embroidery or a thematic pattern. This craft will be a great gift for your dad or brother.


More ideas
Keychains made from improvised means look no less beautiful than crafts made of leather or felt. Even a small child can make jewelry with his own hands.


From elastic bands and threads
Such a simple accessory can easily be made by a baby 4-5 years old. To create it, you need to cut a neat circle out of cardboard or a piece of an old box in advance. One edge should be carefully cut. Next, you need to wind a thread of a suitable color around this circle.
Through this circle, you need to carefully stretch the elastic band, cut the free edges of the future pompom. After that, the edges of the threads will need to be fluffed up and cut.

Made of wood
Leftover wood or waste plywood can also be used to create beautiful key rings.
The simplest crafts are made from round or rectangular pieces. The material that will be used in the work only needs to be carefully sanded and covered with a layer of transparent varnish. This will help extend its lifespan. Next, you need to drill a hole at the top of the craft. A key ring is pulled through it.
You can attach a metal figure or an old toy to the bottom of the craft in the same way.

From a wine cork
Having decided to make a keychain from scrap materials, you can use an ordinary wine cork in your work. In its surface, you also need to drill a hole for the ring. After that, the craft can be immediately attached to the keys.
If you want to make the accessory more original, the cork can be painted using acrylic paint and decorated with an inscription or a simple drawing.
The finished product must be covered with a layer of clear varnish. In this case, the craft will not deteriorate after being exposed to rain.


Plasticine or polymer clay
Children's decoration for a backpack or pencil case can be made of polymer clay or plasticine.
The easiest option for such a craft is a donut-shaped keychain. It is made from airy plasticine. The process of its creation is as follows.
- To begin with, you need to roll a sausage out of light brown plasticine and connect its edges. Carefully level the junction.
- You need to roll a flat oval out of pink plasticine. Trim its edges carefully. This should be the same size as the donut.
- Next, you need to make a small hole in the middle.
- After that, the workpiece should be attached to the brown base.
- The finished figurine can be decorated in any way.
It is recommended to cover the resulting donut with a thin layer of clear varnish. This will extend its service life. You need to make a small hole in the finished keychain. It is through it that the key ring is passed.

It is just as easy to make a figurine from polymer clay. To create it, in addition to the main material, you will need a toothpick, glue, a string and a means for attaching the finished keychain. It is done as follows.
- To begin with, you need to roll two small balls out of polymer clay. Gently flatten each of them, align the edges.
- It is necessary to form a piece of cheese and lettuce from pieces of green and yellow clay.
- After that, you can start assembling the figurine. Place cheese and salad on the bottom of the bun.Top everything should be covered with the second half of the roll.
- The craft should be decorated with small pieces of yellow material that imitate sesame seeds. Instead of polymer clay, you can use colored glitter.
- Next, the workpiece must be pierced with a toothpick or a thick needle.
- The resulting craft must be baked in the oven. Then it can be attached to a cord and hung on a key ring or mirror.

From beads
Needlewomen who are fond of beading will love this craft made of small colored beads. Even a preschooler can make such a colored keychain with his own hands. All you need to do is follow the step-by-step scheme. An example of a beautiful craft that can be made from beads is a cute butterfly.
To create it from beads, you first need to weave the base, then make the wings and attach them to it. When the bow tie is ready, it can be supplemented with a convenient eyelet.
This decoration will appeal to both children and adults.


Of coins
A keychain made of coins will turn out to be beautiful and memorable. Any materials can be used to create it. Coins brought from distant countries or preserved from the times of the USSR will look original.
To create such a keychain, a small hole must be drilled in each coin. One or more coins can be worn on the ring.

From lace
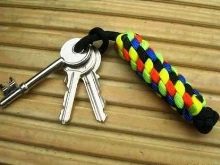
Key rings made of ordinary laces also look interesting. It is very easy to make such an accessory. To get started, you just need to thread the lace through the key ring. Next, two of its edges need to be tied with a neat knot. Then this must be repeated again. The edges of the craft should be secured with glue.
To create a keychain, you can use both plain and colored laces.


Made of plastic
Flat plastic crafts also look original. Such keychains turn out to be no less beautiful than purchased products made of plexiglass.
To create such a craft, you can use candy packaging or food storage containers. The surface of the plastic must be smooth and even. A master class on creating such a craft is very simple.
- The base of the figurine must be cut from a workpiece of a suitable size. Permanent markers or acrylic paint are used to outline the contours of each drawing. After that, you need to make a small hole in it.
- When the craft is ready, it must be transferred to a baking sheet covered with parchment. It is worth baking the craft for 2-3 minutes at a temperature of about 160 degrees. If you overexpose it in the oven, it will become too brittle and quickly deteriorate.
From such blanks, you can make not only a stylish keychain, but also a beautiful bracelet or badge.

From fur
To create such a beautiful keychain, you can use both natural and artificial fur. In addition to him, the needlewoman will come in handy with a carbine, a black cord and scissors. The process of creating such a craft consists of the following stages.
- To begin with, the leather cord must be threaded into the ring of the carabiner and tied with a double knot.
- In the same way, the second part of the lace should be attached to the colored strip of fur.
- The second strip must be fixed in the same way, and then wrap the first part of the fur with it.
- The edge of this part must be fixed to the top of the craft. For better fixation, the upper part of the keyring can be sewn with threads of a suitable color.
Such a craft will look beautiful on a bag or keys.


From beads
Homemade key rings made of bright beads are also popular among needlewomen. In addition to these, you will need a leather cord. The keychain is made very simply:
- one end of the lace must be tied in a knot;
- string bright colored beads on it;
- after that you need to tie the second knot;
- the resulting keychain can be attached to the key ring.
Beads of different colors and sizes are suitable for creating such a decoration. You can also use fishing line or metal wire instead of a string.


From fabric
Bright crafts from pieces of unnecessary fabric also look beautiful. To create such a keychain, you will need fabric, iron, small scissors, filler and colored tape. It is done very simply:
- first, from a piece of dark fabric, you need to cut a figure of a suitable size;
- further, the resulting blanks must be decorated with light embroidery;
- after that, both parts must be ironed with an iron;
- sew the resulting blanks together, leaving a small hole;
- turn the toy out and fill with padding polyester or cotton wool;
- attach a ribbon to the finished craft.


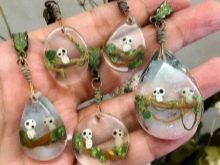
Epoxy resin
Epoxy resin is a material that can be used in work by both novice craftsmen and experienced ones. To create a craft, molds of a suitable size are usually used.
- Flowers and leaf pieces must be dried thoroughly. Moisture should not remain in their fibers.
- Before use, molds must be wiped with a napkin and treated with silicone oil. Thanks to this processing, the finished figure will be easy to get out of the mold.
- Dried blanks need to be placed in a mold for pouring, fill with a solution prepared in advance. In the process, you must follow the instructions on the package. Mix the mass with a wooden spatula for two minutes. It is important to do this slowly, otherwise air bubbles may form there.
- Place the molds on a flat horizontal surface. Cover the blanks with a piece of cardboard or an empty box.
- After 25 minutes, all bubbles formed on the surface must be carefully removed using a toothpick. If necessary, the procedure should be repeated after 10-15 minutes.
- Leave the molds to harden overnight.
- After the product has solidified, the workpieces must be carefully removed from the mold.
- Next, in the resulting pendant, you need to drill a through hole, thread a ring through it. The finished craft can be attached to the keys.


From buttons
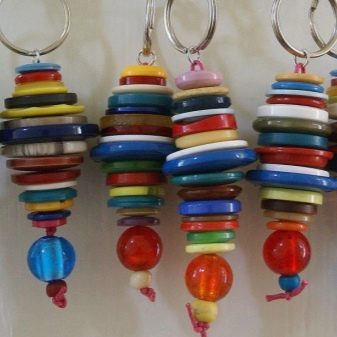
Such a simple craft can be made from a set of unnecessary buttons. They can be either plain or colored. All that is required is to string individual buttons on a strong thread, fishing line or thin metal wire.
The edge of the craft must be fixed by passing a colored bead through it.

From threads
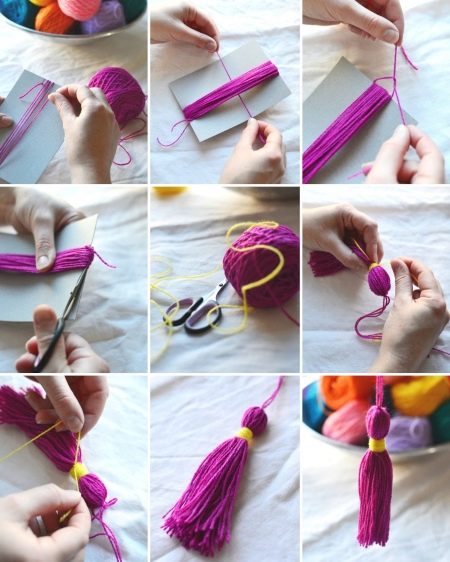
To create a beautiful pom-pom, you will need two colors of thread, scissors and a piece of cardboard. The process of creating such a craft consists of the following stages.
- First you need to cut a piece of cardboard to the correct size.
- A thread of bright color is wound around it.
- From above, the resulting skein must be tied with a thread of the same shade. You need to attach a small loop to it.
- The free edge of the skein must be carefully cut with sharp scissors.
- Next, the upper part of the keychain must be tied with a yellow thread.
Lego
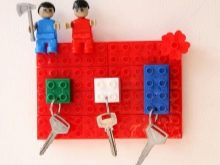
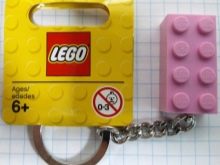
Key rings made from parts from the Lego designer also look original. All that is needed to create such a craft is to choose a piece of a suitable size and drill a small hole in it, stretch a key ring through it.
By the way, to store them, you can make an original key holder of a suitable size from the designer. In this case, the key fob will be easily secured in a suitable place.

For information on how to make keychains with your own hands, see the next video.


