How to make a paper pumpkin for Halloween?

It's probably impossible to celebrate Halloween without a pumpkin. And it is unlikely that the matter will be limited to one pumpkin. Both real fruits and their cute creative imitation will come in handy. Paper will help out, from which you can make many cool options for holiday attributes.


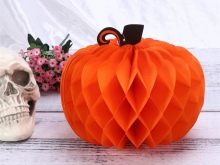


Craft from strips with your own hands
This kind of work is usually done even by elementary school students. You can make a voluminous pumpkin quickly and effectively. This will require sheets of colored paper: orange and green. And also a ruler, pencil, scissors, glue and a fastening button.
Manufacturing stages.
-
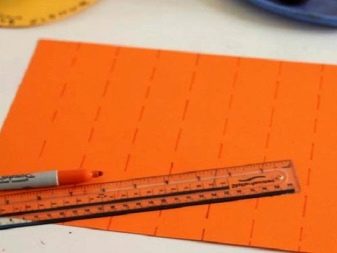
Orange A4 paper must be lined sideways. Each strip should be 2.5 cm wide. A total of 10 strips are required.
-
The stripes need to be cut out, if necessary, erase the pencil marks.
-
Make punctures at a distance of half a centimeter from the edge.
-
From a sheet of green paper, you need to cut out a sheet (there may be 2 or even 3), somewhat reminiscent of a maple, only with more rounded tips.
-
The strips must be fixed as in the photo (the fastening button is useful). On the table, the fastened strips are laid out with an asterisk. By the way, if there is no fastening button, a stapler can help out. Each subsequent strip is superimposed on top of the previous one.
-
The top of the pumpkin is collected in the same way. First, the leaf clings, and then the strips-slices.
-
To make the pumpkin flattened, a flagellum is pulled between the fastening buttons, right inside.


It is not necessary to leave the finished pumpkin empty. It can be filled with sweets that children are looking forward to on Halloween.
By the way, for stripes, you can take not only orange colored paper... For example, music sheets are also suitable, which are also cut into strips, and then made orange by the spray method. For example, an old toothbrush, which is dipped in paint (or tinted water), and then using a ruler drawn along the pile, the coloring composition is sent to the surface. This musical pumpkin will look even more original.
And also for the manufacture of strips, you can take metallized colored paper, corrugated, printed and foil. All options are good and allow you to create a craft that is even brighter than the original in the master class.


How to make an accordion?
An accordion is paper folded in such a way that it resembles furs in a real accordion. Younger schoolchildren probably used this technological technique in labor lessons. Useful for work: sheets of orange double-sided paper, PVA glue, stapler. You can use scotch tape instead of glue.
Here's how to make a pumpkin.
-
You need to collect 4 circles: 2 pieces with a diameter of 20 cm, 1 piece - 22 cm and another 1 - 18 cm. Each includes 4 elements folded like an accordion, bent in half and connected with a stapler.
-
The parts can be glued together with PVA, or connected with tape.
-
The circles are to be planted on a paper tube in the following sequence: the first one is the one with a diameter of 20 cm, the second - 22 cm, then - 20 cm, and ends - 18 cm.
-
The place of the nozzle, which can be considered unpresentable, should be masked with a circle. A mug with a diameter of 10 cm, which is cut from the same paper, will be enough.
-
You will also need a wire for pumping, it must be wrapped around a narrow strip of green paper. A piece of paper should be cut out of the same paper.
-
The resulting stalk must be sent into the hole of the tube, and the leaf must be glued.
The corrugated pumpkin is ready!


Making an origami pumpkin
There is a very simple MK, according to which origami pumpkin will make even the smallest ones. And this example is also good in that you can make a lot of such pumpkins and make a cool garland out of them for Halloween. You can take colored paper (double-sided) of the same color - orange, yellow. Or you can use printed design paper, the pumpkins will turn out to be even more interesting. And if this is a blank for a garland, you can alternate different versions of paper.

For one pumpkin, you will need a 15 by 15 cm square of paper, and also a narrow strip of a contrasting color, from which the tail will be formed.
Let's look at how to make an origami pumpkin.
-
First, the seamy part of the sheet is used. The top point should be aligned with the bottom. The resulting triangle must be smoothed out.
-
The right corner is to be aligned with the left. The fold should be ironed.
-
You can open the left "pocket".
-
The workpiece is turned over to the other side. The same actions are performed with the right "pocket".
-
Folds are made along the dotted lines, the edges are "hidden" inside the figure.
-
The folding at the top will also have to be repeated.
-
The top can be folded back.
-
The bottom point repeats the same action.
-
The protruding parts have to be removed to make the pumpkin more rounded.
With a marker on the pumpkin, you can draw an ominous smile, but this is optional.

And there is another version of the origami pumpkin, this is a model from Joe Nakashima... It will be a very beautiful three-dimensional model, and despite the fact that a real pro came up with it, amateurs can repeat it. Craftsmen are asked to use velvet paper to make such a pumpkin. For work, you need a square of paper 21 by 21 cm - one side is orange, the other is green.

Here's how to do it.
-
A "double square" model is created. The diagonals are folded along the sheet - it needs to be bent so that the diagonal guidelines appear.
-
The paper must be turned over, folded in half in two directions.
-
The right, left and bottom corners need to be aligned with the top. Now the workpiece can be flattened - the "double square" is ready.
-
The semi-finished craft must be positioned so that the free corner is in the "away from you" position. Bend the right and left edges to the middle, and then return to their original position.
-
Using a reverse fold, the side flaps are wound inward.
-
The product can be turned over.
-
The same actions are duplicated on the reverse side, fold lines are outlined.
-
The valves can be filled inward.
-
The upper part can be lowered.
-
The resulting triangles are hidden inward, folds are opened one by one.
-
The shape is bent so that the bottom point goes beyond the top of the border. You can open it.
-
The workpiece is turned inside out, the sharp end is on top.
-
The side corners are folded.
-
They need to be brought inward with a reverse fold.
-
And again the previous step, only now on the right.
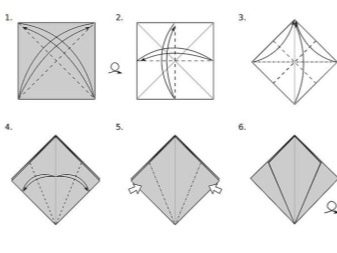

All sections can be straightened out and enjoyed the finished pumpkin. The model is not the simplest one, but it looks impressive.

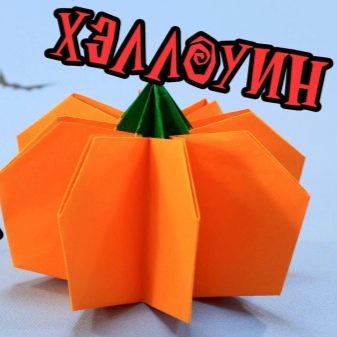
More ideas
However, these are far from all the models of paper pumpkins with which it is so easy to create the atmosphere of a mystical autumn holiday.
Here are 15 cool Halloween pumpkin ideas for decorating your home.
-
A regular book sheet is cut out in the shape of a pumpkin, veins are drawn with a pencil or marker. The pumpkin is glued onto a piece of burlap. Above, there is a leaf, a leg made of a branch and a rope for hanging - if you don't want bright colors that cut your eyes, it is quite an option.

- A flat craft, a postcard, or (if enlarged, a panel) for Halloween. Easy to do, like printed cardboard applique on sackcloth.

- A variant of a garland with very beautiful floral inserts. Made from colored paper and twine.

- You can make several of these pendants under the chandelier or elsewhere in the house. They are also made from strips, and very quickly. In a garland, such pumpkins also look great.

- Here's how different sheets of printed paper are used to make one pumpkin garland. It will look very bright, expressive, festive on furniture and not only.

- If you take a very thick cardboard and paste over it with design paper, and then cut out pumpkins from it according to the pumpkin patterns, you get such a decor. You can hang them in different places of the house.

- Pumpkin combined with a bat is the real atmosphere of All Saints Day. Therefore, in order not to reinvent the wheel, you can make a similar garland.

- And if you attach such a black witch's hat to the same pumpkin made of orange strips of paper, you get a cute and very accurate themed decoration. They can be placed at the festive table with treats.

- And if you want to quickly and easily make a garland on the door, then here is an option. In addition to pumpkins, there is also a candy, a ghost, and a bat - all the recognizable symbols of the holiday together.

- If the paper is folded like an accordion, you get such an ominous pumpkin. You will need to attach her eyes, nose, mouth, hat and bow tie. The finished craft can be hung on the wall or on the front door. Or maybe a mirror.

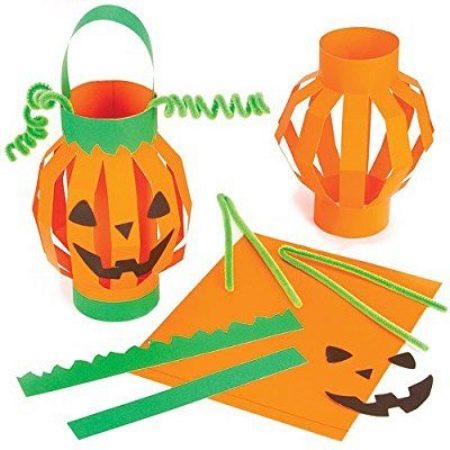
- The good old idea of paper lanterns can easily be adapted to make a pumpkin for Halloween. Only the signature face needs to be done on this orange flashlight.
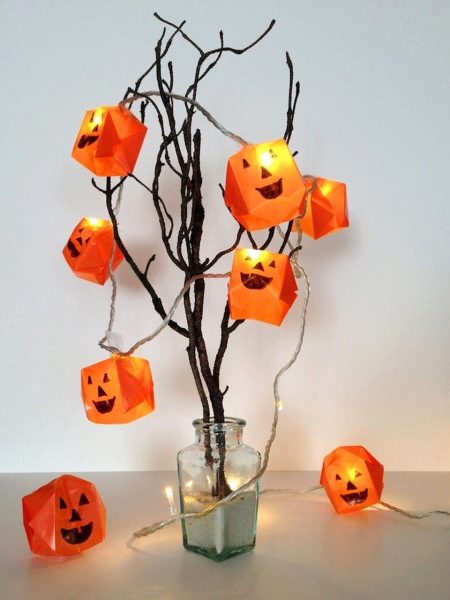
- Speaking of lanterns: if you take the simplest garland and make similar figures on bulbs, there will be a cool festive glowing garland. From pumpkins, of course.
- Here you can see how picking paper changes the simplest option, making it more sophisticated.

- It's hard to imagine modern Halloween without the pumpkin from the book. Everything is simple, but effective.

- But a pumpkin can become a hat for a child, it is almost a pumpkin mask, in which it is easy to be a very noticeable hero of a festive evening.

No mysticism, pure wonders of creativity!
How to make a pumpkin out of paper, see the video.


