Crafts for the Day of the Elderly

The first day of October is considered a holiday dedicated to the elderly. Due to their age, grandparents especially need attention and care. Older Person's Day is another opportunity to express respect and appreciation to the older generation.


Original postcards
The most versatile gift for any holiday is a postcard, especially since it is easy to make it yourself.
Having tried it once, you can make the making of such crafts a good tradition and give them not only to relatives, but also to all friends.


Applications
Starting from the younger group of kindergarten, children can take part in making beautiful appliques. One of the themes for them is all kinds of flower arrangements. In order to make an applique in the form of a bouquet of flowers on October 1, you need to follow a series of simple steps.
- Take a square sheet, and bend the adjacent sides of one corner to the center, align the slices with respect to each other. Expand the workpiece back.
- Draw flowers, flower centers and greenery on colored paper. Cut everything neatly. If you have to make several identical applications, it is better to make templates, and trace the details for the bouquet along them.
- On the free upper corner of the unfolded workpiece, glue the green part, then the flowers and the middle. When the glue is dry, fold the side pieces and iron the folds well. Outside, the applique can be supplemented with a congratulatory inscription, and inside, you can write or glue a printed congratulation.

Besides, you can use beautiful pictures depicting an elderly couple. The easiest option is to stick a suitable picture on colored cardboard, and use any available decor for decoration: rhinestones, ribbons, cuttings, chipboards and more.


A postcard with a window looks very interesting, opening which you can see grandparents. A photograph or color picture is useful for this postcard. Here's how to do it.
- Fold a sheet of colored cardboard in half. On the inside of the first page, draw a rectangle slightly smaller than our photo.
- Divide the rectangle in half and cut through all the lines except the side lines to form the window shutters.
- Paste a photo on the second page of the postcard opposite the window.
- Decorate the front of the postcard as you like.
Since this is an autumn holiday, the applique can be decorated in this theme. For example, bright orange, yellow and red leaves of different trees. Dried natural material or leaves cut out according to a template is quite appropriate here.


Volumetric
There are quite a few techniques for making postcards with volumetric details, but with the support of adults, children from 3-4 years old will successfully cope with this. As an idea for crafts, you can take an image of grandparents. For a postcard, you will need cardboard, colored paper, cotton wool, glue and scissors. Step-by-step instruction.
- Glue colored paper on the base with an indent from the edge to get a kind of frame (or paint over this area with a contrasting color).
- Cut out two circles for the head from colored paper. And the figures representing the body can be cut out of fabric - this is how elegant clothes for grandparents will turn out.
- We glue paper parts on a colored background, add facial features.
- The most interesting stage is hair creation. To do this, you need to tear off a few pieces of cotton wool, apply glue, and form hairstyles. And you can glue your grandfather's eyebrows, mustache and beard.



To create a festive mood, decorate the card with voluminous paper flowers. To do this, take the squares of the required size, fold them in half twice, and then diagonally. Cut off the free edge, giving it a rounded or pointed shape. Then we unfold, cut along one of the folds and glue adjacent petals so that the flower becomes concave. Thus, we make several flowers and leaves. We make a flower arrangement, gluing only the middle of the flowers.
It is worth saying that voluminous paper flowers are a win-win option for decorating any card or invitation.


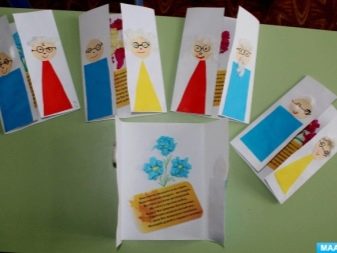
Using the same technique, you can make a simple postcard with a congratulation hidden inside.
- We fold the narrow sides of a thick sheet of paper to the center, combine the cuts, and iron the folds.
- Inside we write or glue congratulations on the holiday.
- On the front side, on one side, we glue the figure of the grandmother, and on the other - the grandfather. We make gray hair from cotton wool, as in the option described above.
For a more complex voluminous postcard for the Day of the Elderly, parts of the main characters are made of plasticine, which easily fits on paper.
Instead of plasticine, parts can be made from dough or modeling mass, which must be well dried and painted. Anything can be used for decoration - threads, fabric, wood and much more.

Making dolls from cones
At any age, it's nice to get a beautiful DIY doll. Bright clothes and a perky face will definitely enhance your mood. In addition, such a souvenir can be left as a keepsake and decorate the interior of the room. The easiest way is to make a doll based on a cardboard cone. First you need to make a blank.
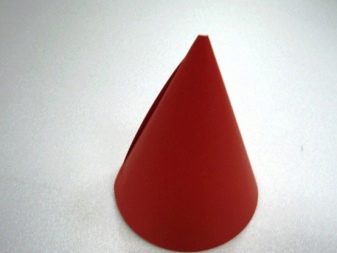
- Cut out a circle with a diameter of 20 or 21 cm from red cardboard, divide it into 4 parts with a pencil on the seamy side, and cut out one of them.
- We fold the cone, combining the lower sections, and glue it securely on the side. If the base is unstable, it can be trimmed with scissors from below.

Next, we start creating the doll itself.
- Cut out two identical circles for a head with a diameter of 5 cm.
- For hair, you can cut thin strips of colored paper, or take threads 7 cm long.
- Turn the circle over with the wrong side up, glue the prepared strips or threads on the upper half along the edge. Glue another circle on top, leaving a small pocket below. Allow to dry.
- Draw the eyes, nose, mouth, eyelashes and eyebrows.
- Cut and glue the sides of the arm cone.
- Lubricate the left pocket on the head with glue, push the top of the cone inside, and press firmly.
You can curl paper hair by curling it around with a pencil, or by running a scissor blade over it. To prevent the hair from puffing up, they need to be styled and fixed with glue, and bows attached.
The dress will look more elegant if it is painted with paints, or pasted on a paper pattern.



Master class on how to make a thematic doll in Russian folk style.
- This will require one large cone for the base and two shorter and narrower ones for the sleeves.
- Cut a semicircle out of colored paper, glue it in half, leaving a pocket in the middle of the rounded side. This will be a scarf.
- Glue a circle in the middle of the scarf and draw facial features. Mark the ends of the scarf under the chin.
- On the base of the doll, stick a beautiful apron and hands on the sides.
- Connect the head and base, as in the previous version.
By analogy, you can make any figurine - both female and male. The main thing is to symbolically designate clothes, choose material for a hairstyle, and draw a friendly, smiling face.


To simplify the task, you can take a glass instead of a cone. Then we do the doll like this.
- We cut out two circles for the head, when gluing, insert a half of a toothpick inside. We glue the eyes, mouth, nose and hair.
- We paint the glass or glue it with paper. We pierce with an awl from both sides from above, insert threads into the resulting holes and tie a knot inside. For the legs, the threads can be glued to the inside of the front edge of the glass.
- Cut out small circles from cardboard, which will be palms and feet. On the threads inserted on the side at the same level, glue the palms on both sides, cut the protruding threads. We do the same with the legs.
- In the center of the bottom of the glass we pierce a hole, insert the head.

Edible presents
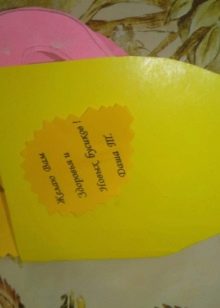
If a mass event is planned, each invitee can be given a present that will be not only beautiful, but also delicious. For example, it could be a good tea bag hidden inside a postcard. To do it, you just need to follow the instructions.
- Fold a sheet of thick paper or cardboard in half. Draw a cup of tea or a small teapot close to the fold.
- Cut without cutting through the fold to create a double postcard.
- Decorate the front side, write kind words and congratulations inside. Glue a small present inside - tea or candy of a suitable size.

A very interesting craft is obtained from lollipops. Here's how to decorate them.
- Without breaking the integrity of the package, glue the base (in the form of legs or any other shape) to the round top. It is better to use a glue gun for this.
- Cut a circle out of white or flesh-colored paper. Cut hair out of velvet paper or other suitable material, stick it on.
- Facial features can be printed on paper, painted or pasted - as you wish.
- Glue the head to the stick. The figurine can be supplemented with pens, flowers, walking sticks, glasses and other accessories.

If desired, any sweets can be decorated festively. For example, put them in a bag or box, and glue the appropriate inscription. And also make a wrapper for a box of chocolates or a can of cookies with your own hands. Of course, you can print a suitable picture on a printer. Or take a sheet of the right size, glue a photo, apply a drawing around it, and sign beautifully.
Better to stick on tape or non-toxic glue.


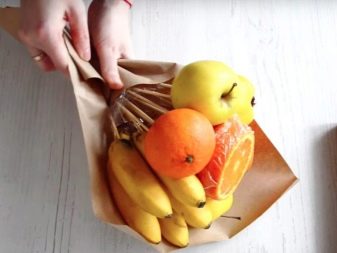
Fruits are more difficult to pack and are best done shortly before serving. Now it is fashionable to make bouquets of fruits and vegetables. Despite the seeming complexity, it is within the power of a person of any ability.


For a simple bouquet, you need 7-10 small fruits, about 20 long skewers, any wrapping paper and tape. The fruits must be washed and dried in advance, and the bouquet must be collected with gloves.
It is more hygienic to carefully wrap all fruits with cling film, especially cut ones.
Progress.
- In larger fruits, at a short distance from each other, stick 3 skewers from below. For smaller ones, two are enough.
- We place the largest ones in the center, then add the rest to the side, and after each we wrap the skewers with a layer of scotch tape.
- When all the fruits are fixed, we wrap the resulting bouquet with paper, fix it with tape, and tie a ribbon.

More ideas
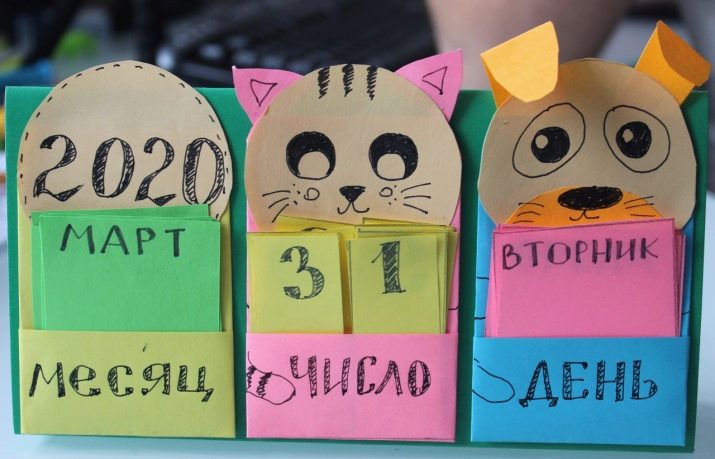
An additional plus of crafts for the Day of the Elderly will be its usefulness. Even an elementary school student can make a desk calendar.
- To do this, you need to take a sheet of cardboard and divide it into 4 parts: 2 are identical, one is twice narrower and another one is very narrow. Bend along the outlined lines, apply glue to the narrowest one and glue to the wide one to get a figure with three side edges.
- On one side, glue three pockets with the inscriptions: month, day and day.
- Make 12 cards with the names of the months, numbers from 0 to 3 (these will be the first digits of the number), numbers from 0 to 9 and the names of the days of the week.
- Decorate the base with fun drawings or themed pictures.
- Put the cards in the corresponding pockets and set the current number.
Another useful present is a beautiful photo frame. For preschoolers, you can take a ready-made frame as a basis. Older children can cut a frame from thick cardboard, plywood on their own or under the supervision of adults.
Since the holiday is autumn, natural materials will look good as a decoration: leaves, twigs, various seeds, acorns, berries. They can be molded onto a thin layer of plasticine, glue or double-sided tape.


Any grandmother will be pleased to receive a needle cushion as a gift. One of the most accessible is done like this.
- We take a low glass, any filler (cotton or synthetic can be used), fabric and glue.
- We fill a glass with a filler with a slide.
- Cut a circle out of the fabric 4 cm larger than the diameter of the glass.
- We grease the inner edge of the glass with glue, cover it with a cloth circle on top and gently push the fabric inside.
- The glass itself can be decorated using decoupage technique or painted.

Any hand-made craft is a great opportunity to give pleasant emotions and attention. The more often we do this, the more good we will receive in return.
For information on how to make a card for the day of the elderly, see the next video.


