Making crafts "Swan"

The Swan craft is one of the most popular homemade models. It can be performed in various techniques and with varying degrees of difficulty. Ready-made master classes are suitable for both beginners and lovers of needlework. Graceful birds symbolize devoted love and graceful beauty.


How to make from paper or cardboard?
To make the simplest paper craft in the shape of a swan, you need to devote a few minutes to the creative process. Festive tables are usually decorated with such birds. By following the instructions step by step, you can get a bird using the origami technique.
- Fold a square sheet into a diamond shape. If you have an A4 sheet, you can cut off the excess part from it.
- Connect opposite corners by bending them diagonally to form folds. The edges must be sharp.
- Bend the left and right corners inward so that the edges meet in the center.
- Bend the outermost inner corners of the figure outward.
- Turn over to the other side, and fold the workpiece in half.
- The acute angle folds vertically upward to form the neck.
- To make the head, you need to bend down the upper sharp corner.
- Form the beak and tail.
From thick white paper, you can make a swan-napkin holder, standing upright. To do this, you need to cut out blanks in the form of a bird with spread wings, folding the sheet in half. The bottom of the structure should be flat. The fold of the craft goes in the neck area, and the rest of the parts are glued together with glue. In order for the structure to be stable, a triangular box should be placed between the wings.
It is recommended to decorate the wings with silvery paper.


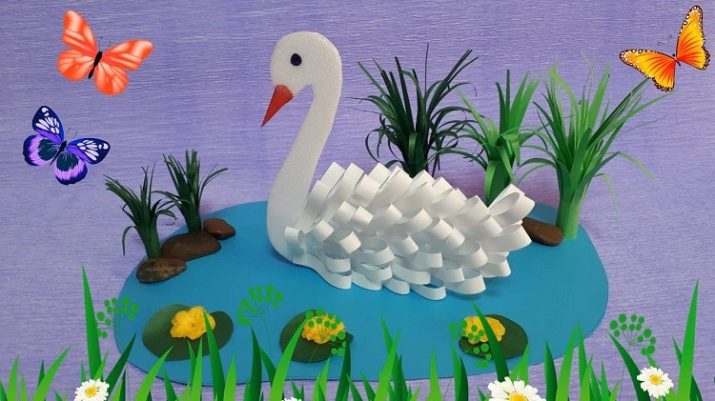
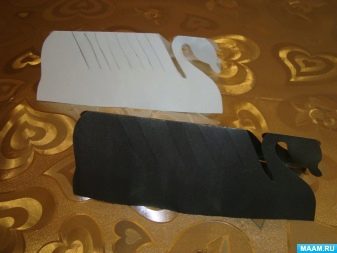
If you want to create a pair of black and white swans, you need to prepare cardboard of the corresponding colors. To make swans on a pond with your own hands, you need a little materials: cardboard, glue, stationery clips and scissors. Additional accessories will require an oval plate, artificial shells or flowers and other decorative items.
To make swans according to a pattern, you need to follow the instructions in the instructions. Having previously prepared the template, draw a swan along the contours on a cardboard sheet bent in half. Make the second bird in the same way. Cut the swans along the lines with scissors.


Connect the breast and tail together with glue using a clamp to secure. Glue the eyes (available at the art store) and the red beak. To create a lake, you need to cut an oval out of blue cardboard. Then glue it to the bottom of the herring.
At the final stage, you should arrange the habitat of cardboard birds by placing decorated decorations there. Having attached the family to the base of the pond, the Swan Backwater craft is ready.


Made from felt
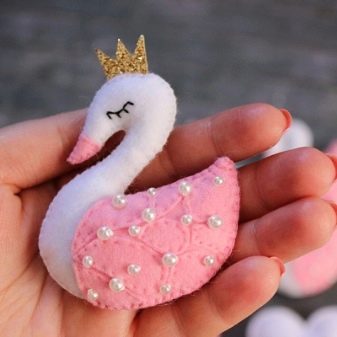
The fabric material can be the basis for making a handmade toy in the shape of a cute brooch. To do this, you need to prepare white threads, scissors, a sewing needle and a glue gun. You can use sequins, beads or rhinestones as decorating elements. Follow a few steps to sew a felt craft.
Make blanks from felt: cut out the main part of the body and wings according to the template, then transfer the image to the fabric. The wings should be voluminous, so you need to fill them with small pieces of felt. The wings should be glued to the body with a glue gun.


Now let's start decorating the bird. Small sequins can be sewn on the edges of the wings. The neck should be decorated with white beads. The unadorned part can be embroidered with a double cotton thread. Instead of an eye, you can use a black bead.
Using paints and a brush, draw an expressive face. After drying, cover the beak with varnish. Next, you need to cut the back side of the craft according to the template. To do this, you need to take a piece of artificial leather. With the material attached at the back, sew the leather to the main structure.


You can use another workshop and make a stuffed toy out of felt. The sequence of actions is similar to the presented option, however, the reverse side does not need to be covered with leather. A synthetic winterizer will be used as a filler. Then the volumetric shape is sewn along the edges.
For the design of the face, you can use a special fabric marker.


Making from a plastic bottle
Unwanted bottles can be great materials to craft swans to decorate your garden. To create a functional model with your own hand, you need to stock up on 5-liter bottles, thick wire, putty, bandage, as well as a metal mesh that will act as wings. Use a spatula, brushes and scissors as tools.
Here's a step-by-step guide. The plastic bottle must be cut lengthwise with scissors or a utility knife. Flowers can be planted in the resulting container by filling it with fertile soil. The future flower bed should be voluminous. Screw the wire into the twisted lid, bending it in such a way as to imitate the shape of a swan's neck. Having prepared the putty, start covering the bottom. To do this, you need to lay the material on polyethylene and press the bottle to the surface.


Moving on to creating the neck, you need to take the putty with wet hands and form rollers from it, pressed into the base of the structure. Wrap the pressed rollers with bandages. To obtain a natural imitation of the neck, it is recommended to form a thickening at the junction of it with the body.At the end of the wire, you need to sculpt the head of a swan, creating the shape of a flattened beak.
The body is then coated with putty. To hide irregularities, the surface is smoothed with a brush moistened with water. The metal mesh is pressed into the uncured putty from the sides of the body. The future wings must hold firmly, so it is worth waiting a while for them to adhere to the surface. To do this, it is necessary to apply the putty to the mesh from the front side, and hold the applied coating from the back with your hand.


To make a tail, you need to use the corner of the mesh, acting on a similar principle. The craft should be completely frozen, so you will have to wait a few hours. Gently transferring the product to a dark place, you should leave it there for two days to achieve final hardening. After that, the surface should be treated with mesh sandpaper.
Then you should cover the swan with a primer, apply another layer of facade paint or enamel. And also varnish can be applied. Using black and red paint, paint the eyes and beak. Having chosen a suitable place, place the bird in the garden.


Craft from threads
For a kindergarten, you can make an interesting applique in the form of a graceful swan. The basis will be white woolen threads. Materials used include: black cardboard, paintbrush, scissors, bird stencil, plain pencil, and PVA glue.
The master class for children consists of sequential steps.
- On a cardboard sheet, trace the template using a simple pencil.
- Apply glue along the outlined contours with a brush.
- Press the thread with your finger to the line coated with glue.
- Glue the rest of the craft with glue.
- Cut the yarn to the desired length with scissors and lay it on the surface with glue.
- After waiting for the fixation of the threads to the surface, the applique can be considered complete.
Making the craft does not take much time and effort, and the result will clearly delight both children and their parents. To make the process even more enjoyable, you need to do the work with the whole family.


For information on how to make a paper swan with your own hands, see the next video.


