All about clay modeling

In the endless stream of the modern rhythm of life, people sometimes forget to take time for themselves, to do what they really like. Psychologists unanimously declare how important it is to have a hobby and periodically be distracted by what you love, forgetting about the routine.
One of the options for such hobbies is clay modeling. This activity can bring a lot of positive emotions, and in terms of material investments, it is not at all costly.

In addition, if you manage to become a true master in this business, then it is possible that it will become an additional source of income.
What kind of clay is used?
Clay products are unique pieces of art that exist only in a single copy, which undoubtedly makes them exclusive. After all, the way one person sees the final result, how his hands and tools work in these hands, what materials are used in the creation - all this is a unique creative process.directly dependent on the inspiration of the passionate person.

An important part of this whole process is, of course, the material with which the modeling is made, that is, the clay itself. It is used in four different colors: yellow, red, white, blue. The shade directly depends on the amount of mineral additives included in its composition. They are needed to make the clay found in the wild, suitable for creativity.


Experts attribute to clay the title of the best material for modeling. Products made from it do not break down over time, but keep their original shape well.If cracks form on the resulting object, this indicates that mistakes were made at the time of manufacture, and too little water is included in the clay.
For sculpting, you can use clay, both purchased in the store and prepared at home. If you decide to go the first way, you can choose between a package that weighs about 0.5 kilograms, and one whose weight varies from 10 to 25 kilograms. Undoubtedly, buying in bulk will be cheaper than purchasing small quantities. This product is sold in a vacuum package so that air bubbles do not get inside.


Otherwise, the finished product will be fragile, and cracks may form on it.
You can also use chamotte clay, and another option is to prepare the raw materials yourself. The recipe is quite simple, the main thing here is to find quality material in the natural environment. Experts recommend looking for it in places where the deposits are shallow, for example, on the banks of a river with a cliff. However, immediately after finding, this raw material cannot be used, since it can crumble as a result, the reason for which is a variety of impurities in the composition.


In order to remove unnecessary elements, the clay is placed in a bucket filled with warm water for one night. In the morning, excess impurities will settle to the bottom, and the top layer, the fattest, will need to be dried until it becomes the desired consistency.

When working with natural clay, it is important to observe certain proportions and knead different ingredients into a mixture consisting of 8: 1: 1 ratios, where the largest number is the clay part, and the rest is sand and water.

If you want to leave the clay for storage for a while, it is important to create all conditions so that it does not lose moisture: keep it in a cool place (many recommend choosing a basement, a cellar, or even a shelf in the refrigerator for this purpose), place it in a plastic bag to limit the flow of air. Open the bag periodically and leave the material on a paper towel to air out to prevent mold growth.

Required tools
The type of clay does not affect which tool you have to work with - the basic set is standard for all variations.

So, for clay modeling, you need the following.
- Solid and spacious work surface. It can be any furniture that is convenient for you. The main thing is that there is enough space for arranging instruments and for the creative process.
- Waste cloth for cleaning dirty hands (paper towels can be used).
- Gloves. They are not so necessary, but may be needed in the process of kneading the clay. Essential for those people whose hands are sensitive and prone to dryness.
- An apron to protect clothing from excess clay.
- A utility knife for cutting pieces of clay and drawing small patterns (some people use a razor blade for this, although it is not so safe).
- Various molds (special or from scrap materials). They are necessary for applying all kinds of patterns to decorate the future masterpiece.
- Sandpaper is needed to sand the finished figurine. Variants of different grain sizes are used (numbers 220, 400 and from 800 to 1500).
- A container with running water at room temperature will be needed if you work with clay mined in natural conditions, it may need humidification.
- Paints. Gouache, acrylic will be needed to create a variety of decorations on a molded product.
- Brushes that differ from each other in thickness: protein, bristles and others.
- All kinds of sequins, beaded decorations, bugles to decorate the product (only if you do not plan to firing).


How to use the material?
After you have prepared all the necessary tools, you should do a number of manipulations with the clay so that it is as suitable for modeling as possible. First of all, you need to get it out of the cool place where it was stored before, and touch it with your hands.

It is important to understand what consistency the clay should be suitable for work, and if necessary, you can add sand or water to its composition to soften the composition. The main thing is to do it smoothly, evenly, tracking changes in the structure of the material.
Modeling methods
Specialists distinguish two types of modeling: constructive and plastic. The first is the manufacture of individual parts and their further connection as a constructor. The second method involves sculpting from a single piece of clay. Techniques have been developed for both methods, which we will discuss below.
For constructive modeling
- Making flagella (sausages). A flat base is molded, and the rest of the parts roll in the shape of sausages. Then they are superimposed on each other depending on what you want to depict on the base. The corners are smoothed out for a wonderful volumetric composition.

- Textile ceramics. The parts are rolled out in layers using a rolling pin, and then joined together by means of clay, diluted to a state of sour cream with a liquid consistency.

- Mosaic. A flat base is also produced, and the constituent parts are formed using molds and connected to the workpiece. The resulting openwork looks very attractive.


For plastic sculpting
- Hand molded from a single piecewithout using any tools. This method is considered quite difficult and requires experience.

- Forming. Different containers may be needed here (for example, a coffee cup), the clay is placed in this mold and "pressed" to acquire the same shape.

- Casting in plaster. This technique requires store-bought plaster molds. Clay is diluted with water to a half liquid state, after which it is poured into containers.

- Potter's wheel. This is perhaps the most romantic image associated with clay modeling. Here, the main principle is stretching. To begin with, a rope technique or sculpting from a single piece is used, then the raw material seems to be pulled up, and by rotating the circle it is given the desired shape.

What kind of crafts can you make?
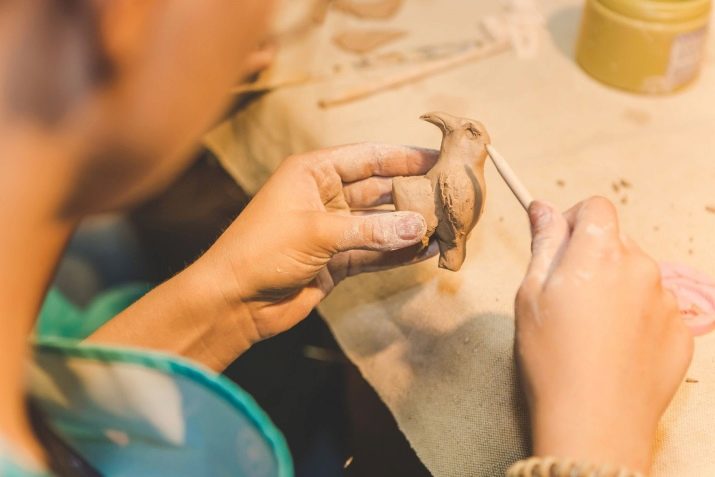
Like any creativity, clay modeling does not in any way limit the scope of your imagination. With your own hands using the necessary materials, you can make a truly unique work of art. Simple and beautiful figures in the form of a variety of animals will bring a lot of joy both in the process of creativity and at its completion, especially if all family members are involved in the work.


Clay modeling has a beneficial effect on children's motor skills. You can start with figures without small details. For example, it would be interesting to make a mug with a child and then decorate it in all the colors of the rainbow. Then you can show courage and tackle the animals with finer details. Let's say making a cat, dragon or tiger - they are considered not so easy in terms of difficulty.


Whistles are also popular, which entertainers use for practical purposes. Adults often prefer dishes: a variety of cups, saucers, flat and deep plates. For those who want to improve their skills, it is recommended to try themselves in creating a Dymkovo toy - one of the Russian folk clay art crafts. Also, many people are engaged in making larger sculptures to decorate the area in the garden.


For the best understanding of the clay modeling process, consider a step-by-step master class for beginners on making an animal.
- First of all, it is necessary to roll out a tourniquet from the clay stored in the package.
- From the resulting part, you need to separate as many pieces as you are going to make parts of the body of the future animal.
- Next, knead each of the blanks with your hands. The clay should become soft and, roughly speaking, docile.
- Next, we proceed to form the base of the figure, for which we take the largest piece - this will be the body.
- After you have formed the base, you need to alternately attach the finished body parts to it: the head, paws, tail of the beast (here, of course, it all depends on which creature your choice fell on).
- A great way to depict an animal as realistically as possible is to have its photo in sight, although, of course, there is no need to observe each of the physiological characteristics of the animal, it is enough to rely on the cartoonish appearance. Also, for the first time, you can find a figurine of this animal made of clay on the Internet and rely on this example.
- As soon as the product dries well, you need to use sandpaper, and then cover the surface with PVA glue (you can also use an acrylic primer). And when it dries up, you can proceed to the staining process. Acrylic paints or gouache are perfect for this.
- A good way to keep the product in its original form for a longer period is to varnish it.


Decorating clay figurines
Dyeing
One of the most famous techniques used to decorate a finished clay product. The paints used for these purposes are divided into two types: those that are applied to the freshly dried product and baked with it, and those that cover the finished product.
The first type includes, for example, cobalt coating (thanks to it, the Gzhel painting is created). The second group is especially common acrylic paints used for painting on glass and ceramics.


Milking
This process of decorating clay figurines consists in immersing the already fired product in milk, and then sending it back to the oven and re-firing, but at a temperature lower than it was before.
After this technique, the ceramic becomes the owner of a dark brown hue, and also acquires water-repellent properties.

It is important to take into account the fact that the dishes that are planned to be used for storing food must not be milked.
Wiping technique
The finished - already fired product - is wiped with a sponge, which is pre-moistened in brown gouache. The paint, as it were, smooths the joints, corners, as a result of which the product takes on a special look. However, it is important to remember that this method is not suitable if you intend to use the product as a cookware in the future.

Clay sculpting is a good way to relax and enjoy the creative process. In addition, this type of activity has a positive effect on the development of imagination and fine motor skills. The only drawback can be seen in the fact that the prices of materials are quite high, and the cleaning process after work is time consuming. Nevertheless, the time spent is worth it, because clay figurines will be an excellent home decoration, as well as a pleasant gift for your loved ones.

For more on clay modeling, see the video below.


