What kind of summer crafts can you do?

How quickly the warm and sunny summer flies by. Each child has a lot of positive and interesting memories of summer holidays, a wonderful and carefree pastime. At the beginning of each school year, all kindergartens and schools hold an exhibition of handicrafts dedicated to the farewell to summer.
These exhibitions are aimed at developing the creative skills of the child, fostering aesthetic taste and the ability to convey the impressions received through crafts. From what to make the craft, children choose on their own. A wide selection of materials gives complete freedom to children's creativity.


Colored paper ideas
Every preschooler will be able to make crafts on the theme of summer in kindergarten. You can make a simple applique out of colored paper. For example, to depict insects or animals that the kid saw during the summer holidays - funny insects, a beautiful butterfly, a little hedgehog. We offer you several workshops on making summer crafts with your own hands for children 3-4 years old together with their parents.


Aquarium in a jar
To make such a product, you will need a 0.5 or 1 liter jar and a set of colored plasticine. First of all, you need to decide on which side the decor will be located.
- Inside. In this case, it will additionally be possible to decorate our home-made aquarium with paper plants, plant a small crab or a plasticine snail on the bottom, come up with everything that is enough for imagination.
- Outside. In this embodiment, the jar is filled with water and tightly closed with a lid. The disadvantage of such a craft is that it cannot be used for games, since the external decor can be easily ruined. But this option looks more original.
It is best to figure out in advance who will live in the aquarium - fish, starfish, snails, crabs. What else it will be decorated with - discuss this with the child, let him describe how, in his opinion, the craft should look like.
To decorate an aquarium from a jar filled with water, you can add glycerin (4 tablespoons) there and dry glitter of any color.


Caterpillar made of colored paper
To make such a craft, you will need the following components:
- sheets of colored paper;
- green cardboard;
- glue;
- pencil;
- scissors.


Algorithm of actions.
- Draw a large piece of paper on a sheet of colored cardboard. To facilitate the task, you can find on the Internet and print a ready-made stencil of a leaflet.
- We draw 9 identical stripes on sheets of colored paper of different tones. The length and width will depend on what size of the finished product you want to receive, so the parameters are selected individually. It is recommended to cut one strip and, rolling it into a cylinder, see what size the part will turn out to be. If satisfied, we cut out all the rest.
- Twist the cut strips and glue them to form a cylinder.
- Now let's start creating our caterpillar. To do this, we glue some parts to the sheet itself, and glue others together, as shown in the picture.
- You can use ready-made artificial eyes or draw on your own.
- The final touch is the manufacture of antennae. Cut out two small strips and twist their ends with a pencil. We glue the finished antennae to the top of the caterpillar.
The multi-colored caterpillar is ready.


What to make from seashells?
Those of the guys who vacationed at sea during the summer holidays must bring a package of shells with them. Many beautiful and original crafts can be made of them, which will be highly appreciated by teachers.
Frame
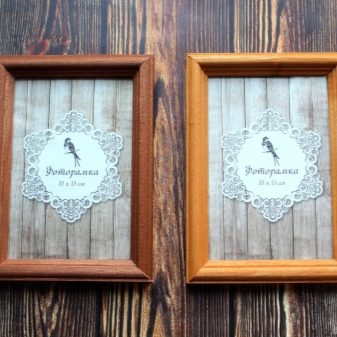
Any photo frame can be beautifully decorated with various shells in combination with additional decor (beads, rhinestones, starfish).
To decorate you will need the following items:
- Frame;
- seashells;
- thermal gun;
- additional decor.


Stages of work.
- Place large shells around the perimeter of the frame. Fix them with a thermal gun.
- Distribute smaller shells in an empty space in a chaotic manner. Secure them with a glue gun.
- Decorate, if desired, with decorative elements - small starfish, pearls, beads.
From above, you can cover the frame with pearl paint from a spray can. If you decide to do this, be sure to place the newspaper under the frame and let it dry well. Better to do this on the balcony so as not to breathe paint.
Any, even the simplest frame can be made stylish and original. A little imagination and free time - and a beautiful decorative element is ready.


Card
A variant of an interesting craft from shells is making a postcard. To do this, you will need:
- a piece of canvas;
- frame;
- thermal gun;
- pencil;
- a printed stencil of the desired pattern;
- white gouache;
- seashells;
- additional decor;
- scissors.


Actions step by step:
- fix the canvas to the frame with a heat gun;
- cover the canvas with white gouache, give it time to dry well;
- cut out a stencil of the drawing and circle it with a pencil, attaching it to the canvas;
- arrange the shells along the contour of the drawing, secure them with a thermal gun;
- fill the whole picture with shells, placing them as close to each other as possible;
- if, nevertheless, small gaps remain, fill them with either small shells or additional decor.
This method is suitable for making any image on a stencil, both on canvas and on a regular sheet of paper.


Turtle
You can create a variety of animal figures from shells. One of the simplest figures is a turtle; even a preschooler can make it. To craft a turtle, you will need the following items:
- seashells;
- plasticine;
- thermal gun;
- blue cardboard.


Stages of work.
- We mold 2 pairs of flat paws from plasticine of any color, slightly pointed to the tips.
- We form an oval head and a small tail with a pointed tip.
- We mold the formed parts of the future turtle onto a sheet of cardboard, leaving room for the shell, which we will make from a large shell.
- Create eyes from two white balls. We place them on the turtle's head, pressing down a little on top. In the center of each eye we stick a small cake of black plasticine.
- We choose a shell of such a size that it covers the space between the glued parts of the figure, covering them a little.
To create a marine composition, you can make several turtles of different colors and place them on a piece of cardboard. On one side of the cardboard we make out the bottom, gluing shells of different sizes and algae made of plasticine.


Interesting options from plants
Together with the children, you can make a beautiful craft for school from dried flowers or other plants that were previously put under a homemade press from stacks of books or something else. From such blanks, you can create whole pictures on cardboard or a sheet of paper by arranging and gluing them with PVA glue.
If there are no blanks from plants, they can be made from paper. To make a vase of daisies, as shown in the picture, you will need:
- sheets of white and colored paper;
- PVA glue;
- cover from an old notebook with a beautiful drawing for a vase.


Algorithm of actions.
- Cut out a vase of the required shape and size from the cover and glue it to the bottom of the cardboard, which will serve as a background.
- From sheets of white paper we form about 7-9 large daisies and 10-12 small ones.
- To make a chamomile, you need to cut 2 squares: for large flowers - 6 centimeters, for small ones - 4 centimeters.
- Fold the squares 3 times and cut them off, as shown in the figure.
- The trimmed blanks of the petals need to be expanded and twisted with scissors to make them more voluminous.
- We connect two blanks, placing them so that the petals are staggered. In the center we glue a circle cut from a sheet of yellow paper.
- We form the rest of the chamomile flowers in this way.
- We place the finished chamomiles on the background so that the large ones are in the center and bottom, and the small ones are on the top and sides. We glue them on PVA glue.
- We make the leaves from green paper. For each, cut out a 6 x 4 cm strip. Fold it in half and cut it out as shown in the figure.
- We glue the finished sheets under the chamomile flowers.


For information on how to make flowers from shells with your own hands, see the next video.


