Variety of Halloween Crafts

Halloween is a popular fall holiday. Many children like to prepare for his arrival and create home decor, costumes and even small themed gifts with their own hands. Such crafts are original and bright.

What to make out of paper?
A child can make thematic figures, masks and home decorations from cardboard, corrugated or plain paper. There are many interesting ideas that are suitable for both toddlers and schoolchildren.

The bats
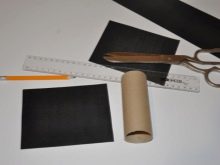
The black cardboard bat can be used as a holder for pens and pencils or a themed gift wrap. A child of 5-6 years old can cope with the creation of such a craft. The scheme of its creation is as follows.
- First, cut a piece of the desired size from the cardboard sleeve. Its edges need to be trimmed.
- Next, cut a piece of a suitable size from a sheet of black paper. Apply glue to one side. Next, you need to wrap a cardboard sleeve with this sheet.
- From the remains of black paper, you will need to cut out the wings of a bat. They must be carefully glued to the cardboard base.
- Small triangles are glued to the front of the figure - ears.
- You need to cut out the bat's eyes from white paper and draw the pupils on them with a marker. They should also be glued to the front of the figurine.
- Under the eyes, with a clerical corrector, you need to draw a smile with fangs.


If the figurine will be used as a packaging for sweets, a circle cut from thick cardboard should be glued to its bottom. The craft turns out to be cute and cute.
Mask on a stick
To make the celebration of Halloween memorable for the child, parents should organize a thematic photo session.To do this, you need to prepare simple masks on sticks in advance.
They are very simple to do. You can use wooden skewers or cocktail tubes as a mask holder. The mask itself is made of thick cardboard and colored paper. For a Halloween-themed party, craft paper hats, fangs, funny faces, or creepy eyes. They are made from individual figures that are glued to a solid base. Next, the finished mask is glued to the stick with adhesive tape.


Tantamareski
Tantamarecs are large photo stands that have holes made for the human head. You can make such a structure with your own hands at home. A craft made from Whatman paper takes up very little space.
To create it on paper, you should sketch a suitable shape. After that, you need to cut holes for the eyes in the right place. They can be done with scissors or a sharp clerical knife. Next, you need to finish this drawing, complementing it with bright details. Using this simple scheme, a child can make both a funny tantamaresque and a scary one.


Garland
To decorate a living room or any room for receiving guests, you can make a beautiful craft from an LED garland and paper. To create it, you need to use a dense material. You can cut figurines of cats or bats out of it. They need to carefully make holes for the eyes. They should be neat and not too big. It is into them that light bulbs from an LED garland are inserted.


Pumpkin
Bulky paper pumpkins can be made from heavy cardboard, double-sided paper, or scrapbooking material.
Step-by-step process of creating crafts.
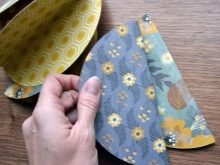
- To begin with, you need to cut 6-9 circles of the same size from sheets of paper.
- Each of them must be folded in half.
- Half of the first circle should be glued to the second. The same will need to be done with the rest of the details. As a result, the child will be able to make a beautiful round pumpkin.
- The tail for the fetus must be formed from neatly curled corrugated paper. Paper strips twisted into curls will complement the craft.


Making products from salted dough
Salted dough crafts are popular with both children and their parents. A plastic mixture is prepared from 1 cup of flour and the same amount of salt. Pour these ingredients into a deep bowl and pour half a glass of warm water. You also need to add 4-5 tablespoons of sunflower oil there. All ingredients must be mixed well.

Crafts from soft and elastic dough can be tinkered immediately after preparation.
- Eyes. To create creepy eyes from salt dough, you need to form several small balls. They need to be sent to the oven for 2-3 hours. The cooled balls should be painted with white paint. When the figures are dry, all other details (pupils, veins) need to be painted on them with a thin brush.

- Fingers. Several long sausages are formed from the salted dough. With a stack or a small knife, it is necessary to draw the joints on the fingers. You need to attach a nutlet to the top of each finger. The resulting figures must be baked in the oven. After that, you need to paint the blood with red paint. You can also use regular food coloring in place of paint.

Salted dough figurines will be an excellent decoration for a festive table. Store them in a dry and warm place, away from sunlight.
Plasticine crafts
Crafts for school or kindergarten are often made from colored plasticine. Beautiful figures and original applications are made from this material.
- Monsters. The figurine of a bright monster is made from a large piece of colored plasticine. It must be gently kneaded and given the desired shape. An eye must be fixed in the center of the figure. It can be made from plasticine or bought at a craft store. Teeth or a smile will complement the image of a cute monster.

- Bat. A child of 7-8 years old can easily cope with the creation of a bat figurine. Its base is made from a piece of black plasticine. It needs to be pulled out slightly. The upper part of the figure will be complemented by neat ears. Two large pieces of plasticine are used to form the wings of a bat. Their edges must be cut with a stack and gently smoothed out. Several thin flagella need to be rolled from the same material. They are used to decorate the wings. The resulting blanks should be attached to the back of the bat. After that, you need to make two legs from black plasticine. They are attached to the lower body of the figurine. After that, it is fixed on a wooden stick or short branch.


Plasticine crafts are beautiful and durable.
Making from scrap materials
Children can also make light-themed Halloween-themed crafts from scrap materials.

Pumpkin
One of the main symbols of Halloween is the pumpkin. You can create many interesting crafts from it. Needlewomen use pumpkins to make lamps, home decorations, unusual vases and baskets.
- Figurine of a cat. To create such a craft at home, a child will need a pumpkin, a marker, a sharp knife and a candle. The vegetable must be washed and dried. Cut off the top of the pumpkin. Next, remove the pulp from it with a spoon. After that, the "cover" must be returned back. On the surface of the craft, you need to draw a cat's face, cut out all the necessary details with a short and sharp knife. Next, you need to wipe off the marks from the marker. The triangles left after processing the pumpkin should be attached back to the crown of the cat with a toothpick. It is necessary to put a candle inside.

- Pumpkin with an inscription. A pumpkin decorated with a thematic inscription will look no less interesting and beautiful. It is done with acrylic paint and a thin brush. The inscription on the figurine can be supplemented with the image of a bat, a ghost or a small black cat.


- Vase with Flowers. A large pumpkin can make a beautiful and spacious vase. To create it, you need to cut off the top of the pumpkin from the pumpkin. Next, you need to choose pulp and seeds from it. A floral sponge must be placed inside the pumpkin. You can buy it at a regular flower shop. Next, the vase should be filled with beautiful autumn flowers and clusters of rowan or viburnum. Dry autumn leaves will complement this composition.


- Pumpkin with sequins. Pumpkins decorated with scrap materials look very beautiful and original. To create such a cute craft, the pumpkin needs to be painted with white paint. Next, you need to attach colored sequins to it. It is best to fix them on the surface of the vegetable with a glue gun.

- Candlestick. You can make beautiful candlesticks from small pumpkins. All you need is to cut off the tail from the pumpkin. Next, you need to cut out a small circle in it, suitable for the size of the candle. The resulting figurine must be dried. If desired, it can be covered with a layer of paint or decorated with original patterns.

The best crafts made from this fall vegetable can be used to decorate your home or yard.
From gauze
To create cute ghosts, use regular gauze and quick-drying glue. Such a craft is done very simply.
- First you need to prepare a stand for the figurine. To do this, one glass must be placed on top of another. They need to be fastened together with duct tape.
- Next, you need to inflate a small balloon. It fits inside the top glass.
- From the gauze, you need to cut a piece of the desired length and width, place it in a bowl with glue.
- After that, a piece of gauze must be put on a previously prepared structure. Then you just have to wait until the material dries.
- When the craft is ready, the ball must be carefully pierced, and the ghost's face decorated with eyes cut out of colored paper or thin felt. The figurine can be used for interior decoration.


From fruit
Original and delicious edible handicrafts will become not only a decoration, but also a wonderful treat at a party.
- Orange monsters. Sweet oranges look like small pumpkins. Therefore, they can also be used for interior decoration. The top of the fruit must be carefully cut off. All the pulp must also be scraped out of it. When the orange peel dries up a bit, cut out the eyes and smile on the front of the fruit. The resulting blank can be used as a beautiful candlestick. In addition, it is in it that berries or sweets are often served to the table.

- Bananas mummies. To create this original craft, you will need fruits, gauze and eyes, which you can buy at a craft store. Making such delicious mummies is very simple. The cheesecloth should be cut into narrow strips. They should be wrapped around each banana. Next, you need to attach the eyes to this figure with glue. The craft can be additionally decorated with a funny face or small woolen spiders.

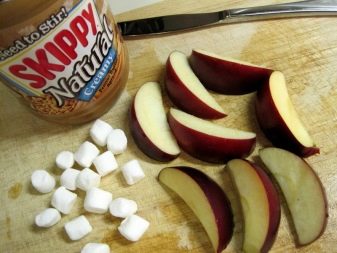
- Apple jaws. To prevent the fruit from darkening, it must be doused with lemon juice. Next, spread the two halves of the fruit with chocolate paste or peanut butter, fasten them together. The resulting jaws must be decorated with pieces of white dragee. They will mimic teeth. The craft turns out to be original and tasty.


The process of creating such beautiful desserts will captivate both adults and children.
From the leaves
There are so many beautiful crafts that can be made from vibrant autumn leaves. One of them is a pretty orange lamp.
To create such a craft, a clean jar must be pasted over with leaves of different sizes. When they dry, the surface of the luminaire can be additionally coated with transparent varnish - this will make it more durable. The top of the can can be tied with a piece of string or regular straw.


Ghosts made from maple leaves also look interesting. Dry workpieces must be covered with a layer of white paint and dried. The eyes of a ghost can be drawn with paint or a marker. These blanks are used to create original garlands. They can be hung both indoors and outdoors.


From threads
Soft and beautiful crafts for children can be made from unnecessary leftovers of threads.
- Ghosts. To create such a figure, light threads need to be wound around a piece of cardboard. From above, the resulting workpiece must be carefully tied. Next, the craft must be removed from the cardboard base, carefully cut the lower part of the skein. Straighten the loose threads. You can decorate the ghost figurine with colored bows and dark felt details.


- Pumpkin. You cannot do without beautiful pumpkins made of soft yarn during the holiday. The orange thread needs to be rolled into a tight ball. It should be smooth and neat. Attach a green tail to the top of the resulting pumpkin. It is made from the remains of a thread of a suitable color.

The resulting colored yarn crafts can be attached to a piece of string. Such an original garland will be an excellent decoration for any room.
From candles
A large number of candles are always used to decorate a room for Halloween. There is a very simple way to make them look more beautiful and effective. To do this, paint the top of a tall white candle with acrylic paint or gouache. Burning, the paint will melt and flow down. Such a "bloody" candle will become an original interior decoration.

From cans
Empty jars are a great material for creating quirky candlesticks. They are very simple to do.
- The jar needs to be washed and wiped dry.
- Next, it must be covered with a layer of paint of a suitable color. Acrylic or gouache is best suited for this.
- When the paint dries, any thematic drawings can be depicted on the surface of the can. A child can cope with this task as early as 3 years old.
- You can put the finished craft on a shelf, a bedside table, or decorate your porch with it. The main thing is to prevent water droplets from falling on the surface of the can.

The most beautiful crafts can be saved until the next holiday by putting them in a box of a suitable size.
For how to make simple Halloween crafts, see the next video.


