How to make an "Autumn tree" craft?

With the arrival of autumn in kindergartens and schools, thematic classes on making crafts from natural materials begin. These include: colorful leaves, cones, acorns. They can be collected by walking in the forest, in a park or square.

Making a picture on cardboard
Autumn is a wonderful time for bright landscapes and individual pictures. Trees, decorated with variegated and unique leaves, occupy the main place in nature. And in order not to miss them in winter, you can make a handicraft on the theme of autumn "Autumn tree" in kindergarten from natural material.

There are many options for such crafts. The craft can be done on cardboard in the form of an applique made from pumpkin seeds.
- First, they need to be washed and dried. Then paint it in different colors, as if it were autumn leaves. Dry again.
- Cut the trunk of the tree out of colored brown paper and glue it onto cardboard.
- And at the end, distribute the leaves of pumpkin seeds on the branches and trunk with the help of PVA glue or Moment glue.


Crafts made of branches and multi-colored lids from baby food will also look original.
- The base is glued to the cardboard - tree branches.
- Cover-constructors of various colors are glued to them from above.
- We take the glue "Moment", as the caps are quite heavy and can come loose.

On the theme of autumn, you can make a themed tree with leaves from acorn caps. Just one interesting trick - you need to paint these hats in different colors. They will be leaves.

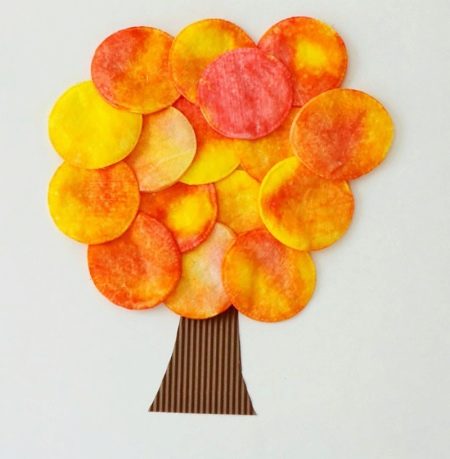
A craft painting can be made not from natural material, but from cotton pads.

When the children paint them with gouache in different colors, let the discs dry.

Then glue the tree trunk cut from brown or light paper with glue-pencil on the cardboard.

Glue colored cotton pads on top of the trunk, like autumn leaves.
At the bottom, you can place a strip of grass of green discs.


Paints
A picture on cardboard "Autumn tree" can be made with the help of a child's fingers, smeared with paint. Children always like it: messing around in liquid paint and then leaving their prints on cardboard or paper.


For older children, there is an option for making an "Autumn Tree" craft using so-called seals. These can be various improvised items, for example, a piece of foam sponge, toilet paper roll, cotton swab, baby food lid. The trunk is made voluminous from curled colored paper. And with seals, dipping in paints or gouache, they make a variety of leaves, of the most inconceivable sizes and shapes.


From plasticine
You will need cardboard and plasticine. Plasticine application is made using the plasticine technique.
- On the cardboard you need to draw the outline of the tree trunk.

- The next stage is to roll thin brown plasticine sausages to match the color of the bark.

- Then we lay out these plasticine strings along the length of the trunk on cardboard, according to a template, filling it completely. Along the way, we attach twigs from these sausages to the trunk.


- Roll sausages from yellow, red and orange plasticine and twist them in a spiral. These will be leaflets. We fix them all over the crown.


- We use green plasticine to make grass under a tree. We roll the sausages and bend them with an angle. Add fallen and falling leaves to the picture.


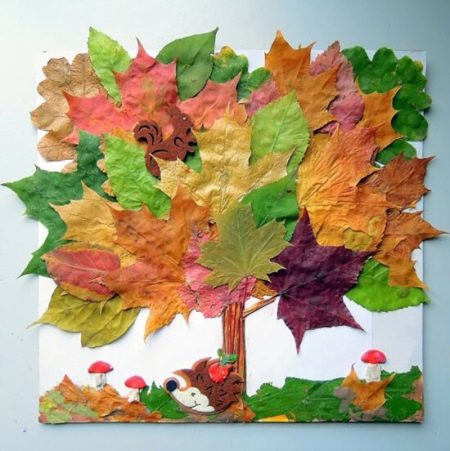
Using leaves
Consider several options for such crafts.
- A tree trunk made of natural material, for example, a birch twig, is glued onto a picture made of light blue cardboard. For decoration we use colorful leaves and glue them on PVA glue or Moment glue at the top of the picture.
From below we glue a variety of natural materials: needles from a Christmas tree, acorns, dried flowers.

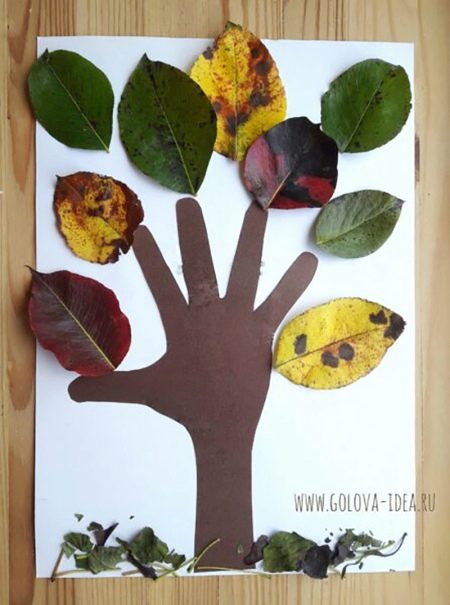
- The trunk of the tree is made of a children's pen outlined on a sheet of colored paper. Then it is cut out and glued to the cardboard with a glue gun. A yellow or red-green maple or aspen leaf is glued on top of each finger.

- A tree with a voluminous trunk on a sheet of cardboard. The paper needs to be rolled up and glued to the picture at the level of the barrel. From it we draw branches with a handle and on them we attach dried leaves from different tree species with glue.

- In this craft "Autumn tree" we draw the trunk with paints, and use the leaves as seals. To do this, cover the dried leaf with paint on one side and put it on the picture. An imprint remains. Thus, we decorate the entire tree with multi-colored leaf prints.

Do-it-yourself volumetric tree in a pot
Topiary "Autumn tree" can be done easily together with children of 9 years old in labor lessons. Such a craft is included in the school curriculum for grade 3 students.
With this craft, you can add something new to the interior of the school, to the decoration of the class. Topiary is made in the form of a small volumetric decorative tree in a pot. It is also called the "tree of happiness" or "European tree".

For crafts you will need:
- old newspapers;
- sewing threads, twine;
- glue and glue gun;
- gypsum;
- scissors;
- acrylic paints, preferably gouache;
- flower pot;
- stick from a tree;
- satin napkins and ribbon;
- lifeless flowers and leaves, berries.

Consider manufacturing in stages.
- For the base of the crown, we make a ball from crumpled newspapers and wrap it with sewing threads.

- The next stage is gluing the ball with torn pieces of napkins. You need to spread the ball with PVA glue and glue pieces of napkins on it. It is necessary to glue it in several layers so that the ball has an even appearance. Leave it to dry for a day.


- At the same time, we make a tree trunk from a stick from a natural tree. We coat it with PVA glue and wrap it with twine. Let it dry.

- When the details of the topiary are ready, you need to assemble it. We make a hole in the ball and insert the barrel into it. We fix it with a glue gun.

- We decorate the crown of the tree. To do this, make small holes with a nail or an awl, drip a drop of glue and insert leaves and flowers. Dried berries can be glued to them.
Alternatively, you can make a tree with a nest and plant paper chicks there.


- The finished craft must be placed in an ordinary flower pot filled with plaster mortar. The consistency of the solution should be like sour cream. It is necessary to let him grab and insert the barrel. Until the solution has dried, we decorate the surface of the pot with artificial grass.

- As a decoration of the pot itself, we take twine and wrap the entire surface with it in a spiral. For decoration, we tie the pot with a satin ribbon, and the craft is ready.


Helpful hints.
- Before making the craft "Autumn tree", you need to thoroughly prepare for it.
- Collect natural material to keep it clean and unspoiled. It is advisable to choose leaves in bright colors: red, yellow, with red tan marks.
- At home, lay out the leaves at home on the windowsill or put in a vase. Give them time to dry. They will become fragile over time and must be handled with care.
- The question often arises of where to get a natural piece of a tree or its branches. In autumn, trees and bushes are pruned in parks and squares, which are then taken to the landfill by large dump trucks. Therefore, you need to have time to choose a suitable twig or stick.
- Cutting out figures from fallen autumn leaves is not so easy. To do this, you need to make a template for the object, and then circle it on a leaf from a tree with a ballpoint pen or felt-tip pen. It is better to cut the figures with small nail scissors.
- Children should do the craft under the supervision of adults in order to exclude cuts with scissors, gluing fingers with glue and other unpleasant nuances.

A detailed master class on making crafts "Autumn tree" can be found in the next video.


