Autumn crafts "Umbrella" from leaves

Making various interesting crafts is a favorite pastime for many children. There are a huge variety of ideas for making such products. Autumn crafts look beautiful and original. Today we will talk about how you can make an autumn "Umbrella" from sheet plates with your own hands.

How to make an applique?
To begin with, let's take a look at how to make an autumn applique "Umbrella" for children step by step. You should first prepare all the materials necessary for this:
- ruler;
- PVA adhesive composition;
- scissors;
- paper of several colors.
The center of the composition is created first. For this, red paper is taken, from which 4 squares with sides of 10 centimeters are cut. After that, each of the resulting squares will need to be folded in the form of a bag, and then fix the edges with PVA glue.


Using scissors, it will be necessary to slightly trim the upper edges of the resulting paper blanks. All these parts are glued together. In this case, the adhesive mixture should be applied to the side parts. As a result, the basis for the future application will be ready.
The blank is carefully glued onto a sheet of blue paper, which should be placed horizontally. It is carefully smoothed with hands. After that, brown paper is taken, a handle and a visor for the "Umbrella" are cut out of it.


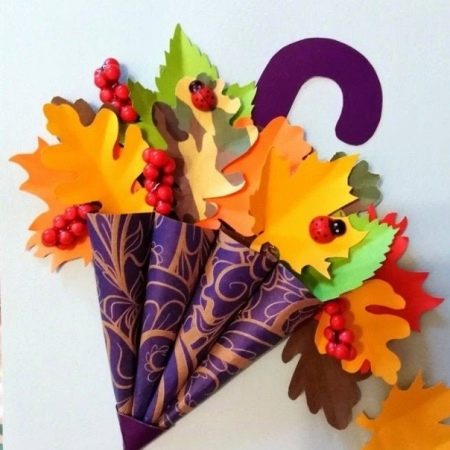
Next, they begin to create autumn leaves. To do this, prepare orange paper, it folds in half. With a simple pencil, draw on it the outline of half a leaf. Then all this is cut out with scissors. Thus, a pair of elements will be obtained at the same time.
The same leaves need to be made from both yellow and green paper base. When these parts are completely ready, they begin to gradually stick to the applique.


Leftover leaves can be attached around the edges of the blue leaf. The finished craft can be perfect for both kindergarten and school.
Let's analyze another option for creating a beautiful autumn applique in the form of an umbrella. For this we need the following materials:
- cardboard;
- velvet wire;
- scissors;
- glue mass;
- dried berries and leaves.


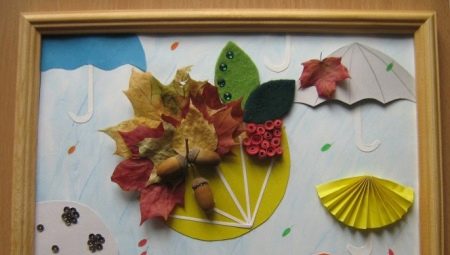
First, a velvet wire is taken, from which a cane is formed for the future umbrella. In this case, it is slightly bent at one end in the form of a hook. After that, they take a sheet of cardboard, from which they carefully cut out a figure in the shape of a semicircle. This detail will become the basis for the applique.
At the same time, dried autumn leaves of various bright colors are prepared. It is also better to take a few dried berries. The base of the umbrella is carefully coated with adhesive and the sheet plates are attached. Berries and a couple of thin twigs are attached from above.

DIY voluminous umbrella
Now we will consider how you can make a step-by-step three-dimensional product "Umbrella". For this we need the same elements as in the first option.
First, draw an even circle on a sheet of colored paper using a simple pencil. Then it is divided into 6 separate segments, which are cut with scissors. For the umbrella itself, only 4 of these elements are needed.

Segments are rolled into volumetric cones and PVA glue. All formed parts are glued to a paper base of any color. As a result, the elements should be laid out in the shape of an umbrella. Also, a handle for it should be cut out of black and brown material.
At the same time, several sheets of other paper (yellow, green, pink, orange) are prepared. Autumn leaves are cut out of them using ready-made templates. When they are all ready, they begin to glue them to the base. But at the same time, it will not be necessary to fix the entire sheet, but only its central part, in order to give the craft a greater volume.


A voluminous umbrella can be made using origami technique. For this, paper is taken in green and yellow colors. 2 square blanks with sides of 15 and 13 centimeters are carefully cut out of the sheets.
After that, a square of 15 centimeters is taken. It is folded diagonally in two directions at once, then the product is bent into 2 equal parts. As a result, 4 small squares should form. 2 of them will remain on the surface, and 2 elements on the side will need to be passed inside.

The square is placed towards itself with drop-down elements. Its edges are gradually bent towards the central part. Then the workpiece is turned over and the edges from the other part are folded in the same way.
As a result of the actions carried out on one workpiece, 16 separate small segments should have been obtained. Any folds that diverge from the center section should be redirected. They will have to alternate one down and the other up. As a result, you get details with a protruding corner.

The corner is folded back and tucked into the inside of the paper blank. This will create the dome of the future autumn umbrella. Then you need to prepare a part that will be responsible for opening the product. To do this, you should do all the same actions as before. When the part in the form of a small airplane is formed, the corners must be cut off. Later, incisions are made, while stepping back from the top of the triangle 4.5 centimeters.

The resulting workpiece is opened by hand. Then again, all the folds are redirected, they will have to alternate and acquire a certain shape. Small cuts are made in the green and yellow dome with scissors. Both paper pieces are connected to each other.
This should be done so that their tops look in opposite directions.

In the green element, the corners are slightly folded back. A small amount of glue is applied to them and, in this form, they are attached to a yellow base.In order to make a handle for the product, it is better to take a thin wooden skewer. It is wrapped in yellow or green paper, after having smeared one of the sides with a thin layer of adhesive.
When the handle is completely wrapped in paper, it is well leveled with your fingers, and then attached to the umbrella dome.

To make the craft look more elegant, you can decorate it with dried autumn leaves and small twigs. They are also attached to PVA glue. Such a decorated product can be suitable for school.
Useful Tips
When making these crafts with your own hands, you should remember some important and useful recommendations.
- When creating such jewelry on your own, it is better to use several different techniques at once to make the composition more interesting and beautiful. The most commonly used techniques are origami, weaving, kusudama.
- If you are using real dried leaves to decorate your craft, you should choose a variety of colors of leaf blades. You need to work with them as carefully as possible, since in this form they will become quite fragile, they can easily be damaged and broken.
- If you are cutting out pieces of paper, then you need to take several paper sheets of bright colors.
- If you wish, you can also decorate the finished autumn umbrella with other decorative details (beads, rhinestones, acorns, cones).


Craft "Umbrella" from leaves in the video below.


