Making a craft "Fish"

Fish can be made from different materials and in different ways. During work, you can discuss with the child what kind of creature it is, where it lives, whether it breathes air.


How to make from paper?
Paper fish can be made in various techniques, from ordinary applique to quilling. For preschool children, crafts should be fairly simple, since fine motor skills are not yet very well developed.
Application
The fish can be made using the applique technique. For work you will need:
- white cardboard;
- black marker;
- colored paper;
- scissors;
- glue.
First you need to make a blank. To do this, draw a silhouette of a fish on white cardboard and cut it out. Then draw the eyes, separate the area of the tail and body.


Now you can start making scales. And here there can be a lot of options. Let's consider the 2 most popular ones.
- Tear-off application. The child tears off small pieces from a sheet of colored paper and sticks them like scales.
- Cut out the circles. They can simply be glued from tail to head, imitating scales. Or pre-fold in half and glue only one side. In this case, volumetric scales are obtained.
The tail can be made from stripes. Alternatively, wind them on a pencil and make spirals. A serpentine fishtail looks more impressive, and children have another exercise for developing motor skills.


From paper strips
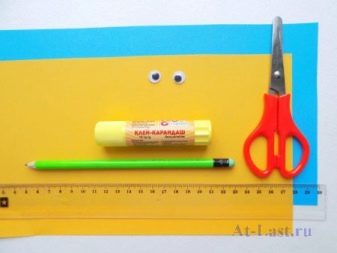
A very simple craft made using the weaving technique. For work you will need to prepare:
- 2 sheets of thick colored paper, for example: yellow and blue;
- scissors;
- glue stick;
- simple pencil;
- ruler;
- black felt-tip pen.


Cut 3 strips of each color 2 cm wide and 28 cm long. Fold each in half. 2 strips of different colors must be intertwined, namely inserted into one another to form an angle.Next, add a new strip on the right side. To do this, put it on the bottom, as it were, so that the blue stripe is in the middle of the yellow one. Fix all overlaps with glue. Next, add the yellow stripe again, but so that it braids the upper part of the blue one. The result should be an alternation.
Now add a blue stripe on the left side and staggered it with the other two stripes. Do everything with the remaining strips. As a result, you should get a square, the fourth part of which is intertwined. Cut the strips in the middle, leaving an allowance of 1.5 cm. Bend and fix with glue. The outer stripes are fins, the inner ones are the tail. Draw smooth lines with a pencil and cut off the excess.


Making from plasticine
From plasticine, you can sculpt whole figures or create flat paintings on cardboard.
Simple fish step by step
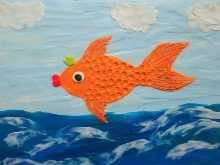
For work, you will need plasticine of two colors. Roll an ellipse out of one and flatten a little on the sides. If necessary, make the muzzle narrower. Squeeze the relief of the scales with a sculptural stack on the sides. If not, you can draw it with a toothpick or use a cap from a felt-tip pen.
Divide the second piece of plasticine into 5 equal parts - these will be the tail and fins. Roll up drops of 4 of them, and then roll them out. Draw stripes on the wide side in a stack. These will be the side fins and the tail. Roll the fifth piece into an ellipse and then roll it out. But on one side, also draw stripes. This will be the top fin to attach.
From black plasticine, you can roll up eye beads or make them a stack.


Plasticine application
This craft is easy for kids to do with their own hands. For work, you will need cardboard, colored plasticine, scissors and stacks. Draw a silhouette of a fish on cardboard. Next, using plasticine, you need to fill the space. Smear a thin layer of plasticine in the places of the head and tail. Make eyes: first roll a ball of white plasticine, then a slightly smaller ball of black, connect.
Scales can be made from circles, laying them out like scales, from tail to head. But the spirals look more interesting. To do this, roll the plasticine into a thin sausage, then twist it tightly into a spiral. Spread on the body of the fish in rows. The tail can be left unchanged by laying in rare thin sausages for texture. Alternatively, you can also blind from wide stripes.


More ideas
In addition to paper and plasticine, you can use a lot of different materials for the "Fish" craft. For example, apply dried leaves or buttons using the same applique technique.
From lemon
Such a fish will be an excellent table decoration. To create you need:
- lemon;
- thick carrots;
- black peppercorns or cloves (2 pcs.);
- knife.
Carrots must be peeled beforehand. Cut off several 3 mm thick circles on the thick side. Cut out the fins and tail from them. Cut off the peel from the lemon without touching the pulp, where the mouth and eye sockets will be. Next, make deep cuts in the places of the fins and tail, insert carrots into them. Place spices in the eye sockets. If not, you can get by with a black marker. If desired, you can cut through the scales on the sides of the lemon or draw it with the same marker.


From pasta
It is carried out using the applique technique. For work you will need:
- thick cardboard;
- marker;
- scissors;
- PVA glue;
- pasta.
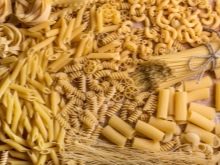
Different types of pasta are needed so that you can set the texture. For example, use shells, scallops or horns for the scales, and coils and feathers for the tail. After the craft dries, you can paint it with acrylic paints, and then it will turn gold.


From disposable plates
For crafts, it is recommended to take a white paper plate or at least a plain one. Next, you need to decorate and apply a drawing. This can be done from either side of the plate. Then you need to cut off part of the plate, but no more than 1/4. This will give the fish an open mouth. Draw on top or glue the eye.Attach the cut part to the plate in the form of a tail. Nice and easy craft for a child in kindergarten.
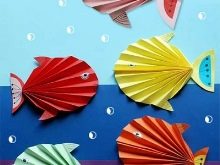
If there are several children, you can offer to make an aquarium. Each child makes a fish, and then an adult attaches them to a blue background that imitates water. From below, you can make the bottom out of colored paper and felt-tip pens.


For information on how to make a volumetric paper fish using the origami technique, see the next video.


