Crafts "Owl" from natural materials

Making crafts contributes to the development of artistic thinking in a child. In addition, handicraft classes bring up perseverance and accuracy in the baby, and also develop fine motor skills of the hands. A wide selection of materials - both artificial and natural - gives you a lot of freedom for creativity. Each school or kindergarten hosts regular exhibitions of children's crafts on different topics. At the beginning of the school year, teachers give the task of making each pupil a hand-made article on the theme of autumn.
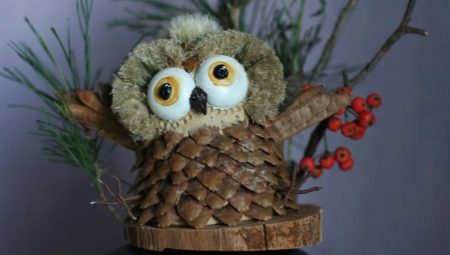
The autumn exhibition is a great opportunity to realize your creative impulses in the form of interesting handicrafts. One of the many ideas for creating crafts is the embodiment of the image of an owl. This beautiful bird has long been considered a symbol of wisdom and knowledge. Therefore, we offer you several interesting workshops on creating an owl figurine from various materials.


How to make an applique?
Autumn is a wonderful time of the year, which pleases us with its beauty and abundance of colors. When going for a walk with your child, be sure to collect materials for crafts - leaves, cones, chestnuts, acorns, etc.
Dry and clean leaves are great for making beautiful appliques. Even a kindergarten student can do them, the main thing is that he does it under the supervision of adults.


For example, to make an applique of an owl from autumn leaves, you will need the following materials:
- base - a thick sheet of paper or cardboard;
- ash leaves;
- pencil;
- scissors;
- colored paper;
- PVA glue.
Stages of work.
- Draw an owl (its silhouette) on the base using a pencil.
- We make the tail of the future owl.To do this, fix five green leaves with PVA at the bottom of the sheet.
- Next, we glue the leaves, which will serve as the body of the bird. We begin to glue from the bottom up, directing the sharp tips of the leaves down. We glue 6 rows of leaves, reducing their number with each subsequent layer.
- We make a muzzle, fixing three leaves on each side so that their sharp tips look to the sides - to the right and left.
- We make ears from two long leaves.
- Glue the muzzle in the center, directing the sharp tip up.
- Cut out the beak and legs from red colored paper. We fix them with glue.
- Cut out circles of different diameters from sheets of yellow, black and white paper - the eyes of a bird. We glue them, as shown in the figure.
A simple but very beautiful owl made of leaves is ready!


Making an owl from a file
Another original idea for making an owl from leaves, using a regular stationery file.
To create such a craft option, you need the following items:
- transparent file;
- dry leaves;
- two stationery rubber bands;
- cardboard;
- pencil;
- a set of colored paper;
- stapler;
- Super glue.
Stages of work.
- Stuff the file tightly with leaves.
- We fix the rubber bands on both sides of the file so that several leaves stick out a little - these will be the ears of an owl.
- Draw two identical legs with three fingers on a sheet of cardboard and cut them out.
- We fix the paws at the bottom of the file with a stapler so that they are attached perpendicular to the file.
- Take a yellow, orange and black sheet of paper and cut out two circles of each color with different diameters. The largest are yellow, the middle ones are orange, and the smallest are black. We glue them on top of each other. Glue the finished eyes on super glue.
The funny owl is ready!


Pine cone ideas
On the Internet, you will find a large number of ideas for making an owl from cones, which is perfect for an autumn exhibition for an elementary school. Below are some interesting master classes, where step by step instructions for making the "Owl" craft are described.


With cotton wool
Materials:
- Pine cones;
- cotton wool and cotton pads;
- artificial eyes;
- a piece of orange felt;
- scissors;
- brush;
- white feathers;
- glue gun.
Stages of work.
- We choose a stable open bump, it is easier to stick cotton wool into it.
- We tear the cotton wool into small pieces, the smaller the better.
- We take a brush and push the cotton wool between the scales of the cone with its reverse side. If you hammer the bump tightly, you may not need glue. If you want to hedge yourself, use glue. There should be enough cotton wool so that the scales are practically invisible.
- Then we glue two white feathers on the sides. We fix the wings on the scales with a glue gun.
- Cut out a blank from a cotton pad that looks like a heart - a bird's head.
- We fix artificial eyes on the head.
- Cut out the beak from felt and fix it on the owl's face.
- We connect the head and torso.
The snowy owl figurine is ready! You can make several of these items and plant them on a branch.


With threads
Materials:
- Pine cones;
- several balls of thread for knitting in different colors;
- small feathers;
- a set of colored paper;
- a piece of felt;
- small black buttons;
- a piece of chenille wire;
- walnut shells;
- pumpkin seed (can be replaced with cardboard);
- thermal gun;
- scissors.
Stages of work.
- We randomly wrap the cones with knitting threads and fix the ends with a heat gun.
- Use a piece of felt to create the head. We cut out oval blanks with sharp corners from it. We glue the eyes. To make them, take an orange sheet of paper and cut out two circles. Glue the buttons on top. We fix the finished eyes on the muzzle using a thermal gun.
- Ears - glue the feathers on the head from the back.
- We make the beak from pumpkin seeds and also fix it on the face.
- Now we connect the torso and head with a heat gun.
- Now you need to connect all the parts into a single structure. On the top of the cone, glue the walnut shells to the places where the shoulders should be located.
- We twist the legs from the chenille wire and fix them at the bottom of the figure. If there is no such wire, it can be replaced with ordinary twigs.
Our beauty is ready!


With acorns and leaves
Materials:
- large pine cone;
- two small leaves;
- acorn hats;
- glue gun;
- artificial eyes (can be replaced with buttons);
- an orange piece of felt;
- orange sheet of paper.
Stages of work.
- Try to match the open bump to make the product look more harmonious. We remove several scales on the cone in the places where the eyes will be located.
- We take artificial eyes and glue them inside the caps from under the acorns. We fix the finished eyes on the bump.
- We glue the leaves on the sides, just below the eyes, at the level where the wings of our bird should be located.
- Cut out a triangular beak from an orange sheet of paper and fix it on a cone.
- Cut the paws out of felt and fix them at the bottom of the cone.
Our little owl is ready!


With felt
Materials:
- cone;
- sheets of felt of different colors;
- pistachio shell;
- glue gun;
- thick sheet of paper.
Stages of work.
- Draw and cut out paper templates as shown in the picture.
- Then we apply the templates to the felt and cut out a pair of each blank, except for the beak.
- We make paws from a pistachio shell and glue them with a glue gun at the bottom of the cone. Thus, the figurine became stable.
- We glue the details of the eyes.
- We fix the eyes and beak on our figurine.
- We glue the wings on the sides of the bird.
The little adorable is ready!


Volumetric product made of leaves
A more complex leaf craft is a volumetric figurine of an owl.
Such a craft will become a real decoration of the exhibition on the theme "Autumn".
We offer a detailed master class that will help you make a volumetric product from leaves with your own hands. This requires:
- ash leaves;
- toilet paper sleeve;
- artificial eyes;
- plasticine;
- glue gun.
Stages of work.
- We glue the leaves from bottom to top, layer by layer. We try to lay the leaves on top of each other so that there are no gaps. We glue only the bases, and not the entire sheet, so that the figure does not lose its volume.
- We sculpt paws from brown plasticine, we make claws at the tips from yellow plasticine. If there is no plasticine, twigs can be used as paws. We fix them at the bottom of the product.
- We glue two large sheets on the sides, imitating the wings of a bird.
- Glue two more medium-sized leaves on the head, forming ears, as shown in the picture.
- If you don't have artificial eyes, you can use bottle caps, inside which you can glue a black bead. We fix the eyes on the craft.
- We form a beak from orange plasticine and fix it on the figure.
The owl is ready!

Ash seed figurine
Another interesting option is to create an “Owl” craft from such natural material as seeds. To do this, you will need the following components:
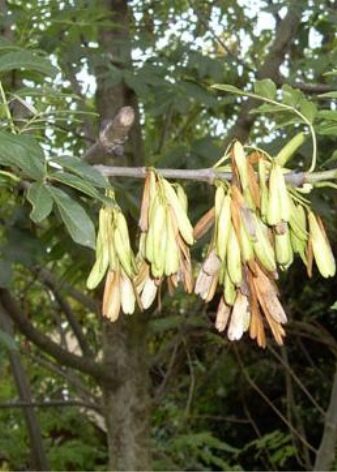
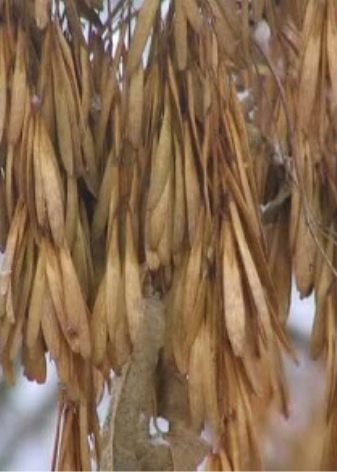
- ash seeds (or as they are also called "helicopters");
- orange felt;
- artificial eyes;
- a sprig of spruce;
- small bumps;
- a sheet of white paper;
- scissors;
- PVA glue;
- pencil;
- glue gun.
Stages of work.
- We draw the outlines of an owl on a sheet of paper. We proceed to gluing the seeds. We glue the bird's head in a circle so that the seeds are directed to the center, as shown in the picture.
- In place of the ears, glue two tails from the seed.
- Now we proceed to the design of the body and tail. Here we glue the seeds with their tails down. We densely fill all the free space.
- Cut out the legs, eyes and beak from felt. We fix them on our craft. Glue artificial eyes on top of the felt base under the eyes.
- Now we make out our composition.To do this, glue a spruce twig at the bottom of the sheet so that the impression is created that the bird is sitting on it. We decorate the twig with cones.
An adorable owl on a branch is ready!


For information on how to make an owl craft, see the next video.


