Creating autumn crafts

Children are very fond of making different crafts with their own hands, because it is interesting and exciting. In this article, we will analyze different master classes on creating autumn-themed crafts for children of different ages.
Preparation of materials
To make something beautiful and original from natural material, you first need to take care of its preparation.
First of all, the leaves need to be collected, and oak, maple, and other leaves are suitable for applications of any complexity. However, try to choose the most beautiful-looking leaves of yellow or reddish color.
Having collected the required number of leaves, proceed to the next stage, namely: to clean them from dust and dirt. Next, you need to cut the petioles, which, however, is not required. After that, they start drying. You can also skip this stage, since crafts can also be made from fresh foliage.


However, if you still need dry leaves, there are two ways to dry them. The first involves drying the leaves. in the book with a lot of pages.
But for the second method, you will need to use iron... Wipe the leaves with a dampened cloth. This must be done carefully so as not to disturb the surface of the sheet. Next, you need to lay out paper sheets on the ironing board. You should not use newspapers for this, as there is a high probability that the ink will be printed on the material.
Preheat the iron to minimum or medium temperature, depending on its power. Ironing the leaves should be done on both sides, and more than once, until the leaves are completely dry. When you're done drying, put the leaves in a safe place if you don't plan on using them.A thick book is fine for such a place.


What can be done in kindergarten?
There are many options for original and interesting crafts on the theme of "Golden Autumn" or "Gifts of Autumn" that even toddlers attending a nursery can do.
The easiest craft option for children is an applique in the form of a hedgehog. She will need cardboard, a simple pencil, leaves, colored pencils and plasticine.

First you need to draw the silhouette of the hedgehog itself. It is not at all necessary to draw it in detail. And if the child does not know how to draw, then he can use a ready-made template.
Next, we proceed to create a separate element, namely, muzzles. You can simply draw it with colored pencils, or you can mold it from a piece of plasticine.

Having finished with this part, we move on to creating hedgehog thorns. To begin with, we select the most beautiful leaves, and lay them out in the sequence you need in order to roughly estimate their location. After that, you can start gluing the foliage.


This stage can be called the final stage in creating an autumn craft, but you can show your imagination and diversify it somewhat by adding elements such as, for example, mushrooms, apples or the sun.
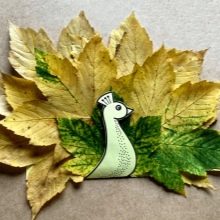
In a similar way, you can make an unusual craft in the form of other animals: for example, in the form of a peacock, squirrel, fox, parrot or rooster. If you wish, you can even create a whole picture in this way, depicting a forest or any other landscape on it. To do this, it will be enough to stock up on material and turn on the imagination.


School ideas
There are many options for autumn crafts that students in grades 1, 2, 3, 4, and 5 will be able to get through pretty quickly. As a result, such an application can be brought to the exhibition dedicated to the autumn holiday at school.
So, you can make an applique in the form of a portrait. To do this, you will need the following accessories: dried leaves and other natural materials, crayons or felt-tip pens, cardboard and glue.
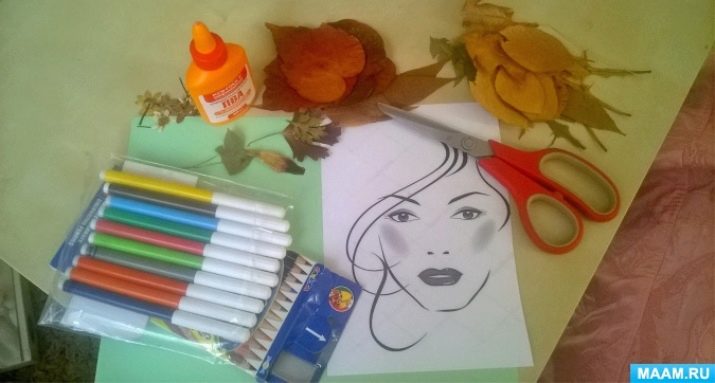
You need to start by drawing a portrait. A certain level of detail is already required here - this is necessary in order for the depicted image to turn out to be original. You can add a variety of details - for example, freckles, dimples on the cheeks or moles.
Using colored pencils or markers, draw the lips and eyes of a person. But the hair does not need to be touched: it will take shape with autumn foliage.


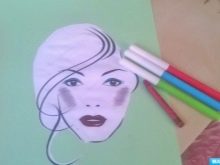

If you are done with drawing, you can move on to the next step. - to work with natural material. First you need to lay out the leaves and other elements, for example, flowers, twigs or spikelets, in the sequence you need. After that, we glue the natural material. The applique work is complete!


There are other options for light crafts. For one of these, you will need an onion, or better, several - you can make onion men of them. The essence of the work is simple: you need to cut out or purchase eyes and other elements for decorating the face. They are all attached to the bulb. Then all that remains is to decorate your craft: for example, you can tie a bow to one onion, and add a hat to the second. It will look very funny and original.

Crafts for home
Topiary
Topiary can be an excellent decoration for an apartment. It can also be made from natural materials such as coffee beans. In addition to them, you will need thick wire, a tube or stick, paint, threads, a bowl, plaster of Paris, decorative items, double-sided tape, hot glue and a voluminous base in the form of a ball or heart.
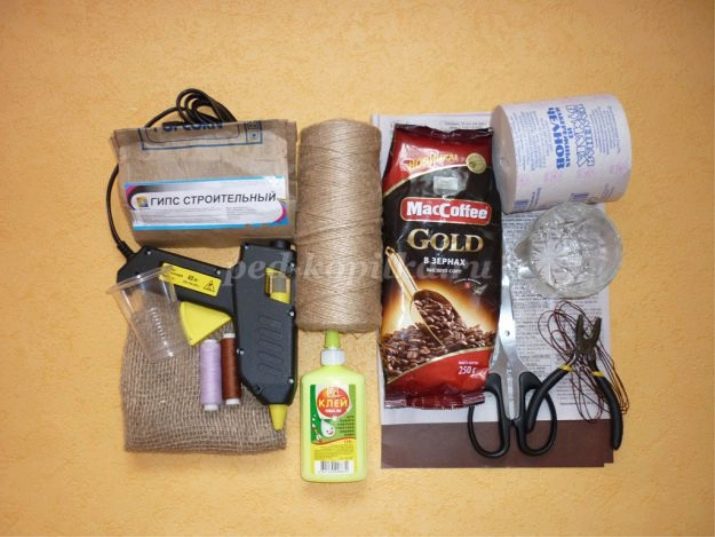
The base, by the way, can be made either independently from cardboard or foam, or you can purchase a ready-made one.
Craft creation begins with work on the blank. It needs to be pasted over with paper and wrapped with dark-colored threads. All this is painted over with brown paint.


This base must be attached to a rod that will serve as the trunk for the topiary.It will also need to be decorated by wrapping it with dark threads or pasting it with sheets of tissue paper.


After that, you can start working with the grain. Preheat the glue gun and start pouring the first layer of coffee with the flat side of the beans inward. Next, we lay the second layer, it should be laid out with the flat side out.
Having finished laying out the coffee beans, we place the future tree in a bowl, having previously mixed the gypsum mixture in it. After that, you will need to wait for the mass to solidify, and cover it with coffee beans, or, for example, sawdust.


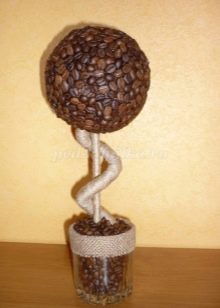
The final touch remains - the design of the craft. This step is optional, but many decorate coffee trees with decorative elements such as bows or, for example, butterflies. This decor can be purchased at handicraft stores.

Panel
The panel in production is as simple as many other crafts made from natural materials. To create it, you will need a cardboard base, a glue gun, pumpkin seeds, watermelon or beans, as well as other elements for decorating a panel that will allow you to realize your idea.
We recommend starting work on this craft by creating a sketch, which will allow you to decide on the composition of the future picture and its content. After that, you need to outline a drawing on a cardboard base, which will facilitate your further task. And only at the next stage you can proceed to work with natural material. Lay it out in the order you need so that the picture looks harmonious. After that, the seeds can be attached to the cardboard base with a glue gun.
We decorate the work, and, if necessary, cover it with beauty varnish. To hang a picture on the wall, place it in a frame. The panel is ready!
You can clearly see the process in the video below.
The music of wind
Wind chime is another interesting home decoration that can be made from natural materials. In addition to these, you will need sticks, twine, and hot glue.

To begin with, we paint all the details for future crafts, if required. Next, we fasten two sticks crosswise, tying them with twine for reliability.

Cut off 9 strands of twine of the required length, leaving a small margin for knots. As a result, you should have two rows of wind chimes for each twig, and one will remain hanging in the middle.
The rows themselves are formed by stringing all the necessary elements on them, be it cones or beads. Some of them can be fixed with hot glue if necessary. We tie a knot at the ends of such rows.


Having finished with the formation of rows, we tie them to the branches, securing them for reliability with a glue gun. Wind chime is ready!


Candlesticks
An autumn candlestick can be molded from salt dough. It is easy to prepare such a dough, for this you need to mix half a glass of salt and water, a glass of flour. All this is thoroughly mixed and placed in the refrigerator for a couple of hours. Roll out the finished dough to 6 millimeters in thickness or more, then put an autumn leaf on top of it, which must first be cleaned of dirt.

Walk over the leaf with a rolling pin, pressing slightly, then cut out the shape of the leaf using a knife. The leaves can be removed, and the salted dough blanks themselves must be put on a glass dish, having previously greased it with vegetable oil, and put all this in the oven, which must be preheated to 250 degrees. After two to three hours, the crafts can be taken out.


Do not remove them from the bowl right away; wait for the dough to cool slightly. After that, carefully lift the workpieces, and wait until they cool completely.


Then you can start painting your future candlestick. The best way to do this is to use acrylic. Be careful not to accidentally damage the fragile puff pastry. Cover the craft with a special varnish if necessary. Ready!


