Making a craft "Traffic light"

Creative activity is very important for the correct development of the child, therefore it is important to practice drawing, sculpting and creating various crafts together. By developing your child's creativity, you can teach him important points in parallel. Thanks to improvised means, it is possible to acquaint the kid with the rules of the road and orientation by traffic lights, creating thematic crafts with him. In order to interest the child with this information and quickly master all the knowledge, it is important to choose the right materials and tools for the traffic light and involve the child in the work process.


Paper ideas
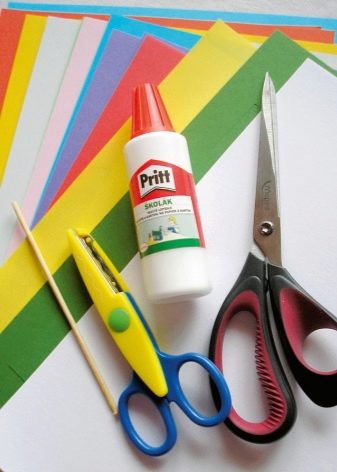
Traffic rules are a very important part of the knowledge that you need to acquaint children from 2-3 years old. It is best to start the learning process through play and creative activity. Children are happy to draw, sculpt and make various crafts, so making a traffic light will be a necessary and important activity for them. The simplest material any child can handle is cardboard and paper. To create a traffic light with your own hands, you need:
- red, yellow and green sheets of colored paper;
- cardboard for the base of the traffic light, preferably black;
- glue (PVA or pencil);
- children's scissors;
- compass or round base;
- decorative elements (if provided).


Crafts on the theme "Traffic light" may be needed both in kindergarten and in school, so parents with children can try to make it on their own. The smallest can be offered to stick colored circles on the base according to the pattern, older children - to create color spots in various ways.Children 5-7 years old are already capable of a voluminous craft that can be used in games and learning.


Application
To create a traffic light, you can choose the application method, in which children must prepare all the necessary parts and connect them correctly. Applications can be flat and voluminous, depending on the wishes of children and adults. Various materials can be used for work:
- paper;
- the cloth;
- plasticine;
- cotton pads;
- lids from plastic cans;
- plastic cups from yogurt.


The most convenient material for work is paper.
To make a traffic light, you need to form three multi-colored circles that are glued to the prepared base. For the smallest, a method in which colored paper is torn into small pieces is perfect and is used to fill in the round holes of the traffic light. Children will be happy to tear up pieces of paper and glue them onto the base.


Children 3-4 years old can be invited to make a circle, encircling a cup, saucer or any other round object. For children of this age, you can try giving baby scissors. You can glue the parts with PVA glue, applying it to the base with your finger or a brush, or use a glue stick.


Preschoolers will be interested in creating original traffic light models, experimenting with methods of filling colored circles. One of the most original is the creation of a specific figure: hearts, flower, square and filling with these elements in the required amount of a round hole on the craft.


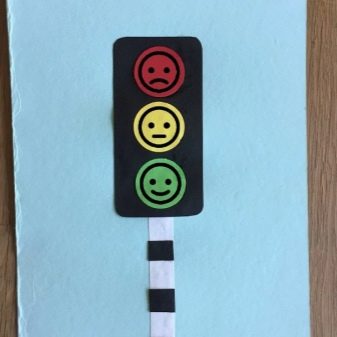
Children use round cotton pads with great interest, pre-painting them with paints or felt-tip pens and sticking them onto a cardboard blank. In addition to a simple traffic light with round windows, you can offer to make creative crafts, where each circle will be something special. Children can draw faces inside, come up with various subjects, while memorizing the location of the traffic light colors and the rules for its use.

Origami
For school-age children, it is worth coming up with more complex tasks for the construction of a traffic light. An excellent craft option would be to use a special method of folding paper - origami. The simplest options are to fold the face of a cat or dog. To create a creative traffic light, you need to prepare:
- colored paper;
- black cardboard;
- scissors;
- simple pencil and eraser;
- felt-tip pens;
- ruler.


The work progress looks like this.
- Create a base for a traffic light using a template from the Internet or draw it yourself on black cardboard.
- Prepare white circles, on which multi-colored muzzles will later be glued, imitating parts of a traffic light.
- The resulting white circles are glued onto a black traffic light blank.
- Make colored details for the dog's head. A square leaf of the desired color must be bent in half twice so that the part takes on the shape of a triangle.
- The edges of the triangle fold downward to form the dog's ears, the bottom folds inward to create a chin.
- Muzzles of red, green and yellow colors are made in a similar way.
- Cut out small circles from white paper, from which the eyes of the dogs will be made.
- Using a marker, draw the pupils, nose, mustache and mouth. Each dog should have a different expression, red is angry, her smile goes down, yellow is neutral, her mouth is straight, green is joyful.
- Stick the dogs in the correct order on the white circles of the traffic light blank.


The cat's faces are created in the same way, only the workpiece needs to be turned over, using the wrong side to draw the face. In addition to creating animals using the origami technique, you can craft balls and other details, having the necessary knowledge for this.


Making from plasticine
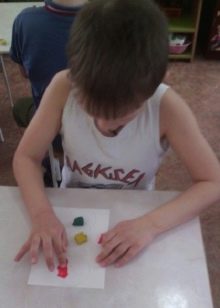
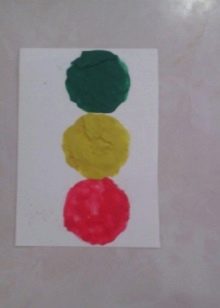
Kids in the kindergarten can be offered to make a traffic light from plasticine, which will not cause any difficulty and will allow you to usefully spend time. In work, you can use the clay itself or combine it with a paper base. The plasticine product is suitable for older children who can mold the body of a traffic light and colored balls on their own. Such items can be decorated with visors over colored circles or other materials at hand.


It is better for the smallest to offer work with plasticine and a traffic light blank on a sheet of paper. The task of the baby is to evenly distribute the mass of the desired color within the drawn circles. In the process of working on a craft, it is important to talk about the rules of the road, you can learn rhymes and songs for better assimilation.

How to make from scrap materials?
Craft "Traffic light" is one of the most popular, it is offered for children of different ages. For a first grader, work with paper and cardboard will be optimal, from which he can cut out all the details and glue them into a single whole. Entering the 1st grade, children are already well versed in the rules of the road and know what each color at a traffic light means, but this information is very important, therefore it is worth repeating it from time to time.


When schoolchildren move to grades 2 and 3, they may also be faced with the need to create a "Traffic Light" craft, but at this age their work can already be exhibited for a competition, therefore there is a need to learn how to make an unusual and creative traffic light, using various tools and materials, experimenting with different techniques. In addition to the usual crafts in the form of a box on a leg with multi-colored circles, unusual, amazing and even fabulous products can be invented.


From disks
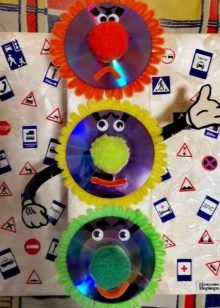
Modern technologies have entered our lives, leaving many new products that can serve not only for their intended purpose. You can make an excellent traffic light from CDs, since the products have a round shape, which is very convenient. To give the disc the desired color, you can paste over it with colored paper or fix a red, yellow or green cover in the center. An alternative option would be to create petals of the desired color, with which the disc is pasted over from the back.


You can draw on the surface of the discs using a marker and a corrector, so you can easily create a dissatisfied, neutral and kind face, depending on the color of the traffic light.
Discs can be mounted on cardboard, plastic, wood, which allows you to create a wide variety of craft designs.


From the bottle
If the child needs to quickly make the "Traffic Light" craft, and there are very few available materials at home, you can completely get by with an ordinary bottle. Using a plastic container of any shape, you can build an original traffic light. The most suitable option would be a bottle with right angles, since you can make a three-dimensional model, where the multi-colored circles will look in all four directions. If there are no such bottles, then the usual container is painted in any color with the help of paints, and after drying, red, yellow and green circles are drawn.

Such products can be decorated with additional elements in the form of a cap, hands with a police stick, and on the bottle itself it is possible to paint a face with paints, creating a Mr. traffic light. If a child wants his traffic light to stand on a leg, then the bottle is turned upside down, and any support that can withstand the craft and look good in finished form is inserted into the hole. The use of paints in this version will allow painting the entire structure in one color, highlighting only the signal lights of the traffic light itself.


From packages
There are many options for creating Traffic Light crafts, so children can easily select the most convenient and acceptable option for themselves. One of the favorite methods of creating this product is working with plastic bags.
To make a traffic light from packages, you need to prepare several plastic items of red, yellow and green colors. On each bag, the handles and the bottom are cut off, which allows the product to be laid out in the shape of a rectangle. The resulting product is bent in half, after which, using scissors, it is cut into uniform strips with a width of no more than 1 cm, not reaching the fold line. All prepared parts are fastened together with adhesive tape.


The resulting balls can be placed in a pre-made hollow blank with holes of the desired diameter.
Such a traffic light can be decorated with a cap and handles, or you can simply use decorative elements in the form of sequins, buttons, beads and ribbons.


What else can you do?
It is possible to make the "Traffic Light" craft from such natural materials as fiberboard and plywood. It will be easier for children to work with fiberboard sheets, as they are softer and easier to cut. To work, you will need to create a sketch of the project, clearly marking out the dimensions of all parts on it. The finished template is transferred to fiberboard or plywood, cut and joined. Fiberboard products can be glued, and plywood can be knocked down with small nails.


For multi-colored circles, it is worth leaving round slots in which to place the signal lights later. Colored inserts can be made of the same material as the base, only painted or pasted over with colored paper. A more complex, but effective option would be to use LED bulbs and color film, which will serve as a light indicator on the craft.


If creating a wood product is difficult, you can try other materials for the work. It will be especially interesting for girls to make a traffic light from beads, using the correct weaving pattern and the colors needed for work. If you follow all the rules of weaving, in half an hour you can get a ready-made, creative and original craft.


An equally interesting option is to create a knitted traffic light, which can be both voluminous and flat. It is recommended to use a crochet hook for work, but the base can also be knitted. Girls who have already mastered both methods of working with yarn will cope with the task without much effort and will be able to make a bright and original version of the craft.


How to make the "Traffic Light" craft, see the next video.


