What crafts can you do yourself?
Despite the abundance of other hobbies, many people are now engaged in needlework. From the materials at hand, both beautiful postcards or gifts and decor for the interior are obtained. All you need for work is good imagination and some free time.


What can be created from paper?
This simple and affordable material can be used to create both simple appliqués and volumetric toys. In work, you can use double-sided or corrugated paper, as well as cardboard.


Birds
From cardboard and double-sided colored paper, you can make a beautiful figurine of a small bird. Even a small child can cope with such a task.
To create a figurine of a chicken, double-sided yellow paper, voluminous eyes, scissors and glue are used. The process of creating a bird includes steps.
- First, fold a sheet of paper like an accordion.
- Next, you need to bend it in half.
- The edges of the accordion must be carefully glued.
- The same must be done with the second sheet. After that, the two blanks need to be glued together, forming a large yellow circle.
- Cut out the bird's legs, wings and comb from yellow and orange cardboard. All these details must be glued to the base of the craft.
- Attach the eyes and beak to the center of the figure.


The craft turns out to be bright and very beautiful.

A small child can easily cope with the creation of a cardboard penguin. To do this, you can use a cardboard core or a base made from a small piece of black cardboard. Attach a three-dimensional white piece to the front of the figure.
This base can be decorated with details cut out of colored paper.
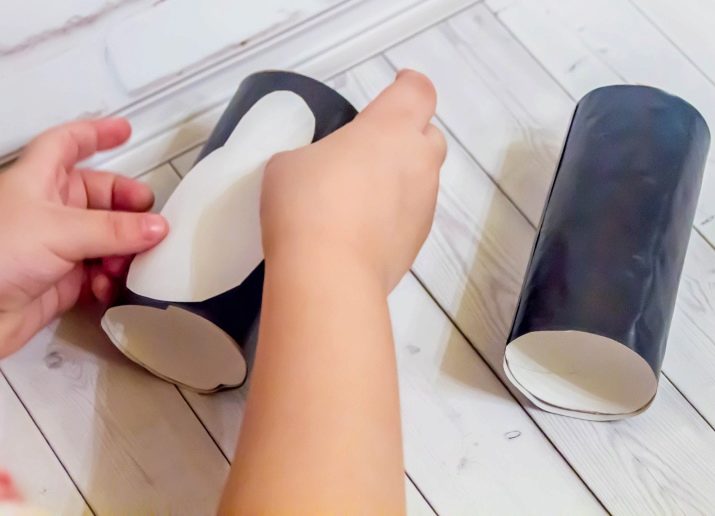
A small bow, legs, beak and eyes are glued to the body of the penguin.


The finished figurine looks cute and cute.

Animals
The list of popular children's crafts also includes various applications with the image of animals.
- Hare. A volumetric oval and two ears of the same size need to be cut out of white paper. They are glued to a piece of cardboard. From pink paper, you also need to cut out two elongated parts that are attached to the ears, and a neat triangular nose. The muzzle needs to be supplemented with voluminous eyes and a mustache. Decorate the lower part of the applique with green grass cut out of paper.

- A lion. To create such a cute lion cub, yellow and orange paper, felt-tip pens and glue are used. It is done very simply. First, cut the orange paper into thin strips. Each of them must be carefully bent in half. Two pieces must be cut out of the yellow paper. Orange stripes are attached to the volumetric circle. The resulting head with a mane must be fixed on a cardboard base. You need to glue the body of the lion to the bottom of the craft. All other details based on the figure must be drawn with a felt-tip pen.


- Bee. The bee made of paper also looks beautiful. To create it from yellow and black paper, you need to cut out two identical circles. You can use a stencil for this. Two clouds and one circle should be cut out of white paper. Next, it must be cut into two parts. After that, all the details of the figure must be assembled and attached to the cardboard base. Eyes, paws and a smile can be drawn on a paper base with a felt-tip pen or gel pen.


You can also make beautiful applications with the image of a hare, snail, frog princess, bear or dog from bright colored paper.


Tank
Such a simple children's craft can be used as a gift for dad or uncle. The process of its creation consists of seven stages.
- First you need to cut off pieces of a suitable size from three cardboard sleeves.
- The edges of the sleeves can be coated with a thick layer of acrylic or gouache.
- Next, these parts need to be connected together with glue and wrapped in craft paper.
- The edges of the craft must be wrapped with strips of foil.
- The upper part of the tank must be formed from the remnants of the cardboard sleeves. It also needs to be wrapped in craft paper.
- The top must be attached to the base using double-sided tape or glue.
- Next, you need to roll a neat tube out of thick craft paper. Its edge must be wrapped with the remnants of the foil.
The tube is also attached to the base of the tank.


The craft can be painted with felt-tip pens or paper stars can be glued to it.

Emoticon
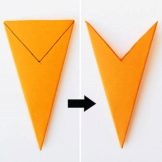
If a child is just learning to do something out of paper with their own hands, this simple scheme for creating an emoticon will suit him. First, cut a neat, even circle out of yellow paper. To it you need to attach eyes and a mouth made from a piece of red yarn.
A larger part must be cut out of orange paper. Its edges need to be made pointed and like the rays of the sun. After that, the yellow and orange parts must be glued together. The craft is ready.



Fruits
You can easily make a voluminous apple out of red or green paper. To do this, the sheet must be bent in half. Draw a half of an apple on paper. Next, it must be carefully cut. The edges of the two figures must be joined together.
The same must be repeated with another sheet of paper. Next, these two blanks must be glued to the cardboard base.

Small circles need to be cut out of white paper. They are glued to the middle of the apple. Attach a brown strip and a green leaf to the top of the figure.
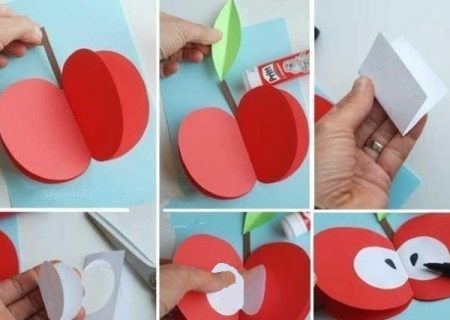
Strawberries, pears or oranges can be made in the same way. The craft turns out to be bright and beautiful.


On the topic "Space"
Small children and schoolchildren will also need a scheme for creating crafts on the theme of "Space". It is easiest for a child to make a rocket figurine out of paper. It is made very simply.
- First, roll a sheet of cardboard into a cone. Its edges must be secured with glue or double-sided tape.
- From the remains of cardboard, you need to cut one large triangle and two small ones.
- From one part, you need to make a volumetric cone. It needs to be attached to the top of the rocket.
- Triangular details need to be attached to its sides.
- The fiery "tail" of the rocket should be cut out of orange and yellow paper.
The rocket must be attached to a piece of cardboard.

In the background, you can place bright stars and planets of different shapes and sizes.


Ship
Another option for children's crafts is a postcard made of colored paper and cardboard. To create it from multi-colored sheets, you need to cut out three triangles. One of them will be used as the basis for the craft, the other two will be used as sails.
The edge of the large triangle must be carefully bent, forming two folds. All blanks must be glued to the cardboard base. Make the sea out of a wide strip of blue. To do this, you just need to fold it in an accordion, and then gently straighten it.


This interesting postcard will be decorated with the sun and little birds.

Smeshariki
Bright multi-colored smeshariki are very popular among children of all ages. Making them yourself is quite simple.


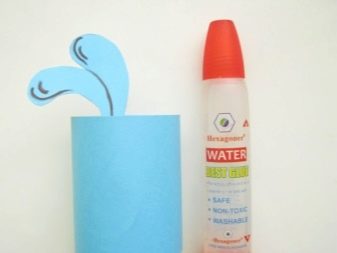
Roll a small cone out of blue cardboard. The rest of the same paper should be used to create the ears and legs. They are attached to the cardboard base with glue. You also need to cut out the eyes, nose and smile of this cartoon character from thin paper.



Minion
Another cartoon character that is popular among children 7-10 years old is the minion. Using cardboard, colored paper and other additional details, the child can easily make a bookmark with the image of this cute weirdo.
First, cut a long rectangle out of yellow paper. To make the bookmark more dense, you can connect two parts of the same shape and size together. From blue paper you need to make a bright jumpsuit, from black paper - a mouth and a base for the eyes. You need to attach a dark brush to the top of the craft.


Airplane
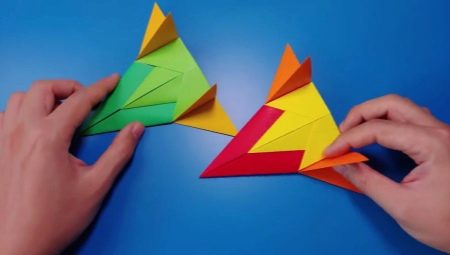
Even a small child can make such a figurine using the origami technique. The step-by-step process for creating a paper airplane consists of seven steps.
- First, fold a sheet of paper in half.
- Bend the top edges towards the middle.
- Part of the resulting triangle must be lowered down. Its tip should connect to the bottom of the base.
- Further, its upper corner must be bent up.
- After that, the figure must be bent in half.
- The lower part of the plane must also be bent upwards.
- The free edges need to be lifted. Their edges must be carefully folded.
The plane turns out to be light and very beautiful.

A car
A small child can easily cope with the creation of a cute car. This process is not difficult at all. To begin with, the edges of the cardboard sleeve must be carefully cut off with a sharp clerical knife. Next, this blank must be painted in a suitable color.
Wheels of the appropriate size must be cut out of thick cardboard. They are glued to the base of the craft.

The resulting toy can be additionally decorated by drawing lightning or stars on its surface.

Fairy-tale heroes
You can easily make various fairy-tale characters from colored paper. One of the most popular is the flamboyant unicorn. It is done according to the scheme.
- The first step is to cut out several circles of the same size from white paper.
- Each of them must be bent in half. All these blanks must be glued together. The more there are, the more voluminous the figure will be.
- You also need to cut out the legs and head of the unicorn from white paper. They must be glued to the base of the figure.
- Colored paper should be cut into thin strips. From them you need to make the mane and tail of a unicorn.
- You can decorate such a craft with colored hooves and a horn.


By the same principle, you can make a voluminous kolobok or goblin out of paper.


"Edible" crafts
A large number of different crafts can be made from sweet fruits and nuts.
One of these crafts is a cute pear and grape hedgehog. To create it, the top of the fruit must be peeled. The grapes need to be fixed on toothpicks. Next, these needles must be attached to the back of the pear. The eyes and nose for this character are made from olives and carnations. You can decorate the figurine with hazelnuts, strawberries or pieces of melon, banana and watermelon.

You can also make a cute mouse from lemon. To do this, cut off the bottom of the fruit. This will make it more stable. Two ears and a tail must be cut out of it. They are attached to the base of the craft using pieces of a toothpick. The eyes of the mouse are made of carnation, and the mustache is made of spruce needles or green onions.

Such crafts can be carried to the Natural Wonders exhibition or used to decorate a festive table.


What can children do from natural materials?
Handicrafts made from natural materials are very popular in the autumn season.
Autumn candlestick
To create such a stylish candlestick, a jar or candle mold, glue, dry leaves and twine are used. It is done very simply. First you need to dry the autumn leaves. The jar must be washed and dried with a towel or paper towels.
Each sheet must be coated with glue, and then attached to the glass base. You can arrange them in a chaotic manner. When the leaves are dry, the candlestick should be covered with a layer of clear varnish. This will extend its service life. The neck of the jar must be tied with twine. You can attach an autumn cone or dried flowers to it.

Photo frame
A photo frame decorated with dried petals will also look spectacular. To create it, flowers prepared in advance and an unnecessary frame are used.
The base for the craft must be painted in a suitable color and dried well. After that, you must attach dried rose petals to it. This is usually done using glue or double-sided tape.


You can decorate the craft with full-fledged small buds.

Caterpillar
Materials for such a craft can be collected in the forest or in the yard next to the house. You can use acorns, walnuts, or hazelnuts to create a caterpillar. They should be well cleaned of dirt and fastened together with plasticine. Next, the caterpillar must be carefully bent. The eyes, nose, mouth and horns for her should also be sculpted from plasticine. You can fix such a craft on the basis of leaves or dried bark. You can supplement it with dry cones or spruce branches.
You can also create beautiful figures from snags, branches, birch chaga, dry grass, or even spikelets.


Making dolls
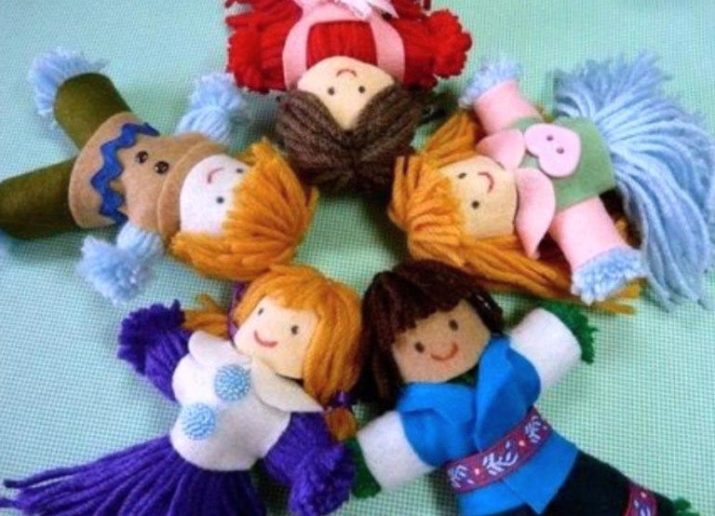
Our ancestors often made cute thread dolls for the holidays. Now such toys can be made with a child or used to decorate the interior. Such a doll is made from threads quite simply.
- First, you need to wind a thread of a suitable color around a piece of cardboard.
- Next, the thread must be tied in a knot, and the skein must be removed from the cardboard. The upper part of the craft must be tied with a thread, thus separating the head.
- The bottom of the skein must be carefully cut with sharp scissors.
- One more detail needs to be done in the same way. It needs to be tied around the edges.
- Next, this detail must be placed inside the figure. Place your arms directly under your head.
- After that, you need to move on to the formation of the waist. To do this, the doll must be tied with a thread in the middle.
- The edges of the hands must also be cut to form the palms.

By tradition, these dolls are made faceless. But if you wish, you can decorate them with images of eyes and a sweet smile. Next, to the top of the craft, you need to attach the hair made from the remains of the yarn of the desired color using a glue gun.
What to collect from paper clips?
You can even use unnecessary paper clips to create DIY crafts. You can make a simple curtain from them.To create it, old postcards, magazine sheets or plain colored paper are suitable. Such curtains are made very simply.
- First, the sheets need to be cut into thin strips.
- They need to wrap paper clips. The edges of the paper must be secured with glue.
- You need to attach another paperclip to this part. With her, you need to do the same procedure.
Ready-made strips of the required length are attached to a thin base. It can be a branch or a strong thread. These curtains are perfect for decorating your workshop.

By the same principle, you can create a beautiful bracelet or a simple pendant.


Beautiful ideas for home comfort
There are many useful crafts you can use to decorate your home or garden.
Seashell pot
Making such a flower pot with your own hands is very simple. For this, you can use both whole shells and broken ones. In any case, the product will turn out beautiful and original. Broken shells must be crushed before work. After that, the pot must be coated with glue. Next, it must be sprinkled with shell crumbs. Whole figures are arranged in rows on the pot.
When the craft is dry, it needs to be covered with a layer of varnish or golden paint.


You can also use coins or buttons instead of shells.

Hot stand
A stylish kitchen stand can be made from regular flat stones. They can be either monochromatic or multi-colored.
To create such a craft for the house from a piece of plywood, you need to cut out a beautiful figure of a suitable shape and size. Next, it must be greased with high-quality glue. After that, pre-prepared stones must be attached to it. From them you can lay out the sun or a spiral. But most often the stones are glued to the base in a chaotic manner.

Making simple DIY crafts is a great family hobby and a great way to bond with your kids or loved ones.

How to make a paper basket with your own hands, you will see in the next video.


