All about facing

All lovers of independent craftsmanship need to know everything about trimming. It is necessary to study pictures and diagrams that allow you to create crafts using the cutting technique from paper and napkins. Knowledge of the history of the emergence of facing art, the features of facing on plasticine and other types of work in technology can be of no small help.


What it is?
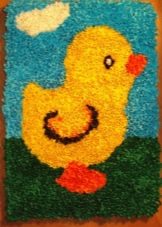
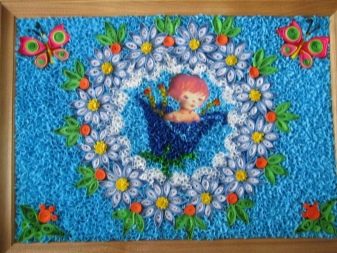
Everyone who knows the topic knows that facing is one of the methods of decorative needlework using paper. It is often referred to as applique and quilling (paper rolling). But in reality it is advisable to single it out in a special category. Small multi-colored inclusions fill the gaps of the decorated composition. With quite a lot of experience and diligence, you can even create a very large picture or panel.


History of origin
Working with paper to create original decorative pieces began centuries ago. And it will be impossible to even give an approximate date. However, the facing technique itself appeared not so long ago.
It has significantly expanded the possibilities in the application, therefore it is becoming more and more popular.
So far, this discipline is actively developing and has already split into several areas.


Overview of types of equipment
There are several popular facing techniques.
Contour
This version of the applique implies framing the surface (perimeter) of the picture. The framing elements are paper twists. This approach is useful for creating edging and borders. It is also used in the preparation of various frames.
Contour facing is often combined with other techniques, including popular scrapbooking.
It is not at all necessary to trim along the contour with any one color. On the contrary, a multi-colored composition will be perceived more fun and interesting. But the center can be left empty if required according to the chosen design. Small sizes of decorative elements allow to achieve the invariability of all outlines and patterns. Pictures should not lose their expressiveness at the same time.


Volumetric
The name speaks for itself. This type of facing is based on twisting of the end parts that is not uniform in density. They are further fixed on the bulk surface by varying the angle of inclination. This type of application allows you to create unique paintings with really complex subjects. By their beauty, they stand out favorably among other options. Mainly plasticine for children is used for work.
Volumetric facing is often used for firmly connected paper figures. Together with paper, cardboard, gypsum, even clay are regularly used.
In some cases, they also refuse glue, simply planting the elements on plasticine. By attaching pieces of paper that differ in size and density, it is possible to achieve special smoothness of the transitions. Sometimes the volumes look almost real, and this is aerobatics for craft lovers.


On a plane
The essence of the approach is also comprehensively clear from its name. The workpieces used are distributed over the entire plane of the base. It turns out, even if not the most catchy, but a relatively compact picture. For work, you can use a variety of materials.


Layers
With multi-layer facing, the parts are glued into each other. This can be done in a variety of ways. Trimming with different shades and colors, you can achieve an unusual combination. This achieves unique visual effects. It is worth considering that all the above types of applications are allowed to be used together in one craft.


Application features
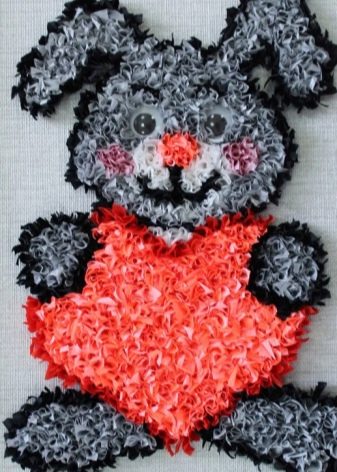
Images from napkins for children are good because they allow you to present even the simplest plot in an interesting and original way. Despite the conciseness of many options, the filled image looks very lively and attractive. Connoisseurs also note the tactile softness of the compositions, which also attracts people. Some schemes are quite accessible even for preschoolers and are useful for enhancing their creative skills, for improving familiarity with the outside world.
Most of the compositions are made of colored paper that is rolled into tubes. The figures or areas can stick to plasticine or foam, depending on the author's choice.
Facing is not too difficult, but painstaking. The work must be done not only assiduously, but also carefully. This activity is only suitable for dexterous people. Not all paper can be used in such a case. In addition to corrugated paper, napkins are often taken for work, you also need glue and scissors, a support material (any surface), as well as a long thin stick or a rod with a blunt edge.


Craft options
There are a large number of design options for novice craftsmen. However, not all of them are suitable for preschoolers. It is necessary to pay attention mainly to the simplest concepts. The composition "Doves of Peace" stands out among them. It is suitable for:
- acquaintance with basic techniques;
- practice improvements;
- instilling skills in activities;
- developing a respectful attitude to the subjects of human labor.

It is very useful to study the drawings and pictures with images of white doves in advance. They are much more valuable and better suited for getting to know the plot than photographs or illustrations in books. For the case itself, you need crepe paper: not only white and blue, but also red. Additionally it is worth preparing:
- PVA glue;
- stationery scissors;
- cardboard for packaging;
- building plaster;
- plastic jar;
- refills from ballpoint or gel pens;
- stationery knife;
- sticks;
- templates with the image of doves.


Such templates are laid out on cardboard and outlined. Usually they make a couple of large and a couple of small birds. When they are ready, these shapes need to be cut and glued. This step allows you to make the craft more voluminous. Next, cut the white paper into strips 2 cm wide. Double-sided cuts are prepared on both sides along the length, after which the open cuts are sealed on improvised pigeons.


Continuation of work is as follows:
- attach pigeons to sticks;
- cut off pieces (more precisely, strips) of corrugated paper;
- turn these strips into squares with a side of 20 mm;
- a facing tool is placed in the middle of the square;
- crush the square;
- rolling the rod between the fingers;
- smear the end part of the tube with PVA glue;
- pressing the facing to the base, remove the rod;
- subsequent trims are glued sequentially;
- put them more tightly, excluding the occurrence of gaps;
- make the beak red;
- prepare blue wings, tail and eyes;
- before filling the second part of the composition with trimming, the pigeons are fixed in a jar using plaster;
- wrap the sticks with white paper;
- tie a bow.


Also, using the facing method, you can make other schemes:
- ship;

- an improvised rocket;

- sun and rainbow over a blooming lawn;

- cactus holding on to plasticine;

- scarlet poppies with green parts on a white general background.

Step-by-step master class
The idea of \ u200b \ u200bmaking a snowman in stages will be very attractive not only for the New Year, but also for other winter holidays, and even just for creative activities in winter. Most often, the figure is made from napkins, preferring planar facing to other options. The first step in the work is to make a hat. Blue plasticine is smeared on it first tightly, and then stripes are already drawn.


For work, you will need blue and blue napkins 3x3 cm in size. The first step is to make a pompom. Taking the rod in your right hand and holding the square to the left, wrap the napkin with the movement of the rod in the manner of a tube. This very trimming without removing the rod is fixed on plasticine, only then the rod can be removed. By varying the density of the arrangement of the tubes, the volume of the composition is changed.


Further:
- prepare a white face;
- form an orange nose;
- add green eyes and a red mouth to the figure;
- all these parts of the snowman's body are butted;
- add buttons;
- trim their legs with white napkins;
- prepare blue handles and blue mittens (both of them will also have to be trimmed)
- paint the background with blue gouache;
- paint snowflakes;
- butt them.


Another option is worth considering - Poppy Fantasy. Such work is carried out in the already described plane technique. A fragment is cut from a roll of corrugated paper (rolled up). Then the strips are cut vertically, and already, without untwisting them, they are cut into squares.
Important: the smaller these squares are, the more elegant the trims will be.
Part of the flower is covered with some PVA glue. Next, place a toothpick in the middle of the square and screw it tightly onto it. Such a tube, without removing it, is placed at an angle of 90 degrees on the part greased with glue. Then you have to:
- pull out a toothpick;
- repeat the previous steps to form the bevels;
- supplement the petals with red and orange shades so that they are visually separated;
- fill the middle to your liking (or leave it empty).


