Ways to decorate boxes
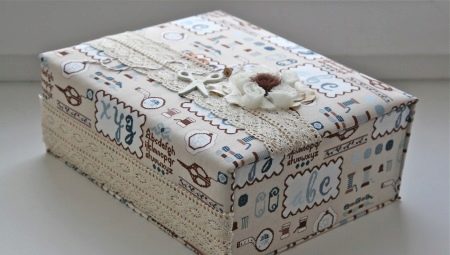
Empty boxes from under various little things can be easily turned into gift wrapping or a stylish interior detail. All that is needed for this is a little imagination and scrap materials that can be used for decoration and decoration.


Decorating interior boxes
Original designed cardboard shoe boxes will perfectly fit into the interior of a bedroom, living room or study.


Wallpaper
To decorate the shoebox, you can use the wallpaper left over from the repair. To work with non-woven or vinyl wallpaper, wallpaper glue is used. Paper sheets can be attached to a cardboard box using regular PVA glue. This is done as follows.
- First you need to cut a piece of wallpaper to the correct size.
- Next, you need to put a box on it. Using a pencil, you need to mark up.
- After that, its side parts need to be wrapped in wallpaper. In this case, the edges must be folded to the inside.
- Then this paper frame must be removed from the box. All excess must be trimmed with scissors or a knife.
- Then you can start pasting the box. First, the glue is applied to the bottom of the box. Then it is put on paper.
- After that, the sides of the box are smeared with glue. The necessary parts of the wallpaper are also attached to them.


From the inside, the craft can also be decorated. It is usually finished with paper or soft cloth. To preserve the structure and color of the wallpaper, the craft can be coated with a colorless acrylic-based varnish after processing.


Decoupage
This technique has long been popular among needlewomen. Using it, the shoe box can be decorated with both simple patterns and full-fledged drawings. The process of its registration consists of the following stages.
- First, paint the cardboard base in a suitable color and dry well.
- The napkin must be divided into several layers.
- Next, you need to cut out a picture from it.
- This drawing must be coated with glue and attached to the box. It needs to be leveled well.
- The edges of this part can be carefully painted over using a sponge. In this case, the picture will look like part of the overall picture.
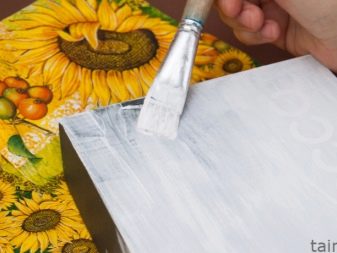
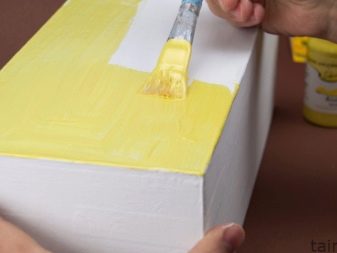


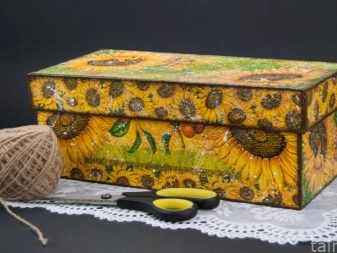
When the box is dry, it also needs to be treated with clear varnish. To make the product look more beautiful, it should be covered with craquelure. After such a finish, microcracks will remain on the surface of the paper. This box will look like a vintage jewelry box.
You can store various decorations and accessories for creativity in it.


Textile
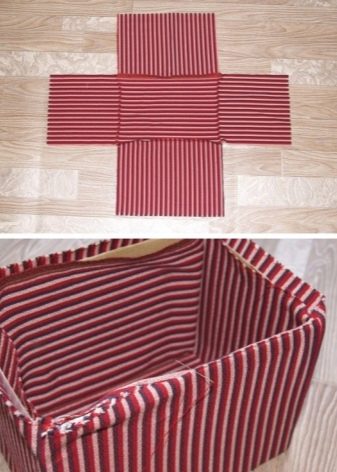
To create coziness in the room, you can use products decorated with fabric. Thick cotton or denim is best suited for this purpose. It is very easy to make such a decoration for your home.
- First, you need to take two measurements from the box. You need to measure the height of the sides and the girth of the base of the product.
- After that, a blank of a suitable size must be cut out of the fabric. Along the edges, you must leave allowances of 1 centimeter long.
- Next, the edges of the parts must be carefully stitched. This can be done either by hand or on a sewing machine.
- The resulting blank can be attached to the base of the box with glue or double-sided tape. When working, it is important to make sure that the fabric is firmly pressed against the cardboard, and there are no waves or folds on the cardboard base.
When the craft is ready, the box can be pasted over with a cloth from the inside. It is very convenient to store books, children's toys and creative supplies in it.

Sweater
There are also more non-standard ways to decorate boxes. So, even an old sweater can be used to create an original container for storing things. In addition to an unnecessary knitted sweater, a glue gun and two pieces of tape for pens will come in handy. A master class on creating a beautiful soft box consists of the following steps.
- First, cut a piece of fabric of a suitable size from the wide part of the sweater.
- It must be carefully glued to the cardboard base.
- Next, the edges of the knitted fabric must be tucked inward. They also need to be fixed with glue.
- On the sides of the box, you need to attach the handles prepared in advance.
It is convenient to store various household items in such a product.


Twine
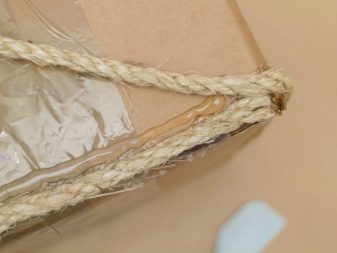
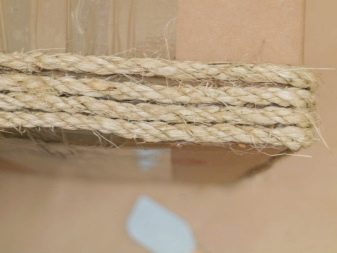
A large box for storing various small items can be decorated with light twine. It is attached to the cardboard base with a glue gun. The rope is wound on a cardboard base. Each part of the harness is fixed with glue. A small cloth lining can be placed inside such a box.
If desired, you can use colored yarn instead of twine. It adheres well to the paper surface. To decorate the finished product, you can use both plain and colored threads. It is easy to make beautiful packaging even from unnecessary yarn leftovers.
The beautifully designed box is ideal for storing various small items used for creativity.


Design options for different holidays
You can also arrange a gift box with your own hands.


For the new year
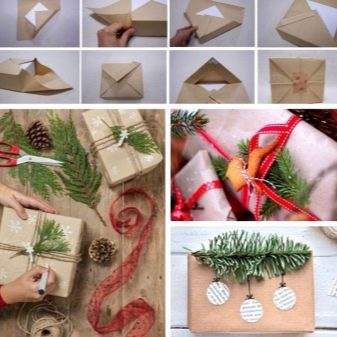
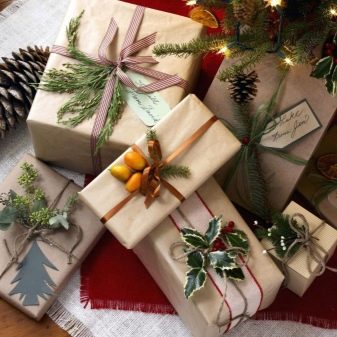
Stylish wrapping of the New Year's gift increases the pleasure of unwrapping it. Craft paper, twine and spruce branches can be used to decorate a small gift box.
First, you need to wrap the gift with craft paper. Its edges must be carefully fixed with double-sided tape. The finished box must be wrapped with twine. Fir branches are attached to its base. In addition to them, you can also use cones, cinnamon sticks, dried citrus slices or gingerbread to decorate the gift box.
For birthday
You can make a pleasant impression on your loved one or friend by wrapping a box with a gift using the furoshiki technique.For work, fabric and packing tape are used. The packaging design process consists of the following stages.
- First, spread the fabric on a flat surface. In the middle of the square you need to place a box with a gift.
- Next, the two ends of the fabric opposite each other must be carefully tied.
- The same must be done with the other ends.
Such packaging can be additionally decorated with a satin ribbon or lace braid.


To the wedding
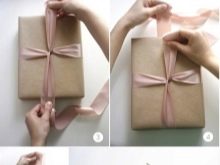
White or pink satin ribbons can be used to decorate a wedding gift. It is very simple to arrange it with your own hands.
- The first step is to place the ribbon under the gift wrapping.
- The loose ends must be carefully folded over and tied in a knot.
- Next, the box needs to be wrapped with tape again.
- Tie its edges with a knot again.
- Next, you need to tie another ribbon to the gift box.
- It must be carefully tied, forming a bow.


The gift wrapping can be decorated with artificial flowers. This will make her even more attractive.
A small gift box can also be wrapped in craft paper. Such a gift looks very beautiful. The finished package can be additionally decorated with small white dots. To keep them small and neat, they should be applied with the edge of a pencil dipped in white paint. Such points are located in even rows. When the drawing is dry, the workpiece must be tied with a light ribbon.
Using this method of decoration, even an ordinary box can be turned into a real work of art.


Valentine's Day
Valentine's Day is another reason to remind your other half of your feelings. You can do this by giving your loved one a beautifully designed gift. Various materials are used to decorate the gift box.
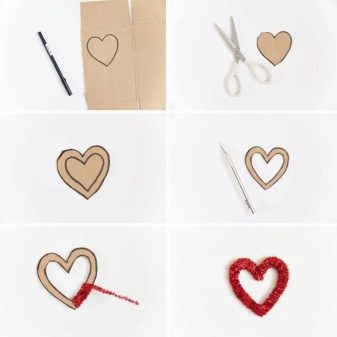
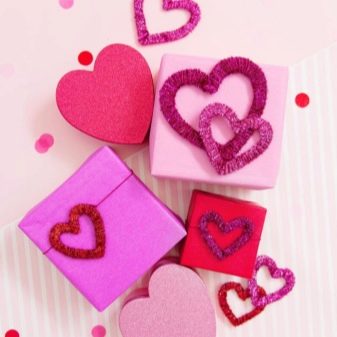
- Rain. A heart of a suitable size must be cut out of a piece of cardboard. Next, you need to cut out the middle part from this heart. Red rain is wound on this blank. You need to arrange it in dense rows. The finished heart must be tied to a gift box using colored thread or ribbon. You can position it in the center of the box or on the side.
- Buttons. Ordinary buttons of red or pink color can be used to decorate gift wrapping. They can be glued to the lid of the box in a chaotic manner. You can also lay out a heart, the first letter of the name of a loved one or a flower from colored buttons. The finished product must be covered with a layer of transparent varnish and dried. This will extend the life of the product.


- Candies. Lovers of sweets will love the gift decorated with sweets. Decorating a box in this way is very simple. To do this, you need to glue rows of candies to the packaging in the form of a heart. In work it is worth using long thin chocolates. They should be located as close to each other as possible. As an additional decoration for the box, you can use a red satin ribbon. If desired, it can be additionally secured with glue.


You can supplement the gift box with a neat tag with a declaration of love written on it. Warm words will make the holiday truly special.
By March 8
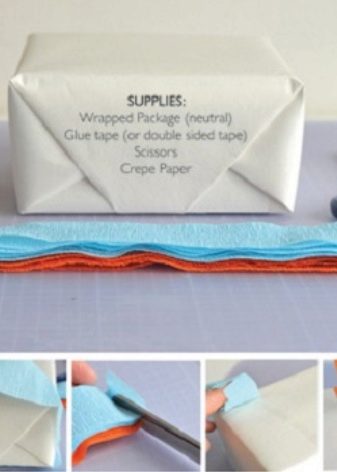
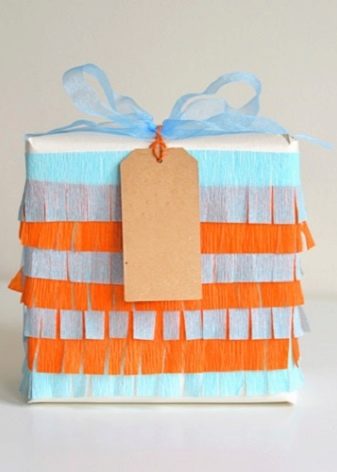
Bright details and rich colors are usually used to wrap a gift for March 8th. A gift box decorated with corrugated paper will look beautiful.
Strips of the same width must be cut from sheets of different colors. Each such detail must be carefully cut along the edges. After that, the volumetric strips must be glued to the box. Even rows are located one above the other. Thanks to this design, the gift looks bright and beautiful.
The box decorated using the quilling technique will also look nice. Even a small child can decorate it with their own hands. To do this, you need to make petals and leaves from narrow strips of paper. All of them are attached to the cardboard base in the correct order.
Flowers made using this technique look cute and pretty.

Decor of boxes of different shapes
Having gained experience, you can learn how to decorate with your own hands products of any shape and size. Square and rectangular boxes can be easily wrapped in wrapping paper. The packaging process for a round product looks a little more complicated.
- First you need to measure the box.
- From the gift paper you need to cut off a piece of paper with a margin of 2-3 centimeters.
- This strip needs to be glued to the side walls of the box. Its edges must be carefully folded inward.
- Next, you need to cut the bottom of the box out of the wrapping paper. It is glued to the bottom of it. This part must be fastened so that the folded allowance is not visible.
- After that, you can start decorating the lid. To do this, a slightly larger circle must be cut out of colored paper.
- This piece is glued to the lid.
- After that, a strip must be cut out of the remaining paper, which will be equal in width to the height of the lid. The edges of the part should be straight.
- This strip should be glued to the side of the lid.

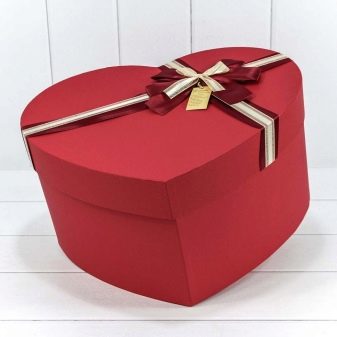
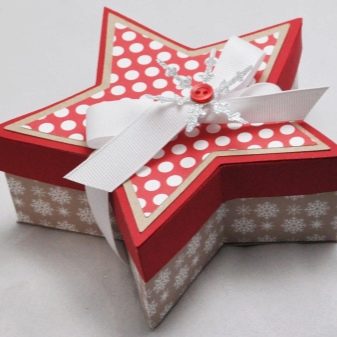
The finished product can be decorated with a bright bow, ribbon or artificial flowers. By the same principle, you can decorate a box in the form of a heart, triangle or star. Using these simple ideas, you can decorate your home and please your loved ones with original decorated gifts.
For how to decorate a box with your own hands, see the next video.


