How can you make a mushroom craft?
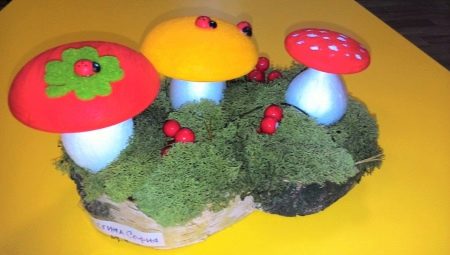
The best way to spend an autumn day off with children is to make beautiful handicrafts from natural gifts on the theme of "Autumn" with them. How to make a mushroom-shaped craft from natural materials, you will read in this article.
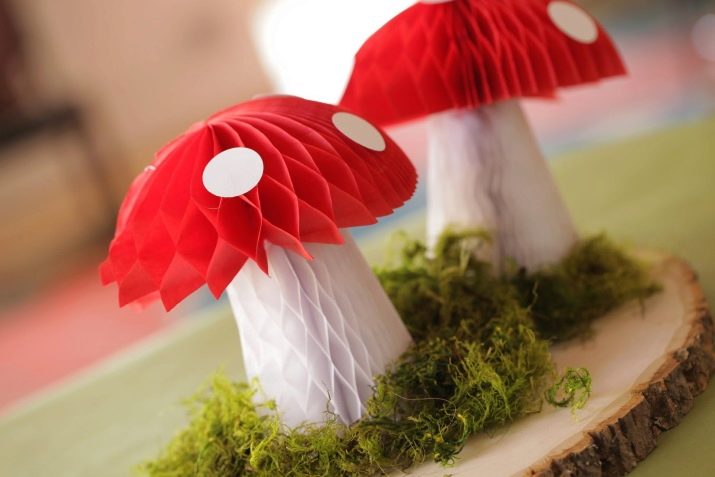
Creation of applications
Mushrooms are a miracle of autumn nature, they delight us with their beauty, special aroma and wonderful taste. Together with the kids, we will make simple applications on this topic for kindergarten.

From paper
The best crafts for the little ones are lightweight colored paper appliqués.
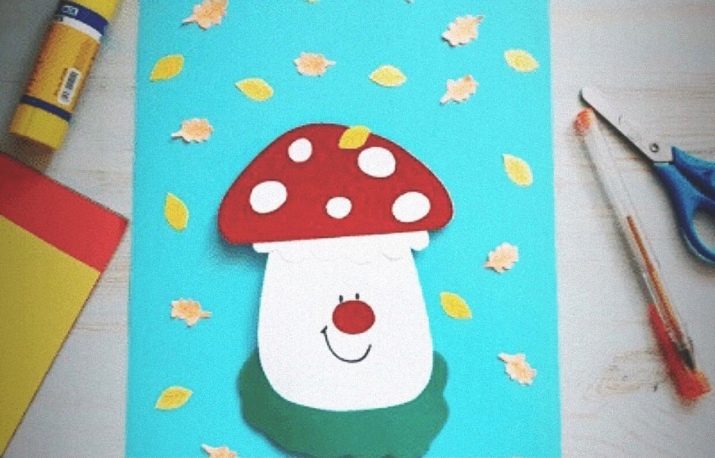
Fly agaric
To make a funny fly agaric with eyes, you will need:
- a sheet of white cardboard;
- colored paper in red, white and green;
- simple pencil;
- glue stick;
- black marker;
- scissors;
- ruler with circles (stencils).

Progress:
- prepare in advance for making a template of a mushroom on a cardboard base of three parts: a leg, a hat and an "accordion";
- tell your child what this elegant mushroom looks like, what color is his hat, specks;
- make a mushroom cap out of red paper and glue it onto the blank;
- on white paper, using a pencil and a ruler, draw large specks for the fly agaric;
- circle the "accordion" according to the template on a white sheet;
- help the baby to carefully cut all the details with scissors;
- glue white polka dots on top of a red hat, and a flirty "accordion" - under it;
- make a round nose out of red paper and glue it in the center of the craft;
- with a marker, draw a fly agaric mouth and eyes;
- cut out the clearing for the mushroom from green paper;
- we connect all the parts with glue.


So we have a handsome fly agaric.
Mushroom basket
With older children, we will collect a whole mushroom family in a paper basket.
For the application you need:
- colored paper of yellow, brown or red color;
- white, brown and blue cardboard;
- glue stick;
- ruler;
- scissors;
- simple pencil.

First, let's make a basket:
- cut brown paper into pieces 1.5 cm wide and 21 cm long;

- put the blanks together and cut them strictly in the middle. We repeat this operation again so that each strip is divided into equal 4 parts.

- we connect the resulting segments into rings with a glue pencil;

- on blue cardboard we draw the outlines of the future basket with a simple pencil;

- starting from the bottom line of the basket we glue paper rings so that the basket looks as if it was woven from a vine.


Now we glue the mushrooms:
- draw hats on the seamy side of the brown cardboard. Mark the mushroom legs on light cardboard. We glue all the details.

- we fix our mushrooms in a basket.

- we make birch leaves from yellow paper and decorate the craft with them. The volumetric application "Basket with mushrooms" is ready.

From plasticine
The youngest participants (kids 2-3 years old) also do not want to stay away from the autumn creativity. Under the guidance of an adult, children can create one of their very first works - to mold bright red chanterelles from ball plasticine. This is done in the following way.
- Take plasticine in bright orange, yellow and green colors.
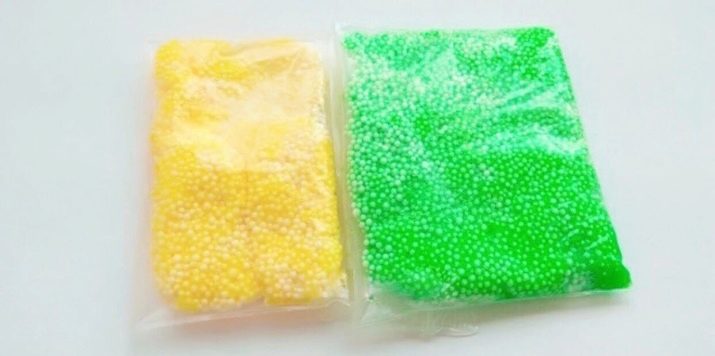
- Take a few pieces of orange plasticine out of the bag and roll the balls with the child.

- On one side, shape the ball into a thin tube. This will be the leg of the mushroom. On the other side of the workpiece, make a dent with your fingertip. Get a hat. Create several of these funnel-shaped mushrooms with your baby.

- Form an islet of green and yellow plasticine and plant a family of chanterelles on it.

- Give your work a nice shape by placing all the mushrooms side by side.

The autumn composition "Chanterelles in the meadow" is ready.

The application with plasticine mushrooms using the plasticine technique looks very bright and festive. A colorful craft can be created with children of the senior and preparatory groups of kindergarten.

Prepare:
- a set of plasticine;
- stack;
- thick white cardboard;
- PVA glue;
- a suitable black and white drawing with a mushroom;
- frame.


The work progress looks like this.
- Glue the blank drawing for the applique to the cardboard base with the front side up.

- Now let's prepare the plasticine for work: we knead the blocks of the desired color in our hands to the required state.

- Let's start performing plasticineography from the bottom edge of the applique. Roll up small blocks of green plasticine and stick them along the contour of the grass to the image.


- Let's make flagella from white plasticine for the contour of the mushroom leg.

- Next, let's move on to the outline of the hat, and then outline the rest of the details: the snail, berries, leaves.

- We are starting to fill in our work. Roll balls of the desired color from plasticine and fill the empty space with them. We move gradually, from large volumes to small ones.


- Fill in the mushroom, grass, snail, and then move on to the berries and cranberry leaves. Roll up balls of the same size and carefully coat them in the contours of the picture.


A voluminous and bright autumn applique is ready. All that remains is to place it in a beautiful frame.

More ideas
An interesting lesson for older preschool children is the application of natural materials. In the work, you can use everything that the possibilities and imagination allow:
- nuts;
- seeds;
- flower seeds;
- spikelets of cereals;
- dried flowers and leaves;
- bark of trees.

The applications are bright and voluminous due to the combination of different textures and colors of fruits and seeds. Let's consider some beautiful options.

"Mushroom glade"
For work, prepare:
- dried multi-colored leaves of maple, linden, ash, birch;
- thuja twigs;
- scissors;
- PVA glue;
- orange cardboard;
- marker;
- frame;
- stencil cardboard.
The work progress is as follows.
- Draw the mushrooms on the cardboard with a marker and carefully cut them out with scissors.

- Transfer the details to the orange base and trace with a marker.
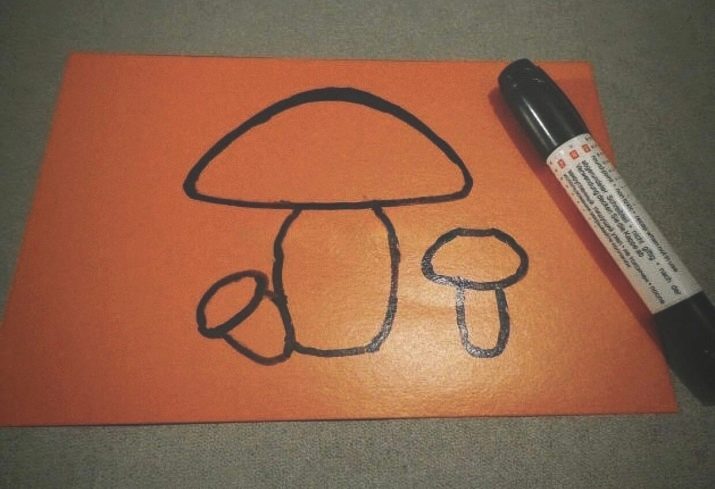
- Sort the dried leaves by shades. Chop the light yellow and dark brown leaves separately into small pieces. Spread the prepared powder on plastic pads.


- Apply a thick glue to the mushroom caps.

- Sprinkle the dark leaf powder on top of the glue.
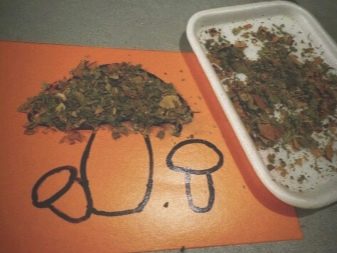

- Cover the mushroom legs with glue and fill them with light yellow powder. Leave the mushrooms to dry completely and gently shake off excess foliage.

- Decorate the craft with small chestnut leaves, willow leaves and small thuja twigs.

- Cut off the tops from the green maple leaves with scissors and make a beautiful grass edging along the bottom of the work.


- A cute mushroom meadow is ready. Place it in a frame under the glass.

Craft from cereals
Making an applique from the most ordinary cereals is much more interesting and fun than eating porridge. It is enough to draw the future composition on cardboard and apply the selected cereals to PVA glue. Let the work dry and enjoy the wonderful mushroom opening day.

Let's see what wonderful crafts you get using this technique.
- In the fluffy paper grass, stocky boletus of buckwheat, rice and barley were hidden. A sturdy boletus made of multi-colored lentils also grew in a clearing.

- You don't need to collect cute but dangerous pale toadstools from tinted rice. Better to just admire them.

- A cute bean and corn oak tree hid behind a red leaf.
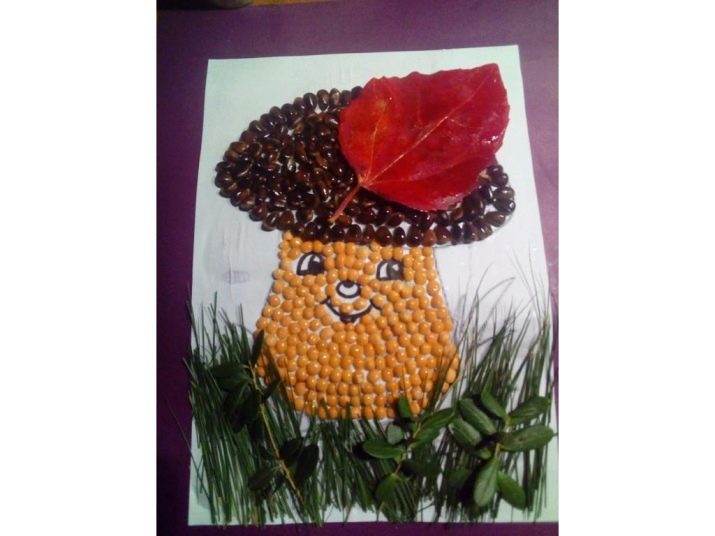
- And here is the fantastic mushroom made from colored rice and millet. How the real autumn pasta grass looks next to him.

Making voluminous crafts
Beautiful volumetric handicrafts can be made from natural materials and not only.
From acorns and chestnuts
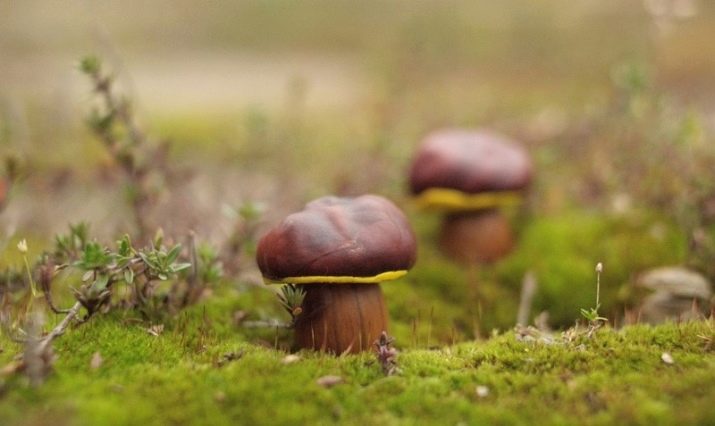
Mushrooms or porcini mushrooms from acorns and chestnuts are very interesting. It's easy to make such a voluminous craft.
You will need:
- natural gifts: chestnuts, acorns, some twigs, leaves and moss;
- cardboard for the base of the composition;
- a bar of yellow plasticine;
- brush with stiff bristles.

The course of work will be as follows.
- Collect large, ripe acorns and small chestnuts as you walk. Clean the collected material from dirt and insects, separate the caps from the acorns, and peel the chestnuts. Prepare the basis for the composition: using plasticine, stick twigs, leaves, dried moss on the cardboard.

- Roll up small balls of plasticine and lay them, flattening them carefully, on the lower, flatter part of the chestnuts. Carefully remove excess plasticine that has gone over the edges with a stack. This will be the inside of the mushroom cap.

- Take the prepared brush and use it to apply the pattern to the plasticine to give the surface of the cap from the inside out a tubular pattern, like in real mushrooms.

- Connect the legs and caps of the mushrooms and place the craft on the prepared meadow.

So it turned out to be a wonderful mushroom place.
Cotton wool and starch dough
You can make dummies of mushrooms for an autumn performance or for a thematic lesson on the world around you at school using this master class.
The process of creating such mushrooms is interesting and exciting.
You will need:
- cardboard;
- acrylic paints;
- brushes;
- scissors;
- cotton wool;
- nails 15 cm long;
- potato or corn starch;
- tea bags;
- water-soluble acrylic varnish.

First, let's make the bases for our mushrooms:
- Cut out the circles-caps of the required circles from the cardboard. We will put the received mugs on nails.

Now let's prepare the starch dough:
- dissolve 5 tbsp in a glass of cold water. spoons of starch;
- boil 1 liter of water;
- pour the prepared starch into boiling water in a thin stream, not forgetting to stir it;
- cool the mass to a comfortable state and add 1-2 tablespoons of PVA glue to it;
- the starch mass is ready.

The manufacturing technology of the craft itself is as follows.
- We divide the cotton wool into pieces of the required size and, having dipped it well in starch glue, gradually attach it to the workpiece, starting from the top.
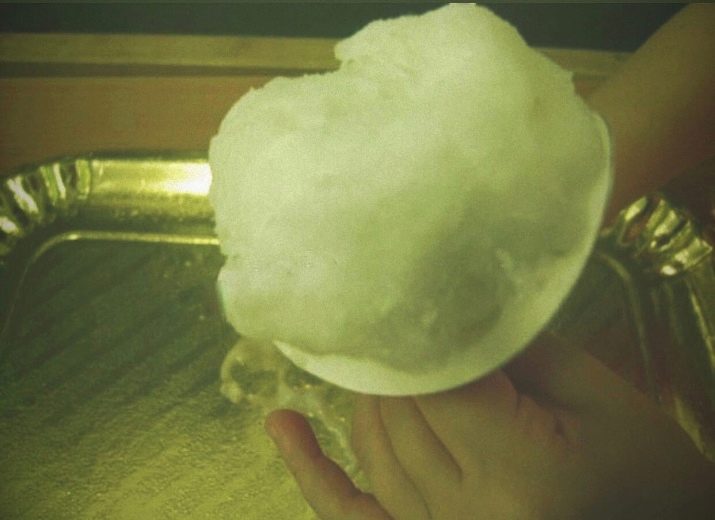
- With the movements of our fingers, we teach children to create the shape and surface we need for our mushroom.

- Step by step, we form a mushroom of the desired size and type. We leave the finished product to dry near the heater for 2 days. It is important not to forget to turn the work so that it dries evenly on all sides. After drying, paint the mushrooms with acrylic paint.

- We make mycelium on the legs of the mushrooms: dip them in PVA glue, and then sprinkle with tea from the tea bags.

- To preserve the work for a long time and give a natural shine to the caps, cover the mushrooms with a thin layer of acrylic varnish.

- The work is ready, you can collect forest gifts in the basket.

Salted dough
A nice volumetric panel with a basket and mushrooms will be made from salted dough.
Prepare:
- PVA glue;
- stacks;
- universal polymer glue;
- paints;
- cardboard;
- braid;
- burlap;
- acrylic lacquer;
- board and rolling pin.


For salty dough you will need:
- wheat flour - 1 glass;
- finely ground salt - 1 glass;
- cold water - 0.5 cups.

First we make a basket.
- We knead plastic dough from water, salt and flour. Roll out a 0.5 cm thick piece of dough on the working surface with a rolling pin and shape it into a basket in the form of a trapezoid. Roll up 4 columns of the same size with your fingers and place them on the surface of the basket in a fan.

- To create an imitation of weaving, form a wide strip from the dough and cut it into several pieces.

- Starting from the lower left edge of the basket, we lay the resulting segments as if we were braiding our "fan" between the twigs in a checkerboard pattern. Be sure to grease the joints with water.

- We form a twisted flagellum from two thin rolls of dough and decorate the upper edge of the basket with it. We do the same with the bottom of the basket. In the same way we make a beautiful twisted basket handle.

Now we blind the mushrooms.
- We form plump barrels-legs for boletus, and we make caps from slightly flattened balls. We connect the parts together by moistening with cold water. We will place some of the mushrooms in the basket, and use a few to decorate the background of the panel.

- Making leaves. We form them from balls and apply in a stack of veins.

- We send the work to dry in the oven. After the product is ready, paint it with acrylics.

Let's make the mushroom hats, handle and basket decor deep brown. Leave the mushroom legs light, the basket golden, and make the autumn leaves bright orange. After drying, we will cover the work with acrylic varnish.
The last stage is the design of the panel. On the prepared piece of burlap, glue the cardboard with PVA glue and carefully iron it with an iron. We fix the remaining mushrooms and a decorative loop on which you can hang your work with the help of polymer glue on the burlap.
A beautiful autumn basket is ready, it can decorate your kitchen, group or classroom.

Useful Tips
To make the work on the craft interesting and bring joy to the child, take on board a few tips.
- Encourage any invention of the baby, even if it seems to you that the child is offering a not very good idea for creativity.
- Do not try to dissuade the child from the chosen craft option. Do not say that the work is too much for him, but think together how to implement the idea.
- Praise and appreciate children's initiative, forget about criticism and sarcasm.
- Be sure to participate in the creative process and teach the pupils to complete the work, but do not do the work for the child yourself.
- Do not limit the creativity of children to create crafts in only one technique. Children's fantasies and the ability to combine the incongruous are so rich that the results of labor amaze others.

Feel free to combine natural materials and other interesting ways to create gifts of the forest. For example, mushrooms can be:
- sew together with the child from felt;

- create using origami technique;

- felted and put on a real tree stump.

They can also be made from waste material:
- toilet paper rolls;
- egg trays;
- plastic cups;
- bottles and bubbles;
- leftover threads;
- old shreds.


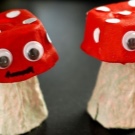
Teach children to see beauty in every bump, sliver, piece of paper, stick, and then creativity will become their favorite pastime.
For more on how you can make a mushroom craft, see the video below.


