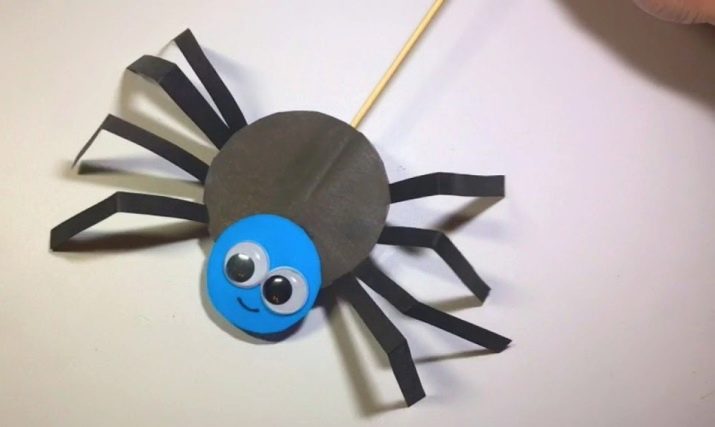
Making a craft in the form of a spider

Crafts are interesting not only for children, but also for many adults. After all, the craft, created with high quality and taste, is suitable as a kind of 3D decoration - instead of an ordinary picture - for connoisseurs of beauty.


Classic version
An example is an artificial spider made from scrap materials. Such a product allows a preschool child during the manufacturing process to understand how this representative of the local fauna works, as well as to develop small, precise finger movements. The following materials will be required for work:
- styrofoam egg;
- decorative wire;
- gray and black acrylic paints;
- simple pencil;
- plasticine of different colors;
- hot melt glue gun;
- pieces of young tree branches (for example, poplar);
- twine.

From tools - scissors and watercolor brushes. The work progress is step-by-step.
- On the styrofoam egg, draw a line with a simple pencil. It will visually split in two. Cut the egg along this line.
- Paint one half gray. To make the spider look like a cross, which is most common, paint a cross on the back of the future spider with black paint.
- Cut the decorative wire into 8 equal pieces. Connect their ends at one point using a thread. Bend the pieces of wire in the same way as the legs of a real spider would normally look.
- Blind 2 small spider eyes from plasticine, stick them to the front of the body.
- Using glue or plasticine, attach the legs to the body.
- Use twigs and twine from the garden to make an artificial spider web.
- Place the spider in the middle of the web.
The craft is ready. It can be placed on a solid base such as a piece of thin plywood with glue. The result is a three-dimensional relief composition.


Autumn spiders on the web
The craft is made in 2 stages: first - a spider, then - a web for him.
With threads
To make a spider from a cone, you will need, in addition to the cone, thin branches, plasticine. The branches are not used completely dry - this will prevent them from breaking if cracked.
- Cut 8 equal pieces of branches.
- Place brown (matched in color) plasticine in the cone in the gaps between the scales.
- Stick in and fix the segments of the branches in the plasticine. The break points of the branches can be fixed with plasticine.
- Roll small eyes out of plasticine balls and glue them to the front of the spider's body.


The spider is ready. To make a spider web, follow these steps.
- Connect and fasten the ends of 8 identical lengths of branches with tape or plasticine.
- Glue small balls of plasticine on the previously marked points of the branches.
- Wind the thread around the points where the plasticine is glued. It will prevent the thread from slipping.
- Place the spider on the maple leaf (center of the web).


The craft is completely ready. For children of grade 2, the process of making crafts from natural materials on the theme of autumn will be fascinating. You can take the materials with you to school. A spider can be made not only from a foam ball, but, for example, from the fruit of a walnut, horse chestnut, young spruce cones.
Spider eyes, as in the previous example, are made from pieces of plasticine. Spider legs are made not only from branches, but also from broken toothpicks or matches. To prevent the structure from falling apart, the material from which the legs are made is impregnated with epoxy glue. After the glue dries, they will retain their shape.
A particularly beautiful spider comes from a horse chestnut or hazelnut. After assembly, the product is painted in the image and likeness of a real, living spider-cross.


With maple leaf
The spider web is complemented with a real maple leaf or its imitation, cut from reddish-yellow wrapping or decorative paper. These elements - one or more - are glued to the web, assembled by hand according to the previous instructions.

How to make from foil?
This craft is a real decoration of the interior of not only a nursery, but also any room. This activity instills in the child an artistic taste, allows him to develop his creative imagination. The craft is also interesting for adult connoisseurs of original jewelry. The main material is food grade aluminum foil. From the tools you need scissors. Step by step, this process looks in a certain way.
- Unfold the foil and cut a 14 cm piece.
- Place this piece horizontally.
- Cut 4 strips of 5 cm - they are used to make spider legs.
- Crumple each strip along the length as tightly as possible until you get an elastic and firm tourniquet.
- Roll the remaining piece of foil into a ball or oval - it will serve as a body.
- Place the flagella in the middle of the foil wad so that they protrude along the edges.
- Fold the edges of the oval so that the flagella are fixed in the center.
- Continue to soften the lump so that the body takes the desired shape. At the same time, the abdomen will stand out against the background of the entire product.
- Bend the flagella in an arc - the spider's legs will be clearly visible.
The assembly is complete. The craft is placed on a cobweb, attached to a curtain, and placed on a large flower.


For information on how to make a craft in the form of a spider, see the next video.


