Variety of spring crafts

Spring is a time that inspires creativity for both adults and children. Therefore, many do with their own hands not only school crafts, but also gifts for March 8, Easter or Victory Day.


What to make out of paper?
You can use different materials to create original spring crafts. The most common and affordable is plain colored paper or cardboard. For work, you can take double-sided or single-sided paper, corrugated paper, as well as special blanks for scrapbooking. The choice of crafts that can be made for a boy or girl is very large.


Voluminous lawn
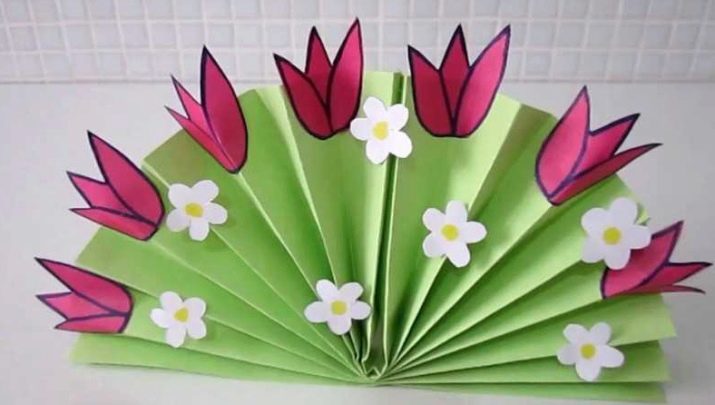
A bright green lawn decorated with flowers will be a great craft for kindergarten. To create it, the baby only needs paper and glue.
The base of this spring composition is made from a double-sided sheet of colored paper. It needs to be folded like an accordion. The stripes should be straight. The resulting workpiece is carefully folded in half. The inner edges of the figure must be glued together so that you get a semicircle.
To decorate this craft, you need to cut out several daisies and tulips from paper. All these details are glued to the green base. The lawn turns out to be voluminous and beautiful.
Caterpillar
Even preschoolers can cope with the creation of this simple craft. It is made of double-sided colored paper. The process of creating a caterpillar consists of several stages.
- To begin with, you need to cut 10-20 circles of the same diameter from colored paper.
- Each of these parts should be folded in half.
- Cut a strip of a suitable size from paper of the same color.
- Further, all round parts are attached to it. The bottom of the circle is glued to the strip. The next part is placed on top of the previous one.The closer they are to each other, the more voluminous the caterpillar turns out.
- A circle of a different color must be attached to the front of the body. The eyes of a caterpillar and her smile are painted on the face. They can also be made from colored paper or cardboard.
- Short paper antennae are attached to the top of the caterpillar.


Butterfly
You can easily make a bright butterfly from a toilet paper roll. It turns out to be voluminous and stable. For decoration, crafts use ordinary colored paper or self-adhesive.
To begin with, you need to cut out the wings of a butterfly from thick cardboard. They should be large and flat. The wings are pasted over with colored paper on both sides. Do the same with the toilet paper roll. After that, the wings of a butterfly are glued to it. To do this, you can use PVA glue or double-sided tape.
Decorate the butterfly with short antennae and small eyes.
If desired, the child can additionally decorate the wings. There are many decor options: for example, paper flowers, bows, pieces of colored felt.

Sun
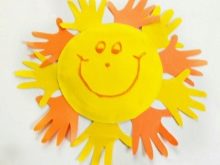
Working on this craft can captivate even the smallest creators. The process of creating a bright sun consists of several steps.
- The first step is to cut an even circle out of thick yellow cardboard.
- After that, you can start creating rays. All you need to do for this is to circle the baby's palm on orange double-sided paper.
- These blanks must be carefully cut out, then glued to the back of the craft.
When the sun is ready, you can add a smile and eyes to it.


Bouquet
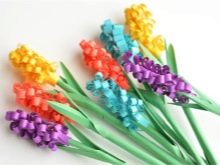
To create a voluminous bouquet, you need to use thick double-sided paper or cardboard. You can decorate the craft not only with paper flowers, but also with felt ones.
The base of the bouquet is made from a sheet of green paper. It must be folded in half diagonally. Several cuts need to be made on the basis of the sheet. Untouched edges are glued together. This workpiece must be carefully twisted into a spiral.
Small flowers are cut out of colored paper. They are attached to the base of the bouquet with glue or double-sided tape.


Rainbow
A bright volumetric rainbow made of paper is made of double-sided colored cardboard. From it you need to cut 7 equal strips of suitable colors. All of them must be glued together, attaching each subsequent one to the previous one.
4 identical clouds are cut out of thick blue cardboard. Two clouds are attached to the edges of the rainbow at the top, and two more at the bottom. When the base of the craft is ready, it is gently bent, giving the rainbow the shape of an arch.
If desired, the blue base of the clouds can be decorated with white cotton wool. In this case, the clouds will look even more beautiful and graceful.


Snowdrop
Such a voluminous snowdrop is a great craft option on the theme of spring. The application can be taken to both kindergarten and school.
It is done very simply. A sheet of white paper should be cut into three strips of the same size. The ends of each of them are carefully glued together. These three loops need to be connected together, forming a small bud. It is glued to the top of the cardboard sheet.
The edge of the bud must be covered with a semicircle cut out of green paper. The same material is used to create leaves. They can be of any length. The bottom half of each leaf should be coated with glue and attached to paper. The snowdrop stem can be simply drawn with a marker or pen.


Cloud
Another interesting spring craft that looks bright, cheering everyone up with its appearance is a cute cloud. Here's how easy it can be.
- To begin with, two identical parts of the cloud are cut out of thick white paper.
- Colored double-sided paper should be cut into long thin strips of equal width. These rainbow details are glued to the first part of the cloud.
- The second part of the cloud is attached on top. To make it look more cheerful, you can draw eyes and a sweet smile on its surface.
The resulting cloud can be hung on the wall in the child's bedroom.


the Rose
Even a child of 5-6 years old can make such a craft. To create it on colored paper, you need to draw a spiral, which is cut along the line and twisted into a neat bud. The edge of the rose is coated with glue. The bud can be fixed on a skewer with tape or glue.
Having made several of these flowers with your own hands, you can form a beautiful bouquet from them. It will be a great addition to a gift for mom or grandmother.

Felt ideas
Works from this material are interesting to do for both children and adults. Felt makes very beautiful soft toys, appliques and flowers.


Spring wreath
This simple hanging wreath is a great decoration for a kid's bedroom. To cope with the creation of such a craft is within the power of a 3-4 grade student. The process of making a bright spring wreath consists of several stages.
- First you need to prepare the basis of the craft. A ring is cut out of thick cardboard or a fragment of an old box.
- You can decorate the frame of the wreath with colored ribbons, pieces of fabric or threads. It is necessary to wrap the ring with any material of your choice, securing the free edges with glue.
- When the wreath frame is ready, you can start creating flowers. They are cut from sheets of thin felt. Blanks of different sizes are fastened together and decorated with colored beads. Flowers are voluminous and beautiful.
- Leaves are cut out of green felt. They are attached to the base of the wreath along with the flowers. You can decorate in this way the whole wreath or only half.
When the craft is ready, you should attach a colored tape to it. It is for her that the wreath will be hung in the right place.


Felt flower
Small spring flowers can be made from felt scraps left after sewing a large toy. For this, the material must be cut into thin strips. The edges of each of them are carefully trimmed to form petals.
A workpiece with wavy edges should be twisted into a tight spiral. After that, it must be sewn through, connecting all the petals. You can sew a beautiful light bead to the top of the flower.
Such a small flower can be used to create voluminous applications or bouquets, or you can make a beautiful brooch out of it.

What to make from plasticine?
Working with plasticine perfectly develops children's imagination and fine motor skills. When looking for a craft option that can be made with a 4-5 year old child, you should pay attention to several interesting ideas.


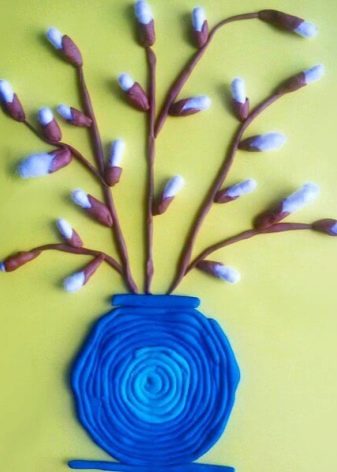
Spring bouquet
Even a preschooler can make a volumetric plasticine application with his own hands. For work, the child will need plasticine, cotton wool, paints and colored cardboard. The craft creation process is pretty simple.
- To begin with, on a sheet of cardboard you need to draw the outlines of a flowerpot and branches.
- A vase is made of blue and blue plasticine. To do this, thin flagella should be twisted from a well-softened material. These preforms are then spirally attached to the paperboard.
- It is worth sculpting thin long branches from brown plasticine. They also stick to paper.
- Small pieces of cotton wool should be rolled into capsules and slightly tinted with blue paint.
- A brown petal is attached to each such part.
- These blanks are located in different parts of the branches.
The volumetric applique can be decorated with a suitable plasticine inscription. In this case, it can be used as a gift to a loved one.
Snail
To create this simple craft, in addition to plasticine, the child will need matches and a beautiful shell. This figure is made very simply.
First, you need to mold the body of a snail from pink plasticine. It should be slightly tapered at the end. A small shell is attached to the body in the middle. To make the snail look brighter, the shell should be decorated with neat yellow plasticine circles. They are attached to the shell in a chaotic manner.
2 matches, broken in half, are attached to the snail's head. Small yellow balls should be fixed on their tops. Black and white plasticine eyes will complement this craft.

ladybug
It only takes a couple of minutes to mold a small ladybug. To create it, you need to prepare plasticine in three colors: red, black and white. The workplace should be covered with oilcloth.
A ball of a suitable size must be rolled out of red plasticine. The ladybug head is made of black material. Big eyes are attached to it. The mouth of this cartoon character can be drawn with a stack. When the base of the figure is ready, it remains only to decorate it with a thin strip and plasticine circles.
The craft, despite its simplicity, turns out to be very cute.

Easter Bunny
Preparing for Easter, a child can sculpt a little bunny out of plasticine. It can even be taken to an exhibition in a school or kindergarten. The work consists of several stages.
- To begin with, you need to sculpt the body of a bunny from white plasticine. Its shape resembles a drop slightly elongated upward.
- The head of the animal is made from a smaller piece of plasticine. Eyes and a nose are attached to it.
- You need to stick a small tail to the back of the figure. This will immediately make it more stable.
- The hare's lower legs consist of two circles and two sausages. They are interconnected and attached to the lower torso.
- Two more short legs are attached to the top of the craft.
- Hare ears are made of white plasticine and decorated with small pink stripes. The joints of the parts must be carefully smoothed.
The finished craft looks attractive. You can supplement it with carrots or an Easter egg made from the remains of plasticine.

Options from scrap and natural materials
Spring crafts are also made from natural materials and from what you can find on hand. To create their works, children can use tree branches, colored buttons, trimmings of unnecessary fabric. Crafts from this raw material are also very beautiful.


Panel from egg trays
Many beautiful things can be made from this material. One of the easy crafts is a panel with flowers. Here's how to do it.
- First, the egg container must be cut into separate cells.
- Their edges must be carefully trimmed to form petals.
- Each part should be coated with several coats of paint.
- When the flowers are dry, you should fasten a button or several beads in the middle of each of them. They are glued to the bottom of the cell with glue.
- Flower stems can be made from thin strips of cardboard or wire wrapped in corrugated paper.
- When they are ready, they are fixed to a canvas or piece of cardboard. On top are flowers painted in different shades.
You can decorate such an original panel with a colored bow of any size. The resulting picture will be a great gift for someone close.


Picture of cereals
To create this craft, you can use different types of cereals. The basis of the picture is made of millet, rice and buckwheat.
Getting started, draw a large butterfly on a piece of paper. All cereals should be prepared and filled into separate containers. After that, you can start working on the painting. Each of its parts must be well coated with glue and sprinkled with cereals of a suitable color. The layer of grains should be quite dense.
When the butterfly is ready, the background of the picture is filled with rice. You can decorate insect wings with colored beads or rhinestones. This will brighten the figurine.

Summing up, we can say that spring crafts can be made from almost any material at hand. The main thing is to approach the process of their creation with imagination.
For information on how to make a spring craft, see the next video.


