Do-it-yourself hot coasters
Today in stores you can find a lot of varieties of hot coasters. Both cheap and more expensive options are on sale. You can make a good hot stand with your own hands. In today's article, we will learn how you can do this.
How to make from fabric?
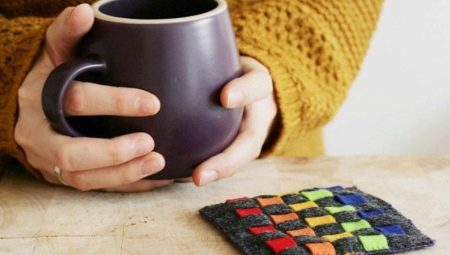
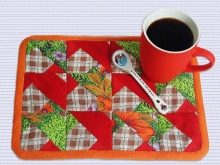
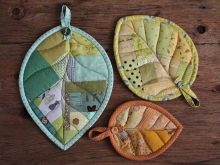
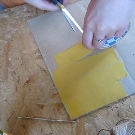
Excellent pads for hot food can be made from various types of fabrics and felt. These materials make charming and practical products. They are made quite simply, not requiring a lot of free time. If you plan to make a hot stand out of fabric or felt, you should take a closer look at the popular patchwork technique. It provides for the combination of textiles with different colors and patterns. A combination of woven patches with different textures and surfaces is possible.
Coasters made using the patchwork technique will become a spectacular decoration for any kitchen. To make such things, you can use not only the sewing method, but also crochet or knitting. Cool coasters for hot dishes are made of felt. For example, consider a master class on modeling such an interesting and attractive product.

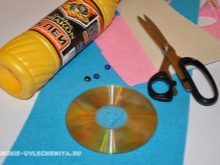
To make felt lining for hot items, you need to prepare:
- thick felt with a density of 3 mm (it is worth preparing the material in blue, beige and white);
- a small piece of black skin;
- unnecessary CD;
- thin cardboard sheet;
- pencil or felt-tip pen;
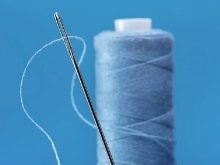
- a blue needle and thread;
- transparent glue (a composition like "Dragon" is suitable);
- scissors with sharp blades.
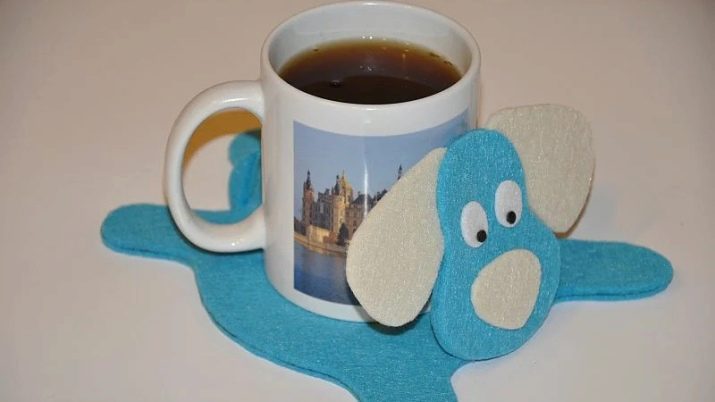
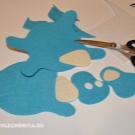
The original stand from the listed materials can be made in the shape of a cute dog. Let's take a look at the step-by-step instructions for modeling such a pretty little thing.
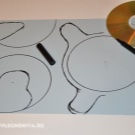
- On a cardboard sheet, circle the circle of the CD, put a point in the center.
- The drawn circle is folded in half to form a line of symmetry. Draw the front and back legs of the lying puppy.
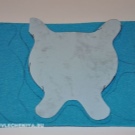
- They make a second such circle. The muzzle of the dog will be formed on it. The height of the head should be no more than 2/3 of the diameter of the circle. The lug height parameter should be smaller.
- The head template must be carefully cut along the contour. At this stage, it is worth applying with a pencil and cutting out the nose, eyes and mouth of the future dog stand from the cardboard.
- Further, all other template elements are cut out.
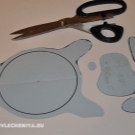
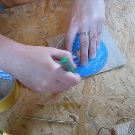
- By means of templates, the contours of all components are transferred to a felt base. There should be 2 blanks for the body and head of the puppy on a blue material.
- Next, you will need to transfer two ears and one composite part in the form of a nose to beige material. The eyes are transferred to white felt.
- All composite blanks will need to be cut out of felt.
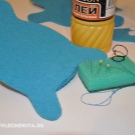
- Sew the head to one of the parts of the dog's body. It is first necessary to glue the connection areas of the parts. The seam should be made as inconspicuous as possible on the front.
- A transparent adhesive should be applied along the perimeter of the product's body. The glue may soak into the felt, so you will need to reapply it.
- If there is no suitable transparent glue, all the components can be connected to each other by means of even overlock seams.
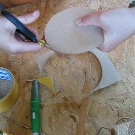
- You will need to fasten all parts of the felt puppy together by placing a disc in the central part of the structure.
- Eyes and nose are glued. Pupils for the eyes of the dog are formed from a piece of black leather using a hole punch.
- A teardrop-shaped element is cut out of the remaining pieces of blue felt for the dog's tail. It is cut in half.
- These components are connected together with glue, and then fixed in the appropriate place.
It is necessary to choose a place for fixing the pupils - the expression of the animal's muzzle will depend on this.
Rope weaving
A very unusual and beautiful hot stand can be created from twine. Wickerwork will become a fashionable addition to many interiors. It can be made, for example, using the macrame technique or other popular methods. To make a lining by weaving from a rope, you need to stock up on the following components:
- any cardboard that can hold the correct shape;
- cord - any will do, but jute and linen twines are the best;
- Double-sided tape;
- pattern and pencil - you can use the same unnecessary CD as a pattern;
- scissors;
- glue gun.

Let's analyze the step-by-step instructions for making a fashionable wicker base for hot items.
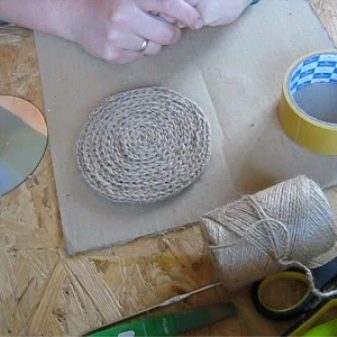
- First, a mold is applied to the cardboard sheet. It is necessary to mark the approximate dimensional parameters of the future product. Particular accuracy is not required here, the main thing is to outline the dimensions of the craft. Then double-sided tape is glued on top. They should cover the entire area of the stand. There should be no empty areas.
- The area covered with tape must be cut off, so that the workpiece remains in size slightly larger than the product itself.
- The prepared cardboard piece is turned over to the back side. Using a mold, it will be necessary to outline the shape of the future stand. It is necessary to check if the form is placed correctly before proceeding with the sketching. There should be scotch tape on the back of the entire area.
- Then the cardboard is cut clearly along the line... Thus, the basis for the future stand will be prepared. At this stage, you must act carefully.
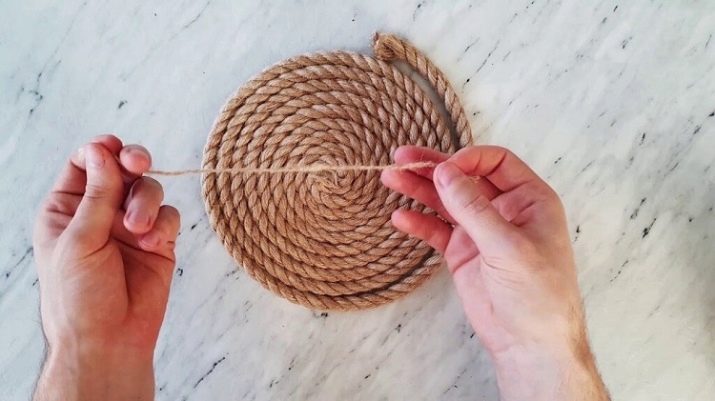
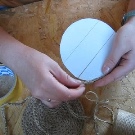
- Now you can start weaving a kind of chain of twine... You should make a loop at the very beginning, and then make other loops, pulling a lace through them.Thus, it is necessary to weave the stand. All operations are much easier if you use a crochet hook. If this tool is not there, you should not worry - the quality of work will not suffer from this.
- Make sure the chain is long enough. When it's ready, you don't need to cut off the tip. It is not so easy to determine the exact length, but if necessary, it will be possible to braid or dissolve excess parts. Now you need to remove the protective layer from the double-sided tape in order to do the fastening.
- You need to start gluing from the very edge of the base. The rope is pressed very neatly around the perimeter. When the circle is traversed, a spiral placement inside is needed.
- Work should be continued until the cord reaches the central part. The entire surface of the base will be covered with rope.
- After that, an ugly butt will remain. For him, you will also need to weave a chain, but gluing should now be done using a glue gun.

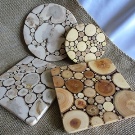
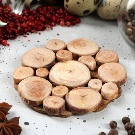
Crafts made of wood or plywood
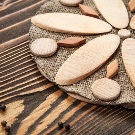
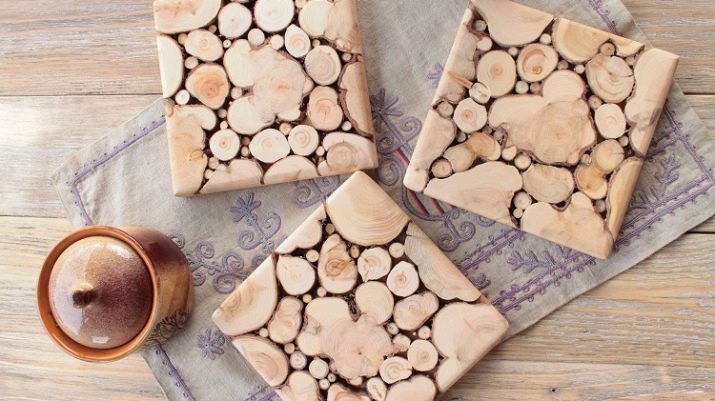
Chic stands are made from wooden components, for example, from matches, ice cream sticks, pieces of chipboard, as well as wood cuts. The latter are especially attractive and presentable in appearance. They are sold in many stores, but they can be made very easily by yourself.
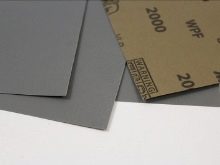
Plum, apple or oak cuts are best for modeling a hot plate. The diameter of the parts can be from 3 to 6 centimeters. To make a stand from a saw cut, you will need to use a standard set of tools that are found in almost every home:
- hacksaw for wood;
- a sheet of sandpaper;
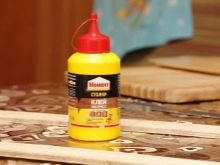
- glue;
- canvas fabric.

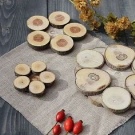
To make an original and stylish thing from a saw cut of wood, you will need to resort to the following steps.
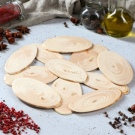
- First you need to pick up branches of a suitable diameter.
- Next, they cut into round elements. Their thickness should be between 3 and 5 cm. You can use a hacksaw for cutting.
- Each of the parts must be thoroughly sanded from the front with sandpaper.
- The bark should be peeled off. If it fits too tightly, then you can leave it.
- The parts are glued together so that each of the round elements has a pair of points of contact. The joints are coated with ordinary PVA glue.
You can also resort to a different method of joining parts. For these purposes, a piece with the appropriate dimensions is cut out of the canvas material. Wood components are glued to this base.

More ideas
Very good homemade pads for high-temperature items can be made from other materials and components. Cool options come from rocks, clay, plastic lids, ceramic tiles, shells, newspaper tubes, coffee beans, and other handy tools.
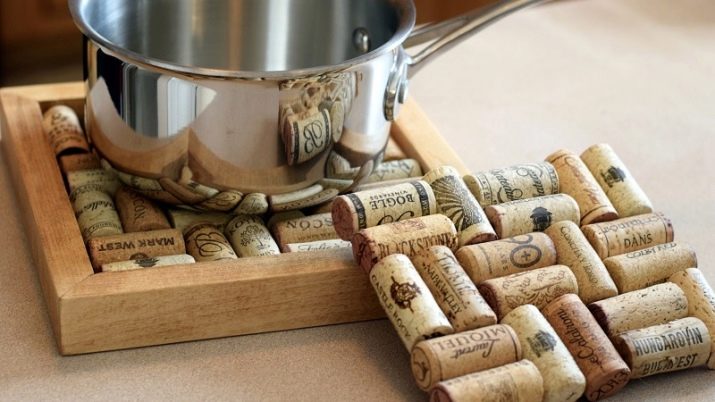
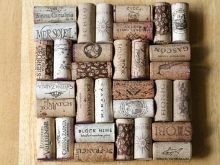
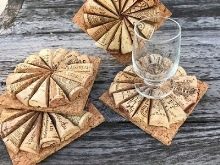
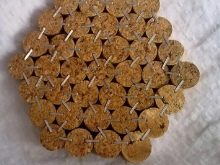
An original solution - a stand made of wine corks... They can be used to craft specimens of various sizes and shapes. The most convenient way is to glue the plugs together with a glue gun. Such a stand can be based on a dense fabric. Also, individual elements of such a craft can be connected with a staple gun.
This fastener should be made on all sides of the cork product, otherwise it will not keep the correct shape.
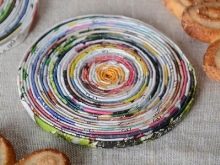
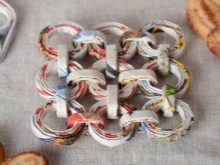
From newspaper tubes, you can make an original and budget holder for a mug. Modeling such crafts can be done with children. In the simplest version, the tubes formed from colored magazines must be crumpled into strips, and then sequentially wound in the form of a disk. Fastening this craft can be done with PVA glue, but it will be much easier to work with hot glue, because it hardens faster.
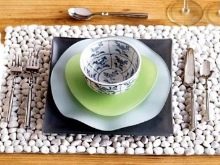
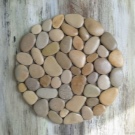
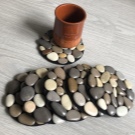
If you want to effectively decorate the table, you can make a creative stand from a piece of tiles, pebbles or shells. For such a craft, you need to prepare a suitable base.It can be a piece of thick fabric, plastic, or plywood. The base can be either rigid or flexible.
In this case, sealant, cement, epoxy or simple glue can be used to hold the elements together.
The assembly of a fashionable stand from the indicated elements is carried out in this order.
- First, you will need to very carefully select the materials from the listed options. If sea pebbles are used, then it is advisable to choose flat pebbles that are approximately equal in thickness and size. Their number should be enough for a craft.
- Now you need to find a good foundation. If you want to take a solid version, then it is better to use wood, plywood or plastic. If it is soft, then thick denim, carpet, rubberized rug will do.
- Depending on the selected components, the bonding component is also selected... If a flexible base was chosen, it is best to use a waterproof construction sealant. It can be either transparent or colored. Special rubber glue will also work. On a solid base, you can use epoxy, liquid nails, and even cement mortar for fixing.
- All components of the future stand are degreased, and then laid out, forming the planned attractive ornament. After that, you can lift each pebble or shell, coat it with glue and fix it in the chosen place.
- You can also use another technology, in which in a special silicone mold epoxy is poured into half the height of the pebbles, after which all the planned components are placed in it. The finished product of this type will have a rigid structure.
- If the stand has a flexible base, it will be possible to use it only after the adhesives have completely dried.
A substrate on a solid base will make it possible to seal the joints between the individual elements of an improvised composition by grouting the joints used when laying ceramic tiles.


For information on how to make cute coasters for hot dishes from scrap materials, see the next video.


