How to weave a braid around a girl's head?
Braiding has become very popular. It all started with simple braids, two or one, but now there are many different types of weaving. It has become relevant to braid hair for little girls both every day at school, kindergarten, and for celebrations. Thanks to the braiding around the head, it is possible to avoid hair getting into the eyes. Braids are suitable for girls with long and medium curls. A variety of weaving techniques will allow you to combine them and create wonderful hairstyles.

Required tools and fixtures
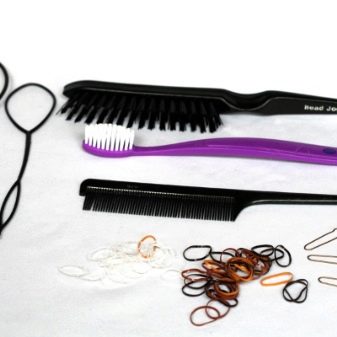
To make everything work out beautifully and correctly, you need to prepare tools and other means:
- to comb and separate the strands, you will need a plastic comb with small teeth and a thin pointed handle;
- special clips or large crabs to secure loose hair for a while;
- elastic bands, invisible hair pins, hairpins with stones, flowers, beautiful hairpins and other accessories;
- styling products (varnish, mousse), which will allow you to keep your hairstyle for a longer time.
Weaving types
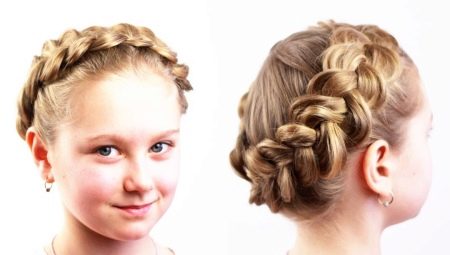
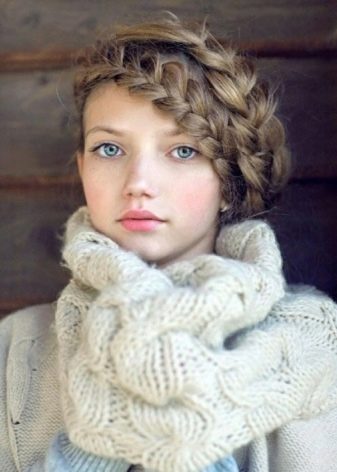
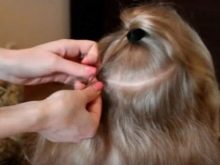
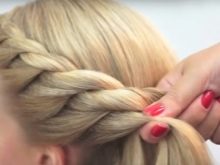
Circular french braid
Let's take a step-by-step look at how to correctly braid a circular braid for a little girl.
- First, comb your hair and part it so that one part is larger than the other.
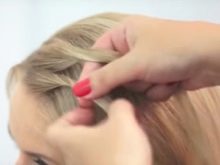
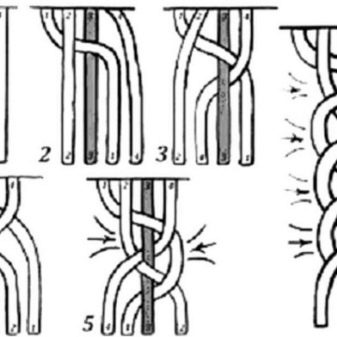
- Then part a small lock of hair and divide it into three equal sections. Weave these strands together like a regular braid, putting one of the side strands on top of the middle one, and on it - a free second side strand. On the next weave, add the rest of the hair gradually.
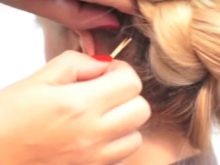
- Once you reach the ear area, continue to weave the hairs at the back of the head, creating a circular weave. At the very end, braid your hair and tie it with an elastic band.Secure the braid to your head with hairpins.
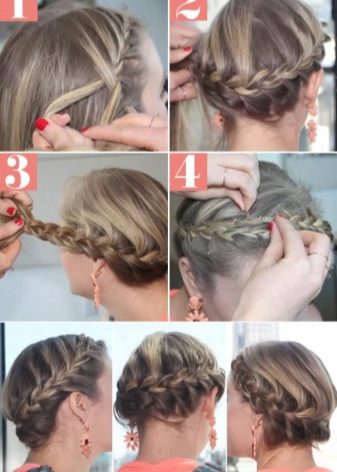

You can leave this hairstyle like this, or you can decorate it with accessories with stones or flowers. By the same principle, you can also braid a reverse braid, or, as it is also called, an inverted braid. The method consists in intertwining the strands together, not on top of each other, but underneath.
This kind of braiding looks even more attractive, especially if the hair is very thin, gently pulling the strands, you can add volume to the hairstyle.
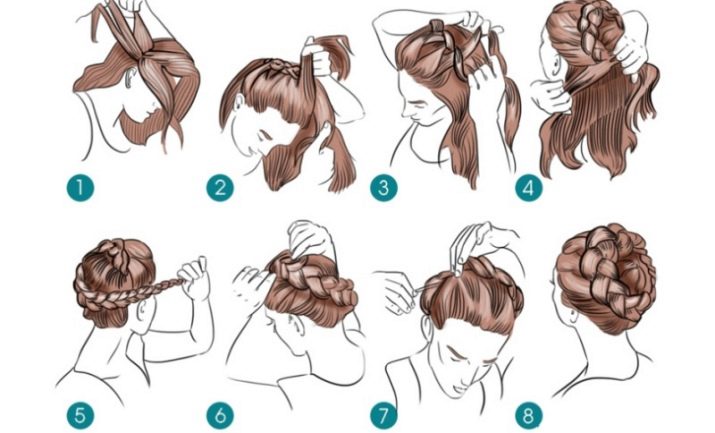
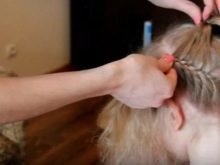
"Snail"
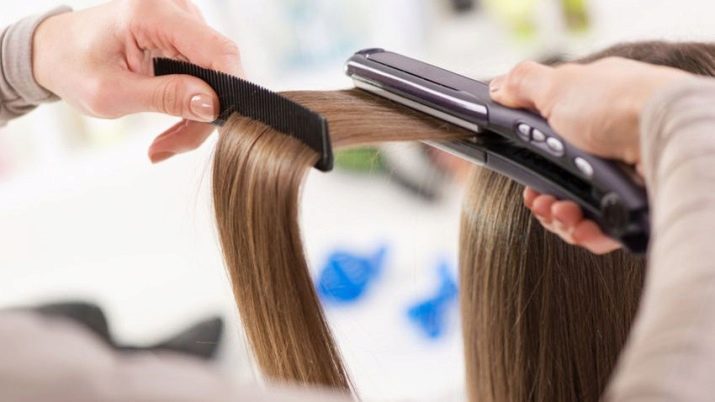
This weaving will take a little more time. Best to braid on straight hair.
If your child has them curly, then after washing, use a balm, a special serum, or straighten it with an iron.
A step-by-step weaving pattern is presented below.
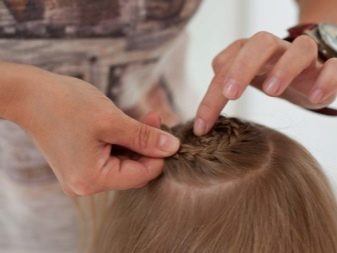
- You need to start weaving from the top of the head. Start by separating a small bun of your hair and tying it with an elastic band. Secure the remaining hair so that it does not get in the way or tangled with the hair that has already been separated.
- Unfasten the center ponytail, take a small bun out of it, and begin to weave a regular braid, adding strands along the outside of the braid. Having made a circle, then another, do not forget to pull the first strands to the crown so that bald patches do not form.
- When you run out of hair at the top of your head, pin it in for a moment.
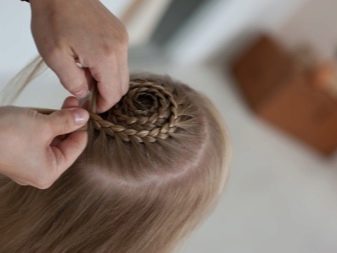
- Loosen the hair evenly around the head, fasten the rest again. This will be the next turn of the circular braid. The thinner the strands are when added to the weave, the more "snail" turns will be.
- Loosen the tied hair and continue adding strands, making sure that the braid is the same distance from the ears on either side of the braid. For neatness, do not forget to keep track of the thickness of the strands, they should not be too wide.
- The last turn can weave a bang into itself, if there is one, or you can leave it without affecting it.
- Usually weaving ends on the side, completing a regular braid and securing it with a silicone rubber band. Carefully using pins or invisible pins, you can pin it in the direction of twisting the "snail".
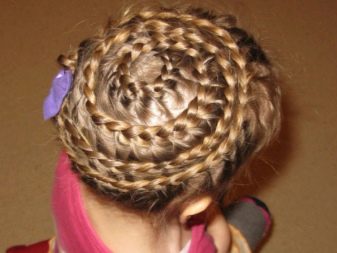
It may not work the first time, but with a little training, the hairstyle will not be difficult and take a lot of time.
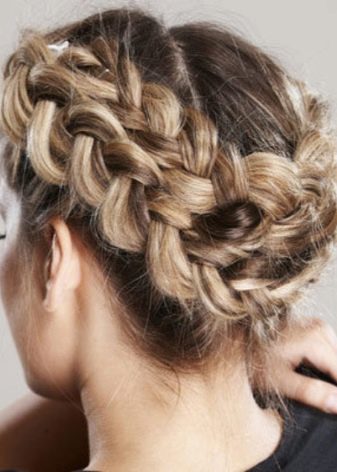
"Basket"
One of the most common and interesting hairstyles for little girls and adult girls. Best for thick hair.
If they are thin, then comb them a little or use the additional "corrugation" attachment on the iron, which will increase the volume and make it unusual.
Let's look at the principle of weaving step by step.
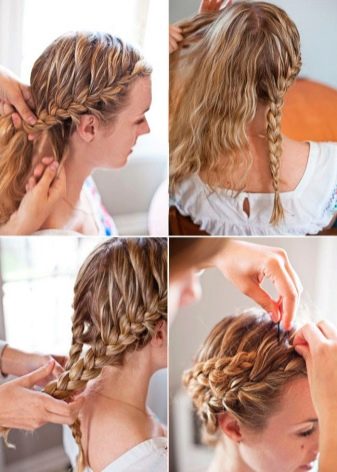
- First, separate the hair at the crown of your head and gather it by tying it with an elastic band. The result is a parting in the middle of the head with loose hair.
- We will start weaving from the back of the head. Separate a small bun of hair and divide it into three sections. Weave the braid upside down, intertwining the strands not on top of one another, but underneath. Do not forget to add hair to the lower section from the general hair from the bottom, and from the top from the ponytail.
- Thus, continue to weave in a circle until where you started. When finished, tie the end with an elastic band and tuck it into your hair.
- Using your fingers, gently stretch the weave a little, adding more volume. Optionally, you can decorate with flowers or hairpins in a circle.
"Basket" - burn
Comb and divide your hair evenly in half before braiding. Take a small strand and divide it in two, weave them together, then add strands of hair from the outside one by one. Weave in a circle, when finished, twist the remaining tail into a plait and use hairpins or invisible hairpins to secure it, hiding it in a ready-made "basket" on the head. This hairstyle can also be decorated with flowers on the inside of the weave. Pull the outer edges of the bundle slightly for volume.
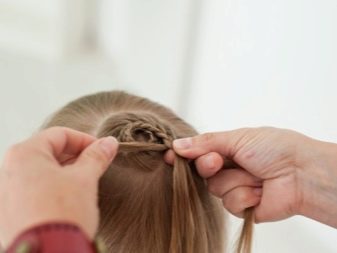
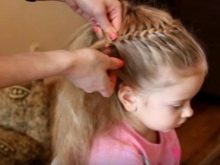
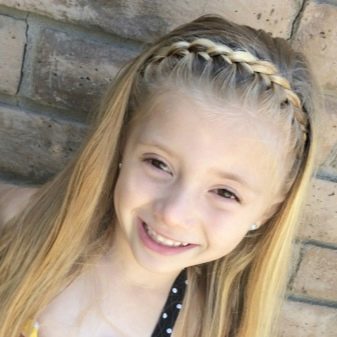
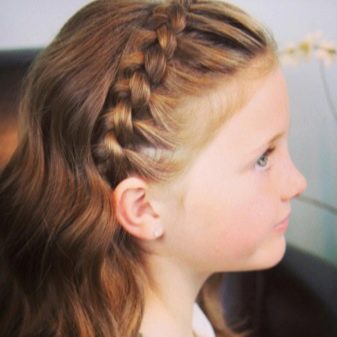
Bezel
Not all curls will take part in this weaving. To do this, comb them back and part off the hair at the left ear.Divide it into three equal strands and start weaving a regular spikelet, adding small thin strands on both sides. You can finish braiding at the right ear by tying a tail, wind the rest of the hair or leave it straight.
The hairstyle will also look good if you braid the braid to the end and twist it around the ponytail, which is secured with an elastic band.
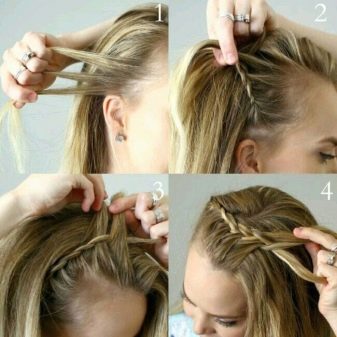
By the same principle, you can also braid an inverted braid, just do not forget to pull the strands at the end, and also decorate with accessories of your choice.
If there are bangs, then they can also be woven or left untouched.
A braid around the head for the lazy
It is best to braid long hair, since after braiding it will be necessary to wrap the braids around the head, securing with hairpins or invisible.
- Comb and part your hair into two halves, starting from the frontal part, ending with the back of the head.
- First, braid a regular braid on one side, then on the next. Tie both small silicone rubber bands, stretch a little.
- Transfer one of the braids to the opposite side, securing well. Do the same with the rest, hiding the protruding tails.
The hairstyle is ready, it does not take much time and does not require special skills.
To learn how to make a beautiful braiding around a girl's head, see the video.


