All about the carriage turnbuckle buttons

The carriage coupler method for decorating furniture has long been incredibly popular, but with the advent of new, more high-tech design methods, it has somewhat lost its relevance. Furniture, qualitatively sheathed using this technology, has a rather significant cost, given the very process of its manufacture. We will talk about the features of buttons for a carriage coupler, about their types, as well as how to make accessories yourself, tighten and fix it yourself.


Peculiarities
The capitonné technique appeared in France a long time ago. For several centuries it has been used to cover the walls and seats in carriages. Thanks to the soft upholstery, it was very comfortable to travel in them, which could not but delight the aristocrats. In addition to the aesthetic appearance and comfort, such a design made it possible to insulate the carriage and increase sound insulation.
A similar technique was successfully used later for decorating furniture, interior decoration. A similar technology is used at present for upholstery of doors, entire walls or individual zones, headboards of beds, furniture.


Among the advantages of a carriage coupler, it is worth noting a number of factors.
-
Convenience and comfort.
-
Easy to clean... Furniture or other surface decorated in a similar technique can be simply wiped or cleaned with a vacuum cleaner.
-
Durability... Such upholstery is characterized by increased strength, which affects the durability.
-
Practicality... The possibility of replacing the top skin without changing the base and soft layer.
Furniture upholstered in this technique looks very respectable, which affects the overall look of the interior.The choice of a coach tie for wall upholstery allows you to give the surface an interesting look, without requiring unnecessary leveling of the wall. Moreover, such a finish creates a layer of additional insulation, has sound-absorbing qualities.


A feature of the carriage coupler is the presence of a symmetrically repeating ornament made of buttons recessed into the base, connected by folds. The depth of the pattern and its size will directly depend on the thickness of the foam rubber filler.
It should be noted that this technology has not undergone any significant changes over the entire period, which indicates its durability. The drawing created by the masters can be different: it is performed in the form of rhombuses, squares, triangles with three-dimensional shapes.


What are they?
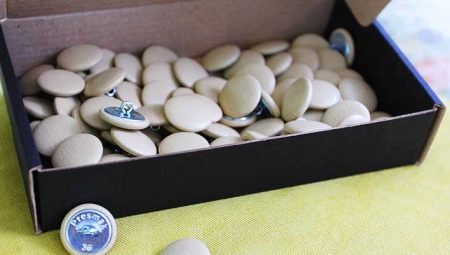
The fixing materials used for the finished surface are furniture elements (buttons); it is also advisable to use nails with a wide head. Their hats, as well as the buttons themselves, are usually covered with material, more often they use leather or fabric used for upholstery.

Specialists involved in the creation of furniture fittings can make it by hand, or use a special press for this purpose. The carriage coupler can be made in different ways, so the craftsmen choose the most convenient option for themselves.
The finishing can be done in 2 directions.
-
Overwrite the workpiece with material, according to the dimensions, after forming the selected ornament on the prepared surface.
-
Make upholstery for the base, using small pieces of material of the required size. To do this, use pieces of textiles, leather counterparts. Although this type of real experts do not consider it correct, calling it a fake.


Correctly selected material will allow furniture to look more impressive. For this, leather, eco-leather, as well as materials with a velvety surface in the form of velor, flock or velvet, as well as jacquard, are more suitable. But silk is an unsuitable material for this. Although the canvas looks very beautiful and has a pleasant sheen, it does not withstand the pressure from the fittings and will quickly lose its attractive appearance.


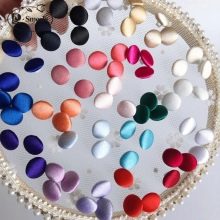
At the same time, buttons are an equally important element of the decor. They can be of different sizes and diameters, look like rhinestones or diamonds. You can often find options made of specially prepared glass, models in the form of roses, LED products.
A separate category can be distinguished nails... The use of such fittings will allow you to add elegance to the interior.


Fittings blanks have different parameters. The most popular are models with a diameter of 12, 19 and 22 mm. According to these dimensions, each product is assigned an individual number. The diameter of the product is chosen depending on the thickness of the material used.
The fittings used for the capitonne are characterized by increased durability. The base of the buttons is made of steel, the loop for it is made of strong wire with a thickness of 1.5 mm. Thanks to this, a product is obtained that can withstand significant loads.
The cup itself is usually 1 mm less than traditional fittings, which allows it to be fitted with the selected material.


It should be noted that buttons or nails are used at the final stage. The tightening is done with threads. In this case, the fittings perform only a decorative function.

How to do it yourself?
To make homemade buttons for upholstery, it is worth doing the work, guided by certain recommendations. To do this, you should purchase blanks in advance by visiting construction or furniture stores that sell such accessories. It is advisable to take enough blanks, with a margin. And you should also choose products with an iron ear, since plastic options will quickly break.To save money, you can also use simple metal buttons, because the blanks will cost more.

It is usually customary to cover the buttons with the material used for the upholstery of furniture.
The manufacture of fittings is as follows.
-
It is necessary to take the material for the upholstery, and cut out circles from it.... Their diameter should be twice as large as the metal workpiece.
-
Then you should take a thick, dense thread so that it cannot break during the sheathing process. The thread is threaded into the needle and fixed with a knot at the end. Having retreated 2-3 mm from the edge, stitches are made, moving in a circle, sewing the workpiece.
The result should be a "basket" into which you need to insert the workpiece, tighten it and tie it with a thread. The thread is pulled together and secured. Outwardly, such a homemade product will not differ from a factory button.
From the seamy side, homemade fittings will look like an accordion, which is not very attractive, but this will not affect the result in any way.


Fixation
The buttons are fixed in a certain way.
-
You need to make a small hole in the panel following the pattern.
-
Next, you need to make cuts in the foam rubber and lining. During assembly and when gluing, they must match.
-
Using a drill, form the holes. It should be taken into account that the holes on the plywood should have a smaller diameter than on the foam rubber.
-
Next, the upholstery material is applied. It is laid out evenly, without compression of the foam rubber, since it can break later when pulled.
-
After that, you need to insert hooks into the holes, and bring them out through the holes in the plywood, then attach a thread or cord of the required thickness to their edges.
-
A button is attached to each hook on the front side.
-
Then you need to pull the cords from the inside out. This will cause all buttons to drop to the same depth and the upholstery will lock in place.
-
The cords from the seamy side are fastened with a stapler. It is better to fasten it in a zigzag, and cut off the excess ends.

It is important to do all the work correctly and accurately. When pulling on hooks and sewing on buttons, it is advisable to use an air gun. Using it, the work process will become less laborious and take less time.
For information on how to make buttons for a coach tie, see the video.


