The most interesting handicrafts for the home: master classes
People who are fond of needlework can make a large number of interesting things at home to decorate the interior. Both children and adults can easily learn how to create original crafts with their own hands.
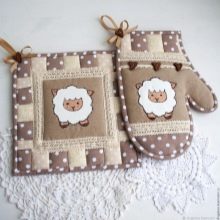
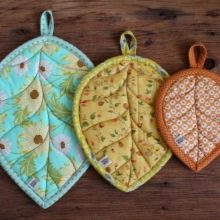
We make potholders
Homemade potholders can be made from both colored fabric and yarn. There are many interesting options for creating such wonderful kitchen accessories.
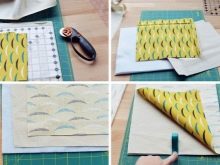
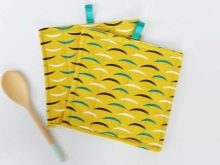
Classic square potholder
A novice master should pay attention to the simplest schemes. The process of creating a classic square product is not difficult.
- The first step is to decide on the size of the future tack. Draw 2 identical squares on a piece of cloth of a suitable color.
- Two squares of the same size should be cut out of padding polyester.
- From a piece of tape it is necessary to cut off the part that will become the base of the loop.
- The fabric squares must be folded right-side up.
- Pieces of padding polyester should be put below. In the middle, you need to fix the loop.
- The edges of the squares must be carefully secured with pins.
- Next, the tack must be sewn on 3 sides.
- The finished product must be turned inside out. Open edges should be carefully tucked up and sewn.
Such a bright product will become a real decoration of the kitchen. Square potholders can be sewn from plain fabrics and from printed ones.

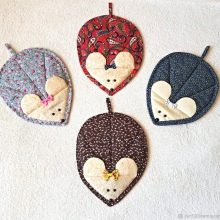
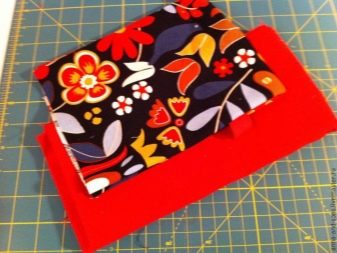
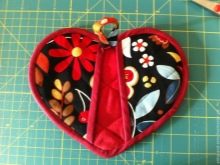
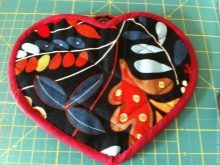
Heart-shaped potholder
Such an original potholder can be a great gift for a loved one for Valentine's Day or any other holiday. It is done in a certain way.
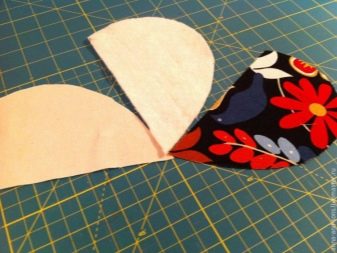
- First you need to prepare the fabric. A heart of a suitable size must be cut out of paper.
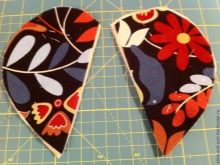
- Using this template, draw 2 figures on the fabric and cut them out.
- These parts need to be folded together and held together with a basting stitch. The product must be turned inside out.
- Next, the figure should be filled with high-quality filler. Most often, a conventional synthetic winterizer is used for this purpose.
- You need to sew a braid along the edge and carefully hide the ends.
- From a small piece of fabric, you need to sew a neat loop and sew it to the potholder.
The junction, if desired, can be decorated with a small bead or button.
Paper craft ideas
Budget home decorations are very easy to make from plain paper. Such crafts are beautiful and original.
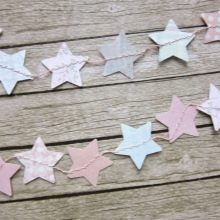
Garland
One of the easiest decorating options is a homemade paper garland. It can be used both on an ongoing basis and when preparing your home for the holidays. To create such a garland from colored paper, various figures are cut out. These can be stars, hearts, leaves, bats, or any other element. All these details are strung on a thin thread.
The garland with the letters fixed on it, from which a phrase or motto is composed, will also look interesting. It can be used to decorate the room for the birthday of a loved one or friend.


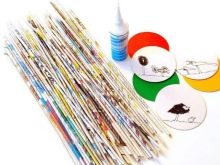
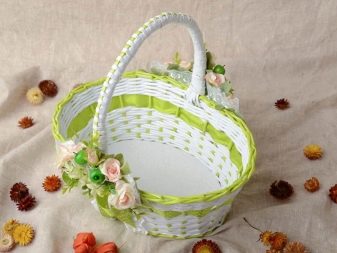
Newspaper baskets
From paper, unnecessary newspapers or magazines, you can make a convenient basket or light box for storing various little things. You can learn how to weave such products pretty quickly.
- First you need to prepare the required number of tubes. They are made from plain tissue paper or old newspapers. This material is wrapped neatly around the knitting needle. The edges of the paper are fixed on the base of the tube with PVA glue.
- When the tubes are ready, you need them leave for a few hours to dry out.
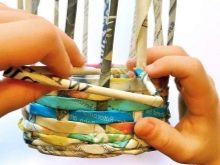
- The four long tubes must be folded to form a snowflake. After that, using the free parts, you can start weaving the basket. Tubes need to circle the main fasteners.
- Thus, the bottom of the basket is woven. After that, the main tubes are gently lifted. Further, the master continues to weave the walls of the basket.
- When the product is ready, the edges of the tubes must be carefully hidden in the base of the basket.
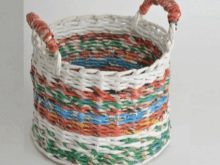
The finished product can be painted in any color, as well as covered with a layer of transparent varnish. This will make the basket more durable. You can decorate it with paper flowers or a voluminous bow.

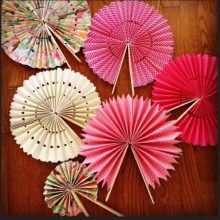
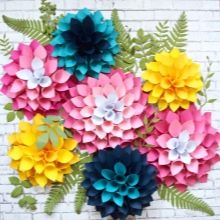
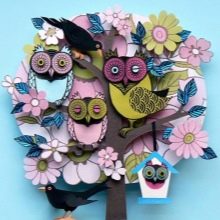
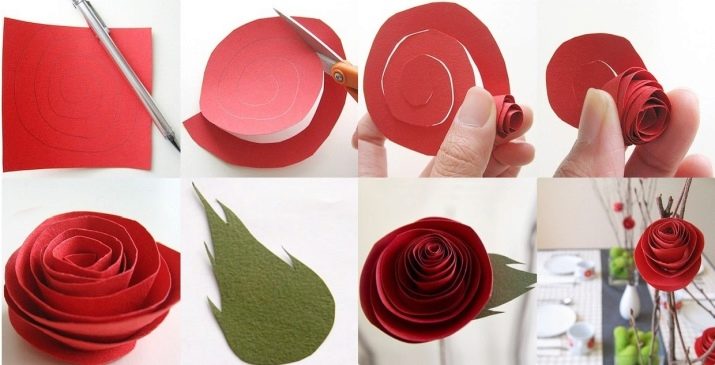
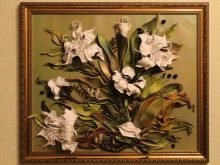
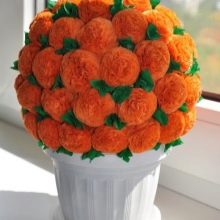
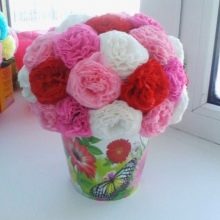
Paper flowers
Thick double-sided paper is used to create these colors. It can be either red or white or colored. Ready-made buds can be used to create voluminous paintings or spectacular bouquets.
To make flowers, the paper must be cut into even squares. On each of them, you need to draw a spiral with a pencil. It must be carefully cut with sharp scissors. Next, you need to form a small bud from the resulting blank. Its edges must be fixed with glue.
The bud should be loose and neat.
Options for paintings and panels
Original wall panels and hand-made paintings have been used to decorate houses since ancient times. Now there are many interesting ideas and master classes for creating such unique products.
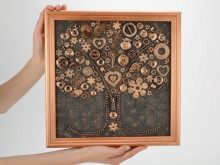
From coffee beans
Handicraft lovers who love coffee will love the idea of making an original painting out of aromatic beans. Making such a masterpiece is very simple.
- First you need to prepare the foundation. A piece of burlap should be attached to the base of the frame with a glue gun.
- Next, you need to draw a sketch of the future picture. Simple images that people associate with comfort are popular: cups of coffee, cute houses or cats.
- After that, you can start filling the drawing with coffee beans. They are glued to the burlap in the correct order using the same glue gun.
- When the drawing is ready, you can decorate it with various additional details: cinnamon sticks, dried orange or lemon wedges, and twine bows.
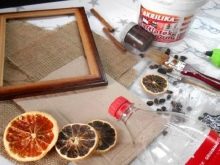
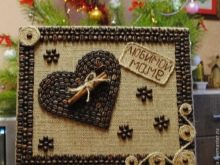
A product made using this technique will be an excellent decoration for a kitchen or living room.
Panel made of threads
To create such a large picture, the needlewoman will need a piece of plywood or a wooden board. The craft creation process consists of the following stages.
- First of all, you need to draw a sketch of the future drawing on the board with a pencil.
- Further along its contour you need to drive in nails. They should all be at the same height.
- After that, the edge of the thread of the desired color is fixed on the first stud.
- Further, the needlewoman can only braid all the nails along the contour.
- You can fill the space of the picture with threads in a chaotic manner.
- The free edge of the thread must also be fixed to the nail.
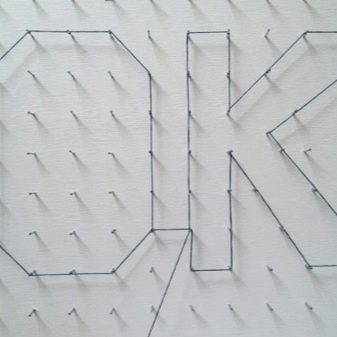
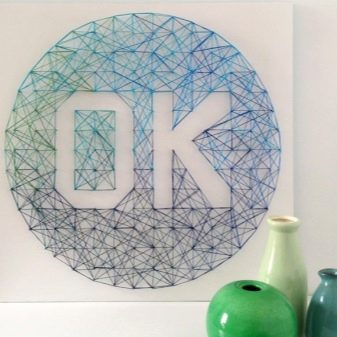
Having learned how to create simple paintings, you can move on to creating more unusual works, consisting of several elements.
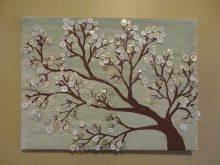
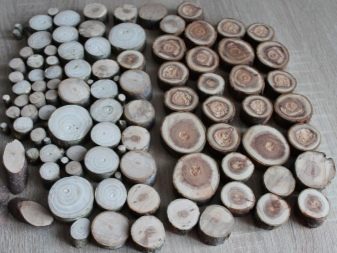
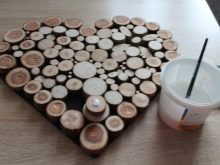
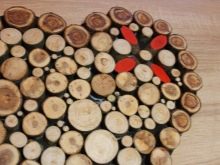
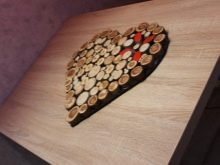
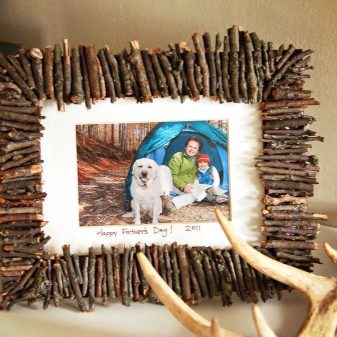
From wood
Such minimalistic panels will ideally fit into the interior in the loft or Provence style. To create them, wide dried branches or wine corks are used. They need to be sawn into rings of the same thickness. You can use blanks of different widths and colors in your work.
These parts are attached to a plywood or old board base. They are fixed with a glue gun.
To make the picture look beautiful, all the details must be placed as close to each other as possible.

How to make flowers from napkins with your own hands?
Amazing flowers from paper napkins will become a real decoration of any festive table. In search of interesting ideas for creativity, you should pay attention to simple schemes for creating such buds.
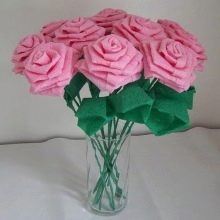
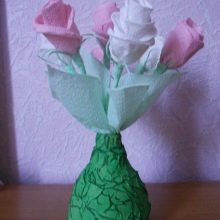
the Rose
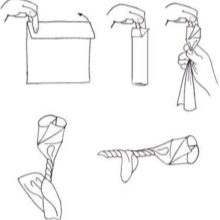
The most popular flower that can be made from paper is, of course, the rose. It is made from white, pink or red napkins.
- First you need to spread the napkin.
- Further, its edge needs to be bent. It is this part of the napkin that will be the rosebud.
- Holding the edge of the paper with your index finger, you need to start folding the napkin gently.
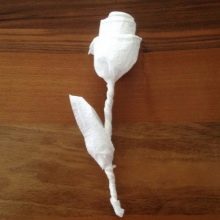
- After that, you need to form the stem of the flower. To do this, twist the napkin tightly. At the same time, one corner should remain free. A rose leaf is formed from it.
Using this scheme, you can make several flowers from which you get a beautiful bouquet. In addition, such crafts are often used during table setting.
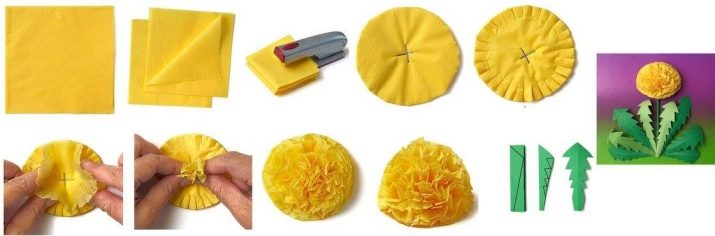
Dandelion
Dandelions made from yellow napkins also look interesting. These flowers are ideal for creating paintings and small bouquets. Dandelions are made very simply.
- First, you need to cut the napkin into squares of the same size.
- Then they should be folded in a small pile.
- In the middle, they need to be stapled with a stapler.
- The edges of the future flower must be cut off, forming an even circle.
- Next, you need to cut it along the edge. Make the incisions small.
- After that, each layer must be gently lifted, crushing it with your fingertips.
The finished flower will turn out to be voluminous and beautiful.
Making a rug from unnecessary things
A small homemade rug will also come in handy at home. It can be placed at the entrance to any room or placed in the bathroom.
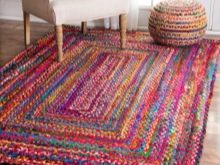

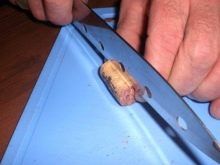
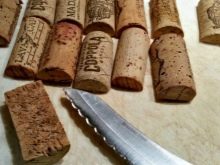
A simple and cute rug can be easily made from old corks. You can use an unnecessary piece of laminate flooring as a basis for creating it. The rug is made as follows.
- First you need to prepare the base of the form, cutting off all unnecessary with a clerical knife or sharp scissors.
- Each of the plugs must be cut into 2 halves.
- The resulting parts are attached with a glue gun to the base. You can arrange them in any order.
- When the work is ready, the rug must be dried. You can use it the next day.

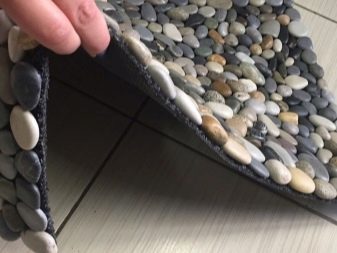
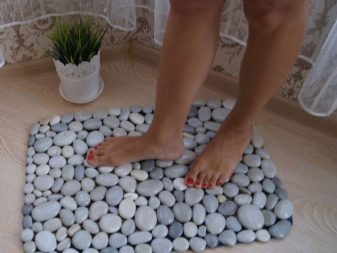
Instead of wine corks, you can also use ordinary stones. They must be well washed, dried and, according to the same principle, attached to a base prepared in advance.Such a mat serves for a long time and pleasantly massages the feet during use.
To prolong the life of the product, it must be dried regularly.
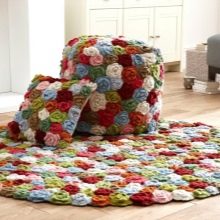
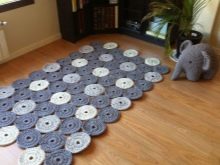
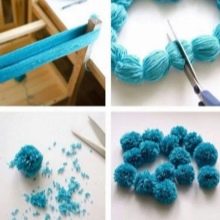
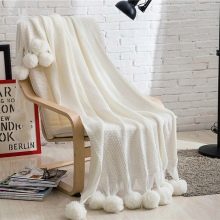
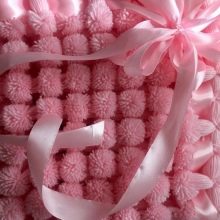
For a bedroom or nursery, a rug made of soft pom-poms is suitable. They are made from the remains of old yarn. The creation process consists of the following stages.
- The first step is to make the pom-poms themselves. To do this, the yarn is wound on a fork or two fingers. The more yarn, the more voluminous the pompom will turn out.
- The finished product must be tied in the middle with a thread.
- Next, the free edges of the future pom-pom need to be cut with sharp scissors or a clerical knife.
- The product must be gently fluffed up.
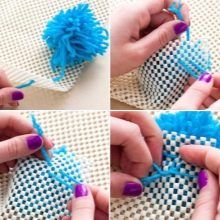
- The resulting pom-poms must be fixed on the base. It can be rubber or made from a piece of plywood.
- The pom-poms are attached to it with glue. You can arrange them in any order.
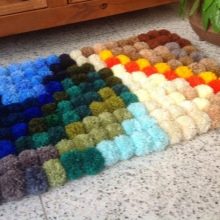
The finished rug turns out to be bright and beautiful. It will appeal to both an adult and a child.
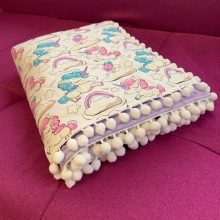
Blankets and pillows options
Needlewoman's blankets and pillows are also often decorated with soft pom-poms. Sewing such a blanket is quite simple. To do this, you just need to find an unnecessary piece of fabric and sew pompons prepared in advance to it. It is best to use new threads to create a blanket. This will make the blanket softer.
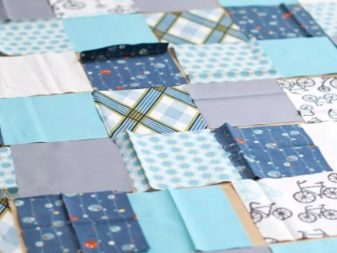
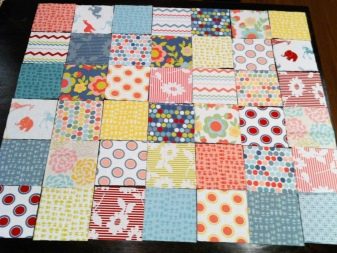
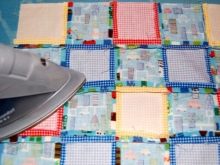
Quilts made using the patchwork technique are also popular. A cozy and beautiful blanket is sewn as follows.
- The first step is to decide on the size and shape of the future bedspread. It can be either rectangular or square.
- Based on how large the product will be, you need to prepare the right amount of materials. For work, you can use pieces of old clothing or bed linen.
- The fabric should be cut into suitable sized pieces. To work with the material more conveniently, it must first be washed and ironed.
- All prepared elements must be sewn together. This is done very simply. Pieces of fabric are folded right side to each other, carefully stitched and ironed.
- After that to them in the same way the following elements are attached.
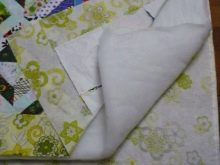
- When the front is ready you can start sewing on the wrong side of the blanket.
- To do this, spread a piece of fabric on a flat surface. On top you need to lay a layer of padding polyester.
- A piece of fabric is laid on it, consisting of colored parts.
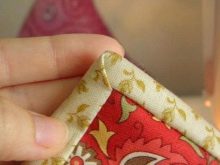
- Ready product stitched around the perimeter.
- Plaid edging made from a strip of colored material that is sewn to its edge.
The same principle can be used to sew a pillowcase for pillows. It doesn't take long to create the right lingerie.
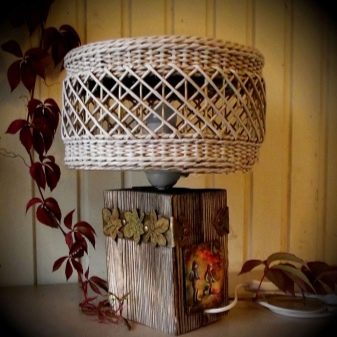
Decor of interior items
Old home furnishings can also be easily decorated with your own hands.
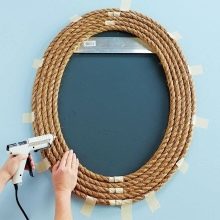
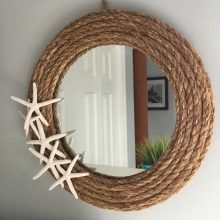
Mirror
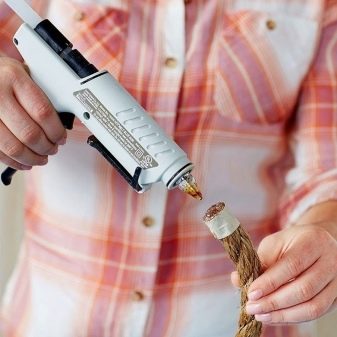
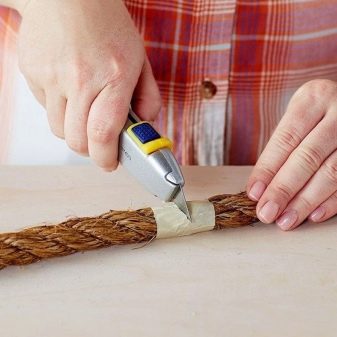
A thick rope is used to decorate the old mirror. It can be either hemp or synthetic. In some cases, even pieces of old rope are used to decorate an old mirror.
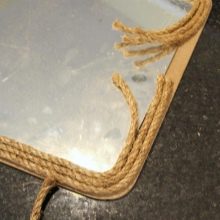
To create a beautiful frame made of thick cardboard or fiberboard, you need to cut out a large base. It should be wider than the mirror itself. It must be glued to the base with a glue gun. The edges of the frame also need to be covered with a layer of glue. The rope is wound around the mirror in even layers. It is very important that they fit snugly together.
The junction of the rope edges can be additionally decorated with jute or some voluminous details. Such a frame painted in white or silver will look beautiful. Such a product will perfectly fit into the interior of a modern apartment.
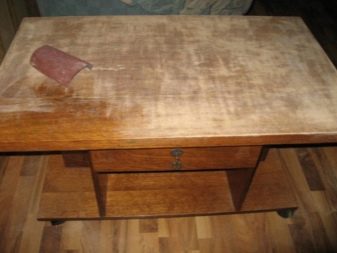
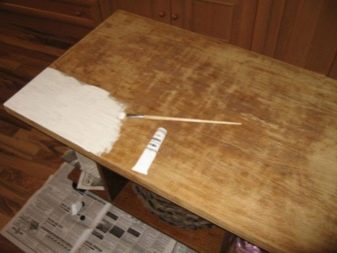
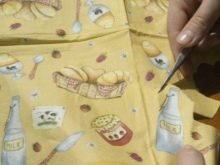
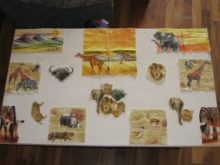
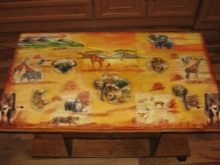
Side table
The old table can be decorated using the decoupage technique. First, it must be thoroughly cleaned and dried. After that, you need to rip out the pages from the old book. Their edges must be carefully trimmed. Prepared pages are glued to the table surface with PVA glue. Thus, all the empty space is filled.
You can also use unnecessary sheet music or printouts in place of old book pages. After finishing work, the table must be covered with several layers of varnish. It is best to spray it with a spray can. This will extend the life of the refurbished table.
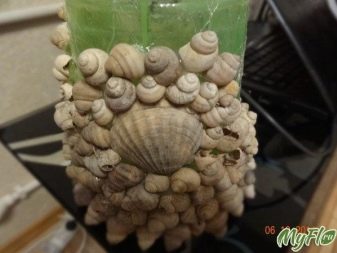
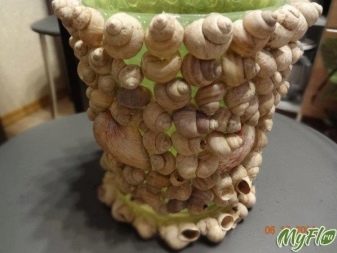
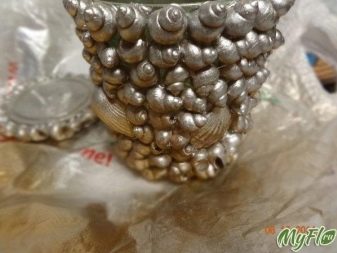
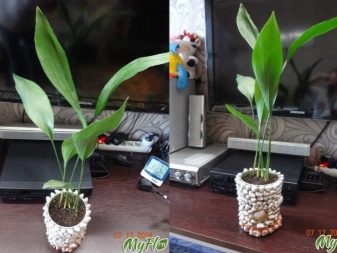
Flower pot
You can give new life to an old flower pot with the help of shells. The pot must be pre-washed and dried thoroughly. The same must be done with all the shells.
The surface of the pot can be pre-painted or pasted over with twine. After that, you should start decorating. The shells are glued to the pot with a glue gun. They should be located as close to each other as possible. When finished with work, the pot should be dried. If desired, it can be additionally coated with a layer of clear varnish or silver paint. This will make the product even more beautiful.
Using such simple master classes, you can transform the interior of your home without spending a lot of money on it. The main thing is to do everything carefully and with love.
For information on how to make a burlap money bag with your own hands, see the next video.


