All about shellac manicure
For many years, shellac has been in the first place among the most popular manicure procedures. He slowly pushed aside the once widespread build-up. What shellac is, what hides, what advantages and disadvantages it has, it is worth considering in more detail.
Features of manicure
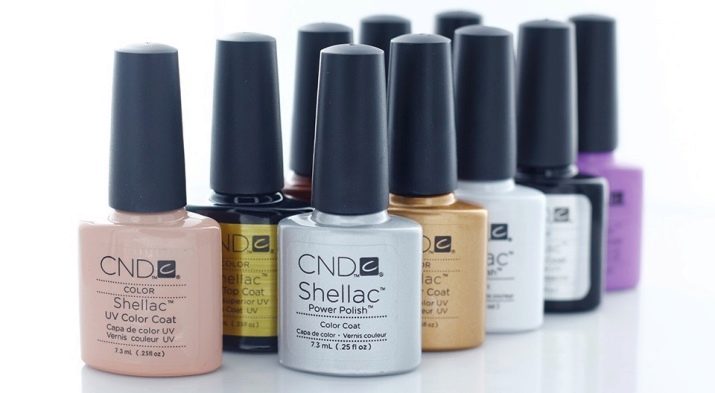
Shellac is a type of nail polish. For the first time such a coating appeared on the world market thanks to the CND company. Today this product is produced by a large number of manufacturers, while the Shellac name has stuck with all hybrid varnish products. It is worth taking a closer look at why the coating has gained such popularity.
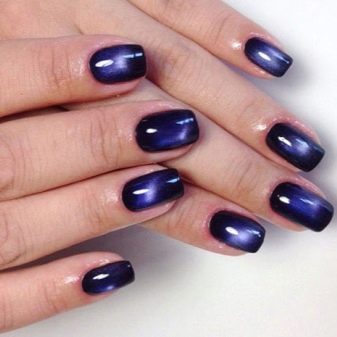
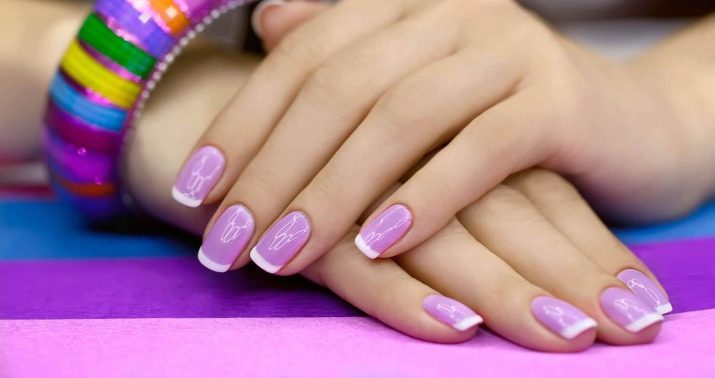
Shellac differs from simple manicure varnish in more juicy shades and a natural shine. Such a coating is worn longer, does not rub off under the influence of water and does not roll. And also shellac adheres perfectly to the nail plate, without weighing it down. Shellac is applied as easily as a regular varnish, but unlike a simple varnish, it lasts 2-3 weeks and perfectly tolerates all external influences. Another distinctive feature is drying, because gel polish is dried in a special lamp, and removed with a special liquid.
The shellac composition is as follows:
- film former - a component for the formation of a solid film on the surface;
- photoinitiator - a substance that absorbs UV radiation;
- active ingredients - substances necessary for the varnish to have a certain consistency;
- pigment - a substance for imparting color to varnish;
- additives and fillers - special components to impart viscosity, gloss and elasticity to the consistency of the varnish.
Advantages and disadvantages
Before deciding on a particular procedure, you need to properly study everything about it, so that you do not regret the consequences later. Like any innovation, gel polish has its pros and cons. It is worth paying attention to the following advantages:
- shellac is suitable for nails of any length;
- the difference between shellac and build-up is that shellac is applied to your nails;
- nails under shellac grow back faster, as nails with a gel coating do not break or flake off;
- shellac stays on nails for up to 3 weeks; neither water nor destructive components of household chemicals affect it;
- shellac is harmless even for pregnant girls, since it does not contain formaldehydes, which are considered extremely dangerous;
- gel polish can be easily removed at home by purchasing a special liquid and foil; under the influence of liquid, the gel easily leaves the nail;
- If necessary, small damaged areas of the nail can be easily enlarged if covered with gel, which will allow the damaged area to grow back calmly.

It is worth considering in more detail the disadvantages of this coating.
- High price. The procedure is by no means cheap. If we compare a manicure with a coating of ordinary varnish and with shellac, then the second option will be twice as expensive. If you want a custom design, you will have to pay for it separately.
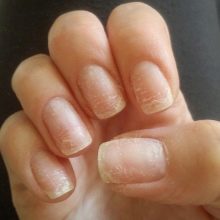
- Diseases of the nail plate. Although the coating is considered practical and durable, it has a big drawback in the form of susceptibility to temperature extremes. For example, taking a bath or doing wet cleaning, the nail expands due to excess moisture, and then, getting into normal conditions, narrows. Due to constant deformation, the coating can crack, which cannot be seen with the naked eye. Through these cracks, dirt, water gets in, and this is an ideal breeding ground for bacteria. Since this coating is worn for a long time, there is a risk that during this time bacteria will significantly undermine the health of the nails.

If it is incorrect to cover with gel: do not dry it out or apply too much gel, the shellac swells, as a result of which the nail plate may be damaged. Sometimes, for the same reason, shellac completely moves away from the nail. Therefore, skill in this work plays a very important role.
Views
The composition and consistency of shellac allows masters to make the most diverse and complex types of manicure. In this case, only the processing technique may differ. It is worth considering the most common types of manicure.
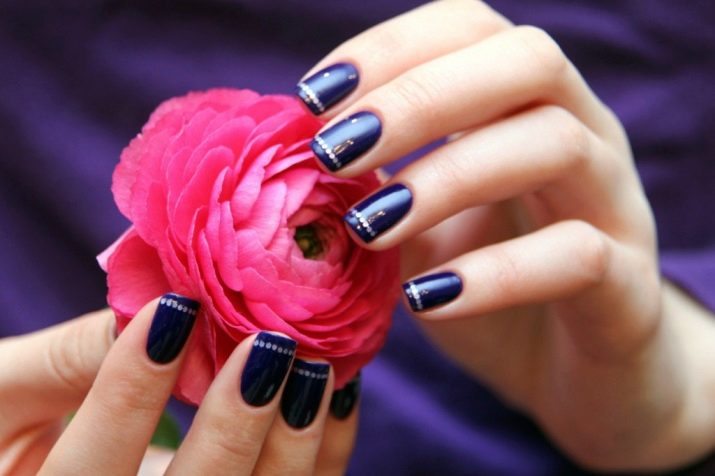
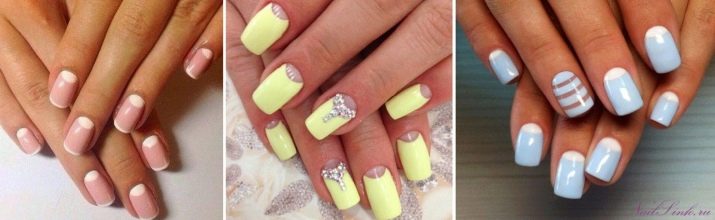
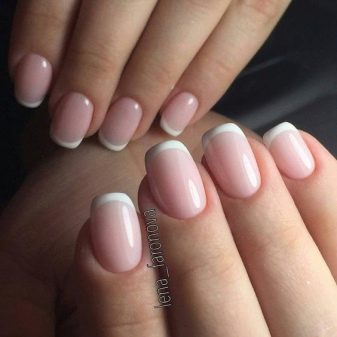
Classic
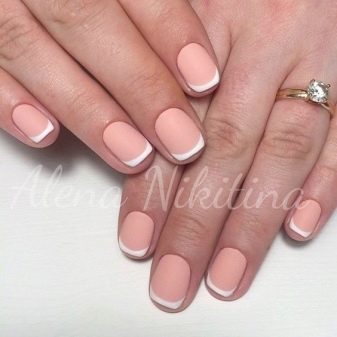
A classic French manicure that never goes out of style. It looks very sophisticated due to the exceptional sheen of shellac.
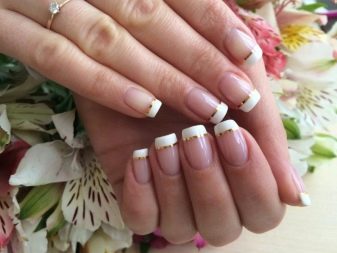
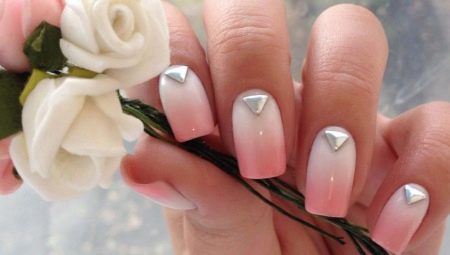
Wedding
Delicate, sophisticated manicure will complement any wedding look, making it complete and sophisticated.
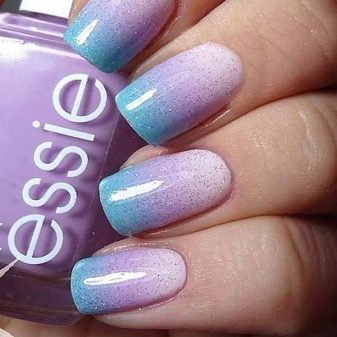
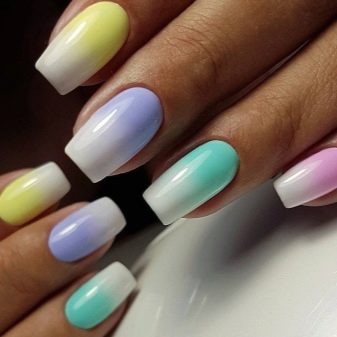
Gradient
It is convenient to do this type of manicure with shellac, since it does not dry out in the air, so you can safely use various colors and transitions.
Lunar
The hole manicure is just as common as the classic French manicure. An extensive palette of colors allows you to experiment with different colors and designs, to display something exclusive.
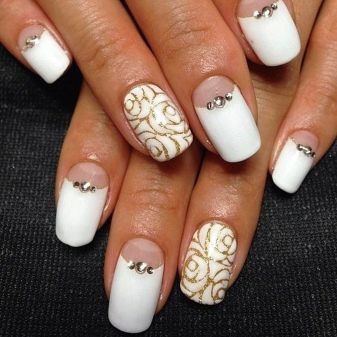
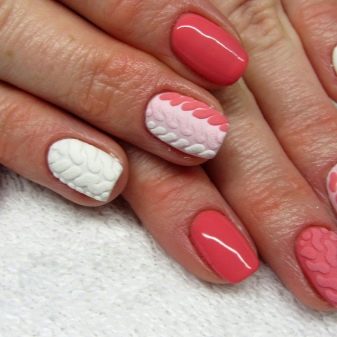
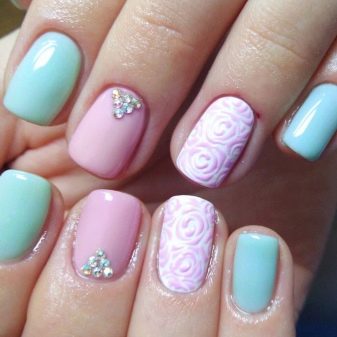
Volume
It is very convenient to do a voluminous manicure with shellac, since the thick consistency of the varnish allows you to display any pattern, it adheres perfectly and does not spread.
Cat's eye
To perform this manicure, special kits are sold, which include a varnish and a magnet. The magnet is brought to the varnish, which creates a pattern that looks like a cat's eye. Hence the name.
Important! The only thing is that you cannot do water manicure with shellac, as it is too heavy, as a result of which it simply drowns in water.
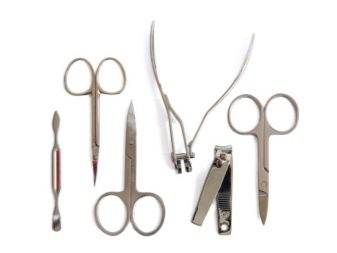
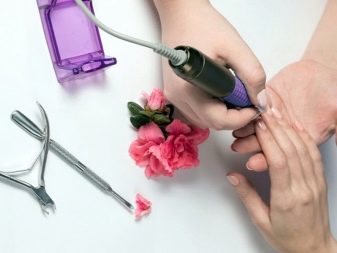
Required materials and tools
To do a manicure correctly, you need to know what tools you will need directly for work. To create an irresistible manicure, you need to purchase the following tools:
- nail tweezers;
- scissors for manicure;
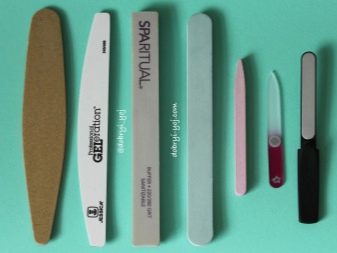
- nail files;
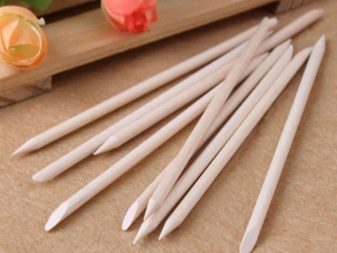
- orange stick;
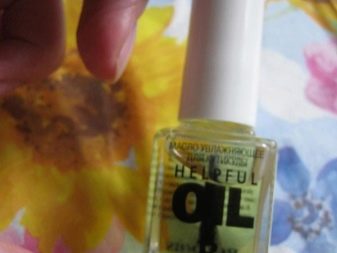
- nourishing cuticle oil.
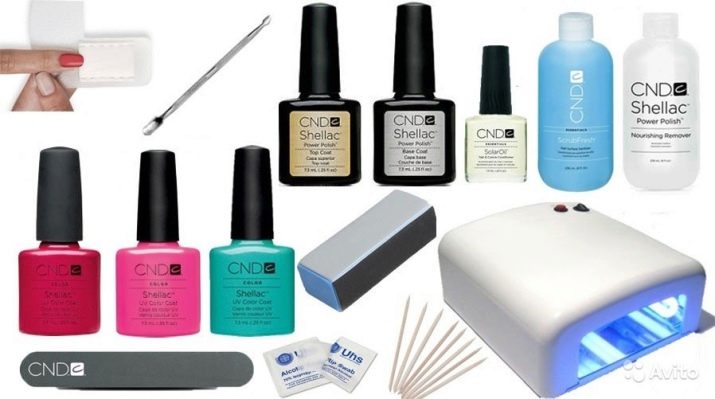
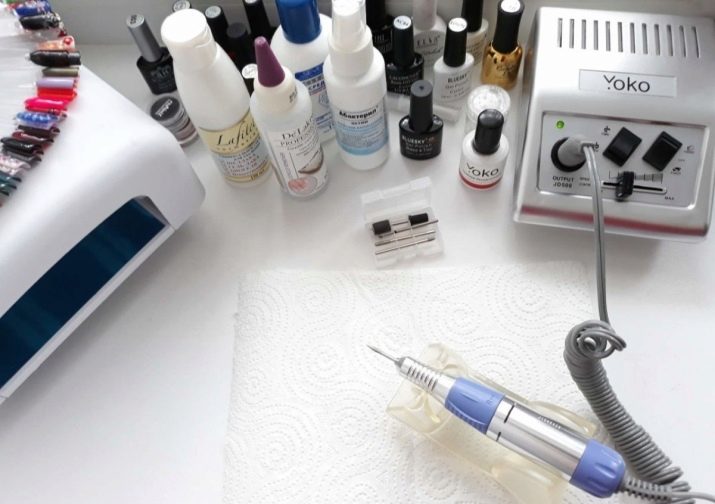
After the nails take the desired shape, you need to take care of the next step - covering the nails. To properly cover your nails, you will need the following ingredients:
- a degreasing agent - it is necessary in order to reduce the risk of fungal diseases;
- special napkins without lint - you can, of course, replace them with ordinary cotton pads, but they leave villi on the nails, which will have a bad effect on the quality of the adhesion of the varnish;
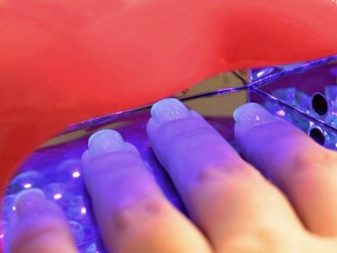
- Ultraviolet lamp;
- shellac base is a special coating that makes the nail smooth, even; the base can be adjusted to give the desired shape to the nail;
- color coating - allows you to cover your nails with any color you like;
- top - a means for securing a manicure, it must be applied after all manipulations are completed;
- isopropyl alcohol 99% or professional adhesive remover.
How to do it at home?
No matter how simple everything looks from the outside, in fact, the work is very painstaking and requires increased attention. The beginner must be very careful, as any wrong movement will damage the coating. For example, if you do not finish drying the base, then most likely the coating will swell or completely move away. Or, if you cut at the wrong angle, the shape of the nail will be spoiled. A beginner should adhere to the following algorithm of actions.
- First of all, you need to carry out a regular manicure: remove excess cuticles, trim the length, and give shape if necessary. It is worth noting that the cuticle has a protective function: it protects the nails from bacteria, so you need to be extremely careful when removing it.
- After cleaning, you need to disinfect your hands and nails with a special antibacterial agent.
- The next step is polishing. Polish your nails with a soft buff. Polishing is carried out with light movements along the nail plate.
- After polishing, the work surface must be degreased. If no special liquid is available, alcohol can be used. This avoids delamination.
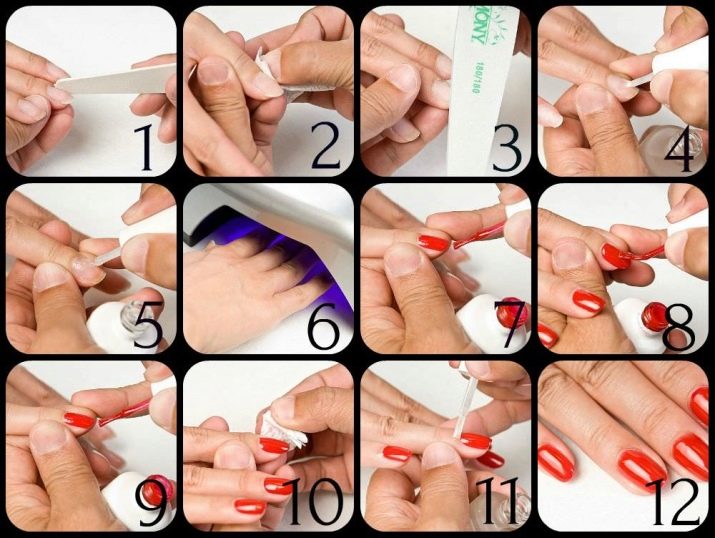
- The next step is to apply a primer. In principle, when working with shellac, the use of a primer is optional. However, without a primer, there is a risk of the varnish peeling off, since it serves as an adhesion component between the nail plate and shellac. The primer does not need to be dried in a UV lamp.
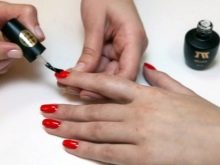
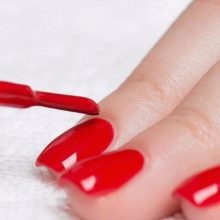
- Next, you need to apply the base. The base coat should be applied to the nails as thin as possible, keeping the brush parallel to the nail plate. The nail is painted over completely, starting from the cuticle and ending with the tip of the nail. The base must be dried under the lamp for about 1 minute. Many craftsmen prefer rubber-based bases, since after it the nails become even and smooth. Please note that once the base coat has been coated, it is not necessary to remove the sticky layer.
- After the base layer comes the color layer. It should be applied to the nails in the same way as the base layer, that is, from the cuticle to the edge, keeping the brush parallel to the nail plate. He also needs a lamp. If desired, the color layer can be diluted with a picture or stones.
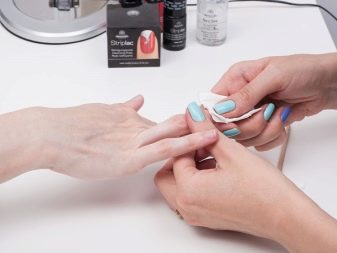
How to remove shellac?
Every 2-3 weeks, the shellac needs to be corrected, which consists in renewing the old gel. Today, there are two main ways to remove old shellac from the nail:
- wash off gel polish with a special tool;
- remove shellac with a special cutter on a manicure machine.

It is worth considering how shellac is removed in a beauty salon if correction is necessary.
This process includes the following steps:
- the client washes his hands with a special soapy liquid;
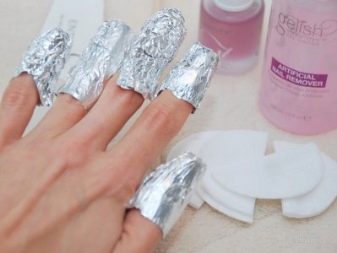
- small sponges are impregnated with a special agent and applied to the nail; wrap with foil in such a way that the sponge is located on the nail and fits snugly against it;
- the windings must be left for 10 minutes, because during this time the gel polish will get wet and it can be easily wiped off;
- if there are still pieces of gel on the nail, you can rewind and leave for 3-5 minutes; small residues can also be removed with an orange stick.

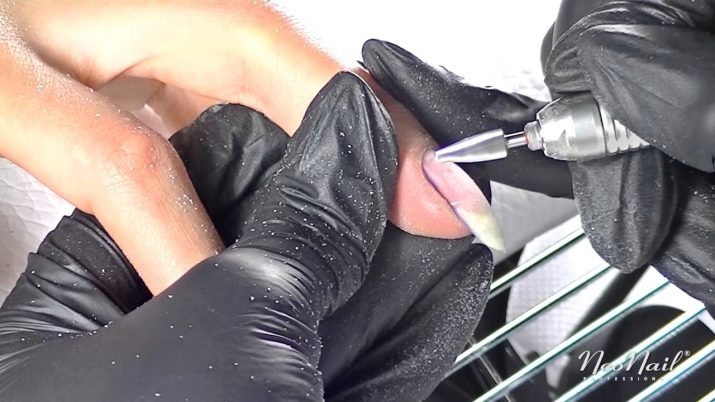
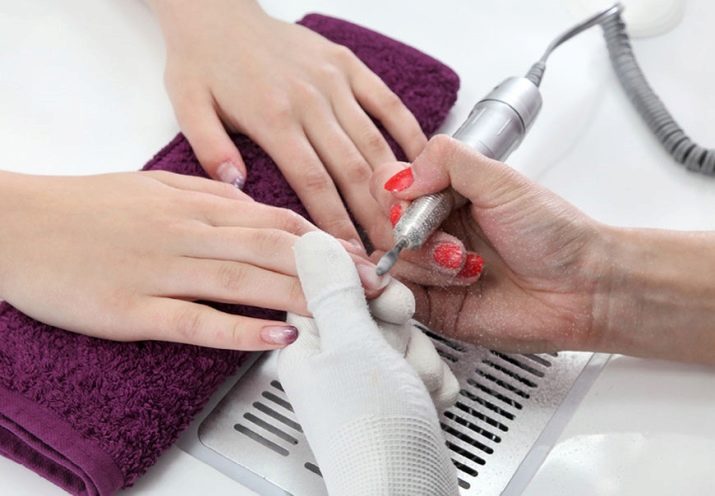
This method of removing gel polish is known to everyone. However, few people know that it can also harm nails. From the action of the solution, the nails are very dry, as a result of which they can begin to exfoliate. If for some reason you cannot or do not want to use this method, then there is another one for you - the hardware one. Shellac is cut with the same manicure apparatus that is usually used for hardware manicure, the only difference is in the shape and composition of the cutter. It spins at high speed while removing the gel from the nail.
Typically, a carbide or ceramic cutter is used. The ceramic milling cutter appeared on the world market relatively recently. She fell in love with its strength, durability and endurance. Another important plus is heat resistance, that is, the cutter does not heat up during operation. The unique composition of the ceramic cutter allows you to gently file the material without damaging the surface of the nail.
The tungsten carbide cutter is made of special metals and has a beveled, straight or cruciform cut. The difference from other nozzles is that the coating is sheared away, forming shavings, not dust. This cutter is perfect for cutting thick layers of gel. Metal nozzles work in an enhanced mode, without spreading dust.
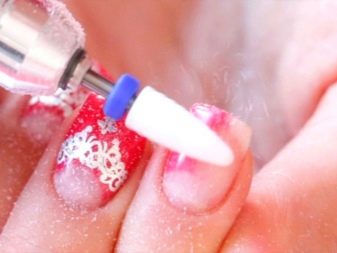

It is worth considering the myths and truths about the removal of the gel with the apparatus.
- Removing the gel, you can cut off the nail. In principle, the master can scratch the nail, but for this he will need to make an effort. The bottom line is that during the correction only the top layer of the coating is cut off, that is, the gel polish itself. There is still a base layer under it - it just serves as a stop-signal for the master.
- When removed, pain is felt. In fact, the pain is not felt during the saw cut. Women who frequently get their nails done will attest to this. Some feel a kind of tickling sensation, others a slight burning sensation, which occurs because the burr heats up with frequent rotation, although this should not be. In this case, it is recommended to change the cutter.
What to do to remove the gel without injuring the nail. It is worth paying attention to the following tips for beginners:
- when starting to cut, make sure that the elbow and arm are fixed in one position so that there are no awkward movements;
- you need to remove the gel with tangential movements, this is necessary so that the nail does not heat up and does not cause unpleasant sensations in clients;
- the master makes movements only in the direction in which the cutter moves, that is, if the apparatus moves to the right or left, then, accordingly, the movements of the master are directed in this direction; if you work against the stroke, the cutter will slide off the nail.
How to extend the life of the coating?
Today you will not surprise anyone with a gel-coated manicure. Gel coating is widespread due to its durability, sheer palette of colors, and a variety of designs that cannot be done with conventional varnishes. However, not all of the fair sex can appreciate such an innovation. For example, owners of thinned nails may experience chipped or even broken nails. But do not be upset, because the manufacturers have thought about this and have developed special strengthening substances.
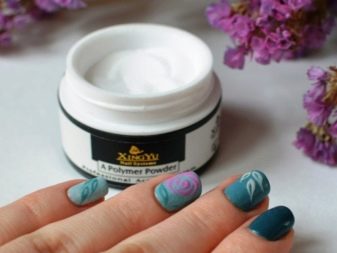
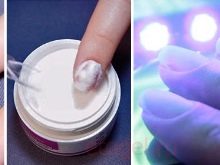
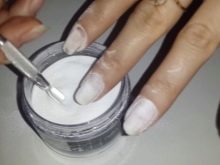
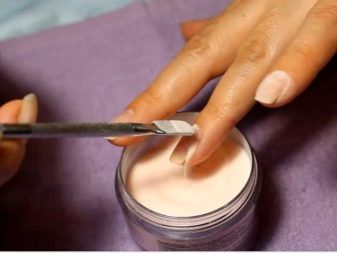
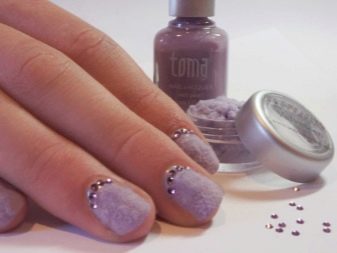
One way to strengthen thin nails is with acrylic powder. It is a synthetic substance with high thermoplastic properties.Powder is made from acrylic acid, which has the ability to strengthen everything on top of which it is applied. This product is quite common on beauty product counters. The only thing is, the name can be different. Acrylic powder is also known as velvet sand. In addition to strengthening, sand also has a decorative function. But all this is one material, which is presented in different forms. It is either white or colored.
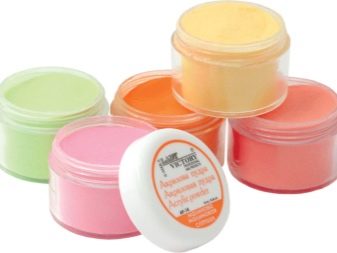
The advantages of using acrylic powder are as follows:
- nails are noticeably strengthened;
- the nail plate is protected from scratches and microdamages;
- nails look natural;
- the procedure does not take much time and effort.
It is worth paying attention to the following disadvantages of the procedure:
- rarely, but sometimes acrylic powder can chip off;
- it is difficult to remove acrylic powder, because it lends itself only to sawing.
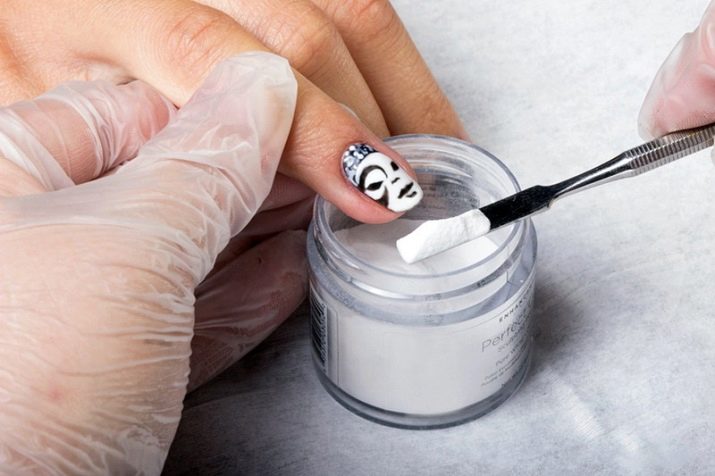
To strengthen nails with acrylic powder, follow these steps:
- carry out a cleansing manicure - it is necessary to thoroughly clean the nail plate from dust and dirt, because an incompletely cleaned nail plate is the reason for the detachment of any coating;
- further, it is necessary to thoroughly grind the nail plate, only without fanaticism;
- treat nails with an antibacterial agent;
- a primer is applied to the nail;
- a base gel is applied to the dried primer;
- immediately acrylic powder is applied to the wet base and dried in a UV lamp for 2-3 minutes;
- then you need to remove the remnants of the powder with a manicure brush;
- if small bumps have formed on the surface, then you just need to grind until a flat surface is formed;
- if necessary, a decorative gel polish is applied, if not, a top layer that needs to be dried in a lamp, then remove the sticky layer from it;
- after all the manipulations, the final finish is applied, which is also dried in the lamp; then the sticky layer is removed from it and cuticle oil is applied.
Another problem faced by clients of nail salons is gel polish cracking. This happens for two reasons - poor quality materials or illiterate work of the master. To avoid such problems, it is worth adhering to the following recommendations:
- purchase quality goods;
- choose a qualified master;
- it is impossible to use creams and oils before the manicure procedure;
- do not omit such a step as disinfection; if there is no special disinfectant, you can use alcohol or a liquid based on alcohol or acetone.
Important! If all procedures are performed correctly, then the problem may be in the nails.
Another unpleasant problem that can be encountered after a manicure is swollen shellac. This can happen if the work of the wizard does not meet all the required standards.
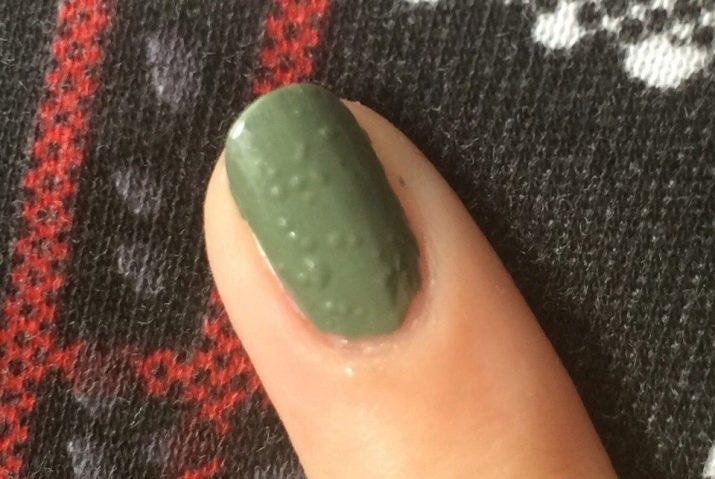
If you apply too thick a layer of the base, then it will not dry out in the lamp, as a result of which it will swell. If the nail is swollen, it is necessary to carry out a correction, and so that the problem does not recur, you need to apply a little gel and dry each nail well in a UV lamp.
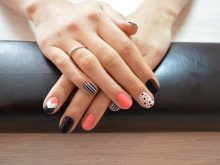
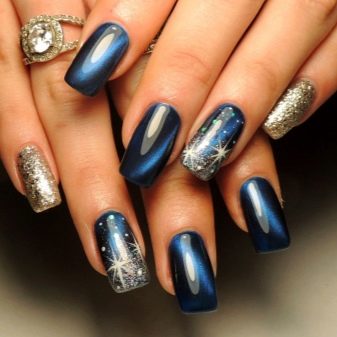
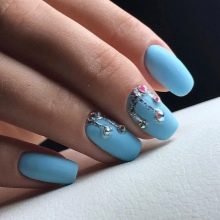
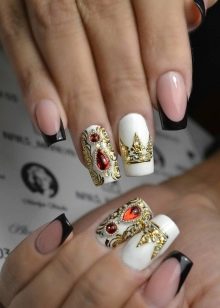
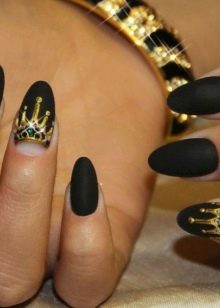
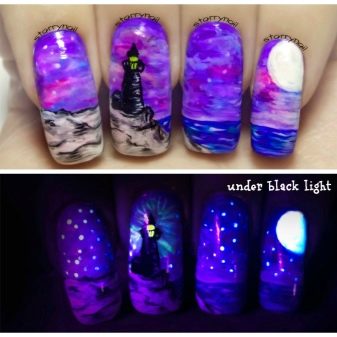
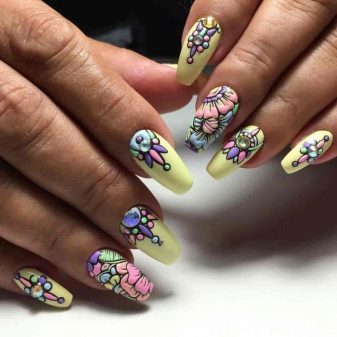
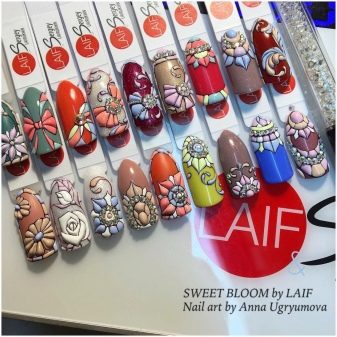
Design examples
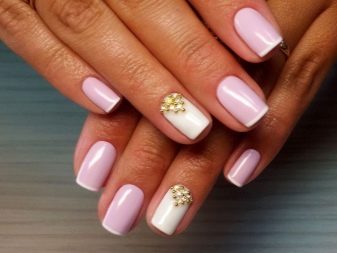
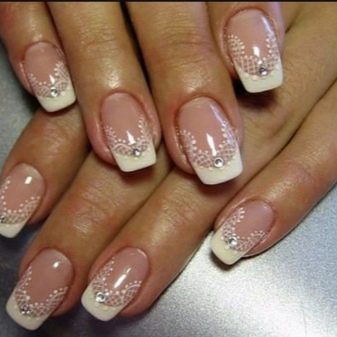
- Immortal classic. This is a classic French manicure that will probably never go out of style. Now the jacket is diluted with stones, flowers, voluminous figures, a matte finish. In any case, it looks stylish and sophisticated.
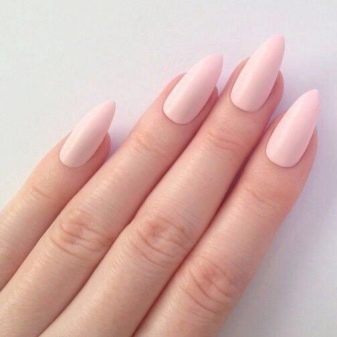
- This year, fashion trends have given preference to calm tones. Light brown shades are widespread, all tones of beige and pink colors. These tones are great for both medium and long nails. Such a manicure can be diluted with rhinestones or acrylic powder of the same color.

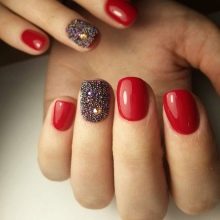
- Despite the predominance of calm tones, bright shades did not recede from their positions. Incomparable red, blue, coral, yellow - were the favorites of the past summer. Bright colors go well with glitters.The fashion industry has provided the world market with a huge variety of stones, rhinestones, sparkles.
- Another interesting novelty loved by the beautiful half of humanity is the royal print. This is, according to most beauty bloggers, the most fashionable manicure this year. The print includes classic colors mixed with gold. The crown and massive stones are also obligatory attributes.

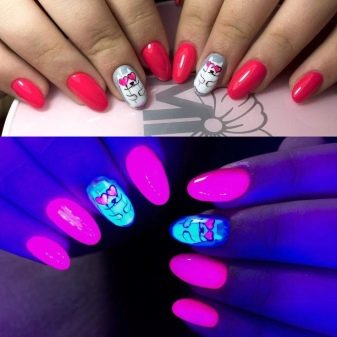
- Neon manicure is another trendy manicure option. It is performed with special neon varnishes that glow in the dark. In this case, the design can be very different.
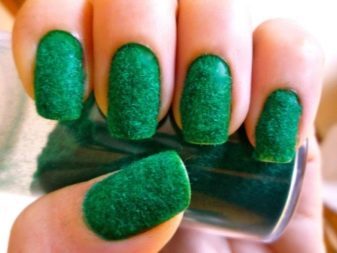
- Velvet manicure is a novelty of this season. Despite its impracticality, manicure has become widespread. The impracticality is that when wet, the villi lose their appearance, although when they dry they return to their former state, but the effect is not the same.
- New items in the fashion industry never cease to amaze. This season, a special place was taken by a print with three-dimensional patterns reminiscent of frosty patterns on the windows. This manicure looks very fashionable, stylish and impressive. In addition to the delightful appearance, voluminous drawings do not interfere with any household chores.
For how to perform shellac manicure at home, see the next video.


