We make boxes from boxes with our own hands
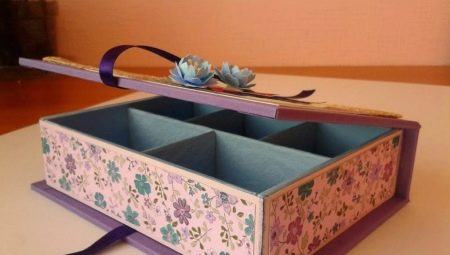
Boxes left over from sweets or pairs of shoes seem completely useless to people, taking up extra space in the house. However, it is quite possible to make such items functional. In this article we will tell you how you can make beautiful and convenient boxes out of boxes.


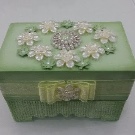
Shoebox crafting
Some of the simplest (but no less attractive) are the original boxes made from shoe boxes. You can easily make them with your own hands, give them absolutely any appearance.


Tools and materials
If you liked such a master class, then for its implementation you will need:
- shoe box with a lid;
- scissors and adhesive;
- high density cardboard;
- fabric or paper for decorating the finished product.
All necessary components are recommended to be laid out in the immediate place of creative work. You should immediately put aside everything that will interfere and distract the master from making a creative box.


Step by step diagram
If all of the above units for needlework have been prepared, you can proceed to modeling a beautiful casket from a shoe box.
- The base in the form of a shoe box is already available, so all that remains is to design and decorate it effectively.
- Shoe boxes, as a rule, are quite large, so there will be where to roam and dream up. The interior of the future box can be decorated with a soft woven material. Fleece is a great solution.
- The outer part of the box can be pasted over with sheets of colored paper, or you can turn to a very original design with decoupage.
- The design of a homemade shoebox box can be made even more spectacular and rich by using decorations in the form of shining rhinestones, sequins or sequins. There are incredibly many options on how to make such a box original and attractive.
- The next step is to tackle the design of the inside of the box. The specified part of the structure can be divided into several separate sections / compartments. For separation, use strips cut from high density cardboard. Further, these cardboard parts can be pasted over with colored paper to make the inside of the box more attractive.
- A product in which such separate sections will be equipped is very convenient to use for storing various items for creativity, sewing, cosmetics or jewelry.
By decorating a shoebox, a craftsman can let his fantasy go free. The external design of such a homemade product can be absolutely anything! The product can be made monochromatic, or you can give it a brighter multicolored look - there are no restrictions in style and design.


Craft from candy containers
A box modeled from an old cardboard box left over from sweets will turn out to be no less original and attractive. These containers can have a wide variety of shapes. There are square, round, oval, multifaceted and many other interesting variations of such boxes. Each piece can be used to make a gorgeous box.
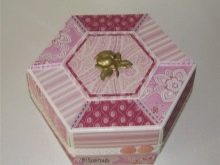

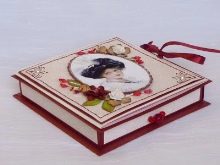
To make an attractive box out of the specified box, you will need:
- the box itself;
- multi-colored paper;
- plain paper;
- glue;
- acrylic paint;
- scissors.


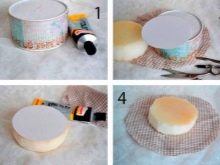
Let's consider in stages how you can model an elegant box from these components.
- First you need to prepare a candy box. It must be clean, without candy wrappers and chocolate crumbs.
- The cleaned container will need to be very carefully pasted over with paper around the entire perimeter. The entire framework must be completely framed in this way. At the same time, it is very important to leave a small margin of paper "finishing" around the edges.
- In order to make the lid and bottom of such a box as neat and aesthetically pleasing as possible, you first need to glue the side zones. The corners must be carefully trimmed, and then also gently bent inward. At all stages, paper must be taken with a small margin.
- Using sheets of plain paper, you will need to decorate the inner cavity of the future attractive box.
- When the interior design is completed, the box must be set aside and not touched until it is completely dry.


The "candy" boxes make especially attractive and elegant boxes. For carrying out such manufacturing work, almost any variety of the container in question is suitable.
Very beautiful boxes are made from boxes of Rafaello sweets. After that, you can store a variety of things in them, for example, jewelry and hairpins for a girl.


More ideas
Of course, the methods of modeling creative caskets do not end at the master classes listed above. A lot of attractive and functional products can be made from matchboxes, from a tea-brew box, as well as from a cigar box. We will talk about the latter basis below.
If you plan to make an elegant cigar box from a cigar box, then you will need to prepare not only it itself, but also other components, namely:
- fabric (corduroy or velvet works best);
- foam rubber with a thickness of 1.25 cm;
- thin cardboard sheets;
- stationery knife with sharp blades;
- scissors;
- ruler;
- hot glue gun.


Let's get acquainted with the step-by-step instructions on how to create a spectacular cigar box yourself.
- It will be necessary to cut out a rectangular piece from thin cardboard, which will be 3 mm less than the bottom of the base box. Use a pencil to mark where the foam pad will end. At this point, the cardboard needs to be cut.
- Next, take a cardboard base for a soft pad. It is lined.
- Then a piece of foam is taken, the width of which corresponds to the size of the cardboard part, but the length should be twice as large. The piece should also be lined into strips with a width of 5 cm. Next, you need to cut the part along these lines.
- At the next stage, you will need to take an adhesive composition. It will need to be applied in moderation to one of the areas on the cardboard. There you should glue the foam rubber part, having previously folded it in half lengthwise. In the same way, you will need to glue all the remaining pieces of soft material.
- Now you need to take the woven piece. Its width should correspond to the dimensions of the resulting base, but the length should be much larger.
- One end of the woven piece will need to be carefully glued to the back of the cardboard backing. The material is wrapped, and then they are gluing the foam pads. The fabric will need to be inserted into the gaps that are present between these soft parts.
- You will need to wrap the cardboard with the rest of the woven piece again, and then glue it.
- At the next stage, you will need a cardboard box, the width of which is 1 cm larger than the height of the resulting pad. It will need to be carefully folded, making an indent of 1 cm from the edge. Make sure that the folded cardboard covers the foam parts.
- You will need to take a couple more woven sections. They should be 2.5 cm larger than the cardboard base of the structure itself. Be sure to carefully cut off the existing corners. After that, the resulting blanks will need to glue the cardboard bases. The finished walls of the box should be securely but carefully glued on the side bases from the pad.
- The sheet of cardboard that you planned to attach to the remaining section of the bottom of the box should also be carefully wrapped with the same fabric as all the other parts. The remaining elements are attached to the bottom of the box. The original craft is ready!


It is possible to make a very original and creative box from several matchboxes, which is a miniature chest of drawers with several drawers. In such a design, it will be possible to store a lot of all sorts of little things.
- To make a mini-chest of drawers at home, you need to reliably glue several matchboxes to each other. And you should also prepare a cardboard frame-base. It is necessary to glue the boxes to it in such a way that the "boxes" of the structure can move freely.
- You can arrange matchboxes in such boxes in different ways. Here you can take a design approach. At the last stage, a creative homemade product will need to be effectively decorated and decorated.
Decorating using decoupage technique, pasting with colored paper, fixing miniature accessories in the form of beads, buttons and other similar details is suitable. The design of the finished product can be absolutely anything.


For information on how to make a casket from a shoe box, see the next video.


