How to make flour slime?

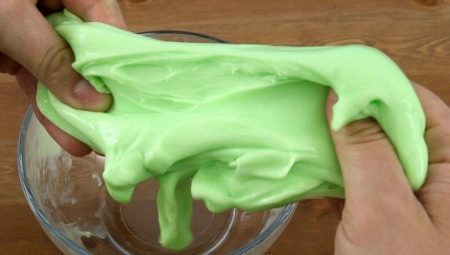
Slime made from ordinary flour is one of the most budgetary options for the most popular toy. It will not be difficult to make it yourself, and the components are always at hand. Slime is difficult to damage in any way, and even a small child can create it. This article will tell you how you can get an elastic toy from simple flour.

The role of flour in slime
Flour is made from grains that are ground to a dusty state. There are always several kilograms of this product in any kitchen, because no baked goods can do without flour. Anyone who has ever dealt with flour has probably already guessed how to make a slime correctly.
Flour is rich in protein, which, together with water, turns into thick gluten.
The mass perfectly absorbs liquid, and the effect itself is called the moisture content of the flour. This effect will be used to create a fun toy.

Making slime from regular flour is quite simple. First, pour water into the flour, and then stir well. Flour quickly absorbs liquid and turns into a thick dough. The rate at which water is absorbed by flour depends on which grain the flour was made from and how it was processed. The grinding and growing conditions of grain crops are also important.
According to their ability to absorb moisture, flours can be divided into two categories.
-
Increased water holding capacity, in which flour absorbs a lot of liquid. Gluten is elastic, which means that the slime will somehow resemble another popular toy for hands - hendgam (the principle of which is that it needs to be kneaded in the palm of your hand). Slime will not stretch well.
-
Reduced water holding capacity occurs when the flour does not absorb as much water. The material becomes much more elastic, and the resulting slime can be strongly stretched.

The main problem may be that in domestic conditions it is almost impossible to find out the moisture content of flour.
Experts advise to remember that quality, such as moisture capacity, depends on the degree of flour grinding, as well as on other factors. The difference can be seen even in conventional recipes where there is no need to observe precise proportions of products.
Slimes are of different types. It is almost impossible to create the same slime as are found on sale. The fact is that certain ingredients are used in the production. However, even home-made slime will be very interesting to play with. It's also a great time to experiment with slime recipes.

You can simply mix flour and water. The resulting mass will creep out under the hands and is somewhat reminiscent of a handgam.
A more elastic option is considered to be a slime cooked a little differently. This recipe allows you to create a toy that is as close as possible in quality to the factory one. Several ingredients are required for cooking.
-
Thickeners and adhesives. These components will form the basis for the future anti-stress toy. Slimes based on such products stretch perfectly. Salt often becomes an additional thickener, and a pleasant crunch can be heard when the slime stretches.
-
The second ingredient is a regular shampoo, which gives the mass special elasticity and airiness.
-
Liquid soap is required to form a mixture, and will also be an excellent flavoring agent.
-
Toothpaste may be required to give the slime a porous and pleasant scent.

Slime experts say that you can paint a toy using regular gouache. Baby soap is suitable for the same purposes. However, you can experiment - and add the most unusual components to the slime.
Do not forget that flour turns into a sticky substance when liquid gets into it. This means that at least one of the new components must contain water.

And also the slime masters claim that it is flour that is considered a key component. It plays the role of the main ingredient and thickener.
Advantages and disadvantages
Flour slimes have several advantages at once:
-
toys are absolutely harmless, because they do not contain any chemicals, which means that children can safely play with them;
-
even if the toy turned out to be a little crooked during creation, you can always fix the situation by adding water and flour;
-
flour is edible, which means that children can safely bite off a piece from the toy (this option is relevant if the slime does not contain inedible components);
-
many variations of recipes;
-
the cost of homemade toys is 5 times lower than store toys.
The disadvantage of the toy is the rapid loss of its presentation. Sometimes slimes do not stretch well, but in this case, they automatically turn into an anti-stress toy.

Recipes
You can use any kind of flour to create a slime. However, the best option is wheat flour. The product is cheap, and the slime from it will turn out to be very high quality.
The flour must be sifted first: this way there will be no lumps or debris in the slime. You can experiment with recipes, add different ingredients.

With soap and toothpaste
To create a slime from soap and toothpaste, you need to take:
-
toothpaste about 2 tablespoons;
-
5 tablespoons of flour;
-
liquid soap in the amount of 2 tablespoons.
Making a toy is easy:
-
the paste and soap must be mixed well;
-
pour a little flour into the resulting mixture, the mass should become dense;
-
the toy is almost ready, but first you need to knead it in your hands.

With shampoo
Air slime from shampoo is also very easy to prepare:
-
you need one teaspoon of flour;
-
the same amount of hydrogen peroxide;
-
shampoo is needed in a volume of 30 ml.
You can add a few drops of perfume or aromatic oil.

You can make a slime by following a series of steps.
-
The shampoo is poured into the cup.
-
Peroxide is added to the shampoo. Everything gets mixed up.Soon, the composition will begin to thicken and become covered with bubbles. After that, put the container in the freezer and wait 3 minutes.
-
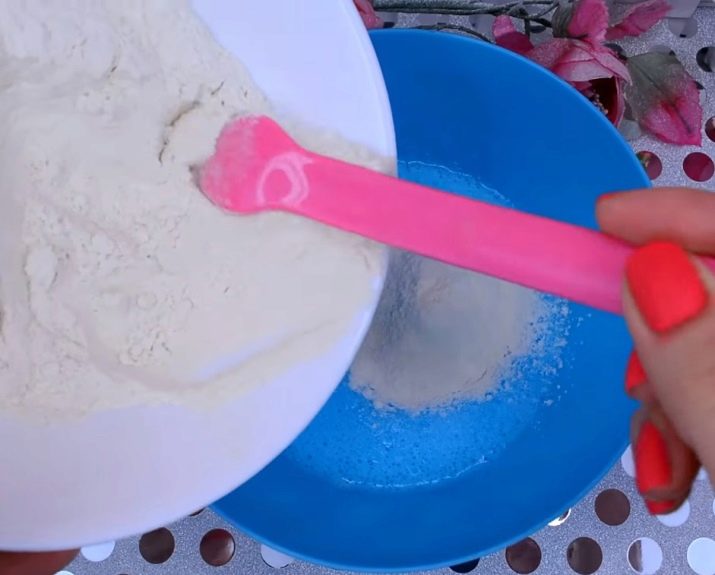
The container is taken out of the refrigerator, flour is poured into it. Everything needs to be mixed well.
-
We leave the toy to "ripen" in an open container at room temperature.
-
If at first the slime sticks to your hands, it's okay. You need to grease the toy with cosmetic oil and knead it - the slime will immediately become elastic.

You cannot use vegetable oils to create an elastic toy. If you add this component, the slime will deteriorate on the second day. Better to use cosmetic oils.
With water
To make a water-based slime, you will need:
-
1 cup flour;
-
ice water (1/4 cup);
-
hot water will be required as much as cold.

Here is an algorithm of actions.
-
Pour baking powder into a bowl.
-
Pour in cold and hot water immediately.
-
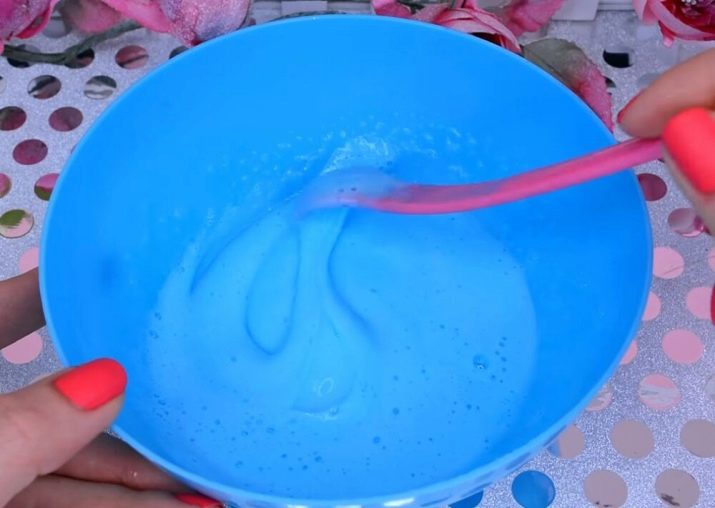
We begin to intensively stir the mixture. Even if the mass looks like glue at first, it will thicken over time. It is best to use a fork for mixing.
-
The toy is ready, you need to knead it in your hands.
-
You can add paint and mix everything again.
-
The toy is put into the refrigerator. After about half an hour, you can get it out.

With baking soda and hand cream
To prepare a toy slime, take:
-
cream;
-
flour and soda (3 tablespoons of each product).
Cooking steps:
-
flour and soda are mixed;
-
gradually a cream is added to the powder, the mixture must be constantly stirred;
-
when the mass begins to move away from the walls of the container, you can knead it in your hands;
-
if desired, you can add glitter or paint to the toy.

With soda and PVA glue
You need to take:
-
about 50 ml of glue;
-
2 tablespoons of baking soda;
-
2 cups of flour;
-
hot (50 ml) and cold (40 ml) water;
-
you can also add a few drops of paint.

The work algorithm consists of several points.
-
Pour flour into cold water (this should be done slowly and in portions). Everything gets mixed up.
-
In another cup hot water, baking soda and paint are diluted.
-
The mass of the two cups is combined. Everything is mixed again.
-
The toy is placed in the refrigerator, where it should "ripen" for 3 hours.

With shower gel
For cooking you will need to take:
-
flour of any kind;
-
shower gel.

Let's take a look at how to make a slime.
-
Flour and gel are mixed in equal proportions. However, you can add a larger amount of any of the ingredients. The more flour, the denser the toy will be.
-
We put the components in a cup and mix.
-
If a colorless gel is used, paint can be added.

With sugar
Looking for:
-
2 tablespoons of toothpaste;
-
50 ml shampoo;
-
granulated sugar - 30 g;
-
shaving foam (50 ml);
-
1 cup flour.

Cooking steps:
-
shampoo mixes with paste;
-
sugar is added and the mass is put into the refrigerator for about 10 minutes;
-
then flour is poured, and foam is squeezed out;
-
the toy needs to be kneaded.

With chocolate
Ingredients:
-
1 glass of water;
-
1 teaspoon caster sugar
-
1 cup flour;
-
1 tablespoon cocoa powder

Cooking steps:
-
cocoa is poured into flour;
-
water is poured into the mass, the mixture must be constantly stirred;
-
when the mass becomes homogeneous, sugar is poured in, the powder should dissolve;
-
the edible toy is placed in the refrigerator for 1 hour.

With Fairy
You will need:
-
flour (about 60 g);
-
lens storage liquid (15 ml);
-
flour (about 60 g).

How to do:
-
dishwashing liquid is poured into a bowl, flour is poured into the same;
-
everything is mixed, and then lens fluid is poured into the mass;
-
the toy should resemble jelly.

With starch
Potato starch works best.
Components:
-
2 tbsp. spoons of starch;
-
50 ml of PVA glue;
-
1 tbsp. a spoonful of water;
-
1 teaspoon of sodium tetraborate.

How to do:
-
starch is mixed in hot water, the mass should settle;
-
the mass will soon turn into a paste, into which glue must be mixed;
-
an activator is added to the glue, then the mass is whipped.
The toy will stretch perfectly and creak slightly due to the starch.

With hydrogen peroxide
Peroxide makes a durable and elastic toy. To create a slime you will need:
-
stirring cup;
-
flour;
-
hydrogen peroxide;
-
shampoo.

Let's take a look at how to make slime.
-
Shampoo and peroxide are mixed (the ratio should be 2: 1). You should get a homogeneous mixture.
-
The finished mass must be put in the refrigerator for 5 minutes.
-
After this time, the mass must be mixed by adding a little flour. Everything is rubbed with hands. Slime can stick to fingers.
-
The finished toy is placed in a bowl and left for a day.

With sodium tetraborate
This substance is sometimes called brown. Borax is used as an antiseptic, but it can also be used to create a slime.
If the skin is constantly in contact with chemicals, then it becomes hard and dry. However, if the slime is too liquid and constantly sticks to the fingers, it can be thickened with the help of borax.

In the simplest recipe, you need to use not only borax, but also flour, shampoo and toothpaste.
-
Put the shampoo and paste in one bowl and start stirring. The components are taken in the same proportions.
-
When the mass becomes homogeneous, flour is added. Everything is mixed again. If you plan to paint the slime, then the paint should be added already at this stage.
-
Borax should be gradually added drop by drop, stirring the mass each time. Stir until the toy is thick enough.
-
The slime is placed in the refrigerator for a couple of hours. After that, the toy can be used for its intended purpose.

How to store the toy?
Since the toy is made from natural raw materials, it does not have a very long service life. To prolong the life of a toy, you must take good care of it.
-
If you put a slime in the refrigerator, a toy made of flour can "live" for a week. If you leave the slime on the table, then at room temperature the toy will deteriorate after 2 hours. A dry crust will appear on the slime.
-
Immediately after playing with the slime, you must wipe your hands with a rag. The toy is put into a cup and placed in the refrigerator.
-
Do not touch the product if your hands are wet. Too much moisture will make the slime sticky and runny.
-
Slime, made from flour with your own hands at home, itself has a natural origin, so it can deteriorate due to mold or simply turn sour. If a fungus has appeared on the toy, an unpleasant odor emanates from it, or it has changed color, then you should immediately discard the slime.


Slime can be called a real hand trainer. Playing with such a toy acts as a massage for the hands and develops finger motor skills.
Flour slimes can stain clothes or ruin furniture. Better to move the game outside, or try not to touch the interior items.
How to make flour slime, see the video below.


