How to make a slime with your own hands?

Given the enormous popularity of such a children's toy as a slime, now many are interested in how you can make a slime with your own hands at home. It is worth noting that there are many proven working recipes and instructions for making such a substance at home. And in this case, we are talking about the fact that you can make almost any cool slime from the available means yourself, including rainbow and even glowing in the dark.


How to cook without sodium tetraborate?
Before considering which formulations actually work, it is important to note that the slime is a rather interesting toy. I mean something soft, viscous and shapeless, somewhat reminiscent of kinetic sand and possessing the properties of a non-Newtonian fluid. In other words, a real slime should look like a liquid slime, but it should be easy to collect during the game.

By the way, if the slime is left in a calm state, it will slowly spread.
The main ingredient that makes up the base of recipes used to be polysaccharide or quar gum. The second base component required for the slime to thicken and become stringy is borax. In the first case, an alternative can be an adhesive composition and other polymers, while the second ingredient is replaced with sodium tetraborate, boric acid and other thickeners, including even special solutions for lenses.


If you really need to make a toy for a little boy or girl, then you can independently prepare a regular composition for a slime in just 5 minutes. However, it is recommended that you first explore the recipe options.The fact is that the sodium salt of boric acid, which has the properties of an effective thickener, is capable of provoking allergic reactions in children and adults. That is why, if there are relevant concerns, it is worth paying attention to the options for making good slimes, which will not contain sodium tetraborate.

One of these recipes for creating a guaranteed safe slime is as follows.
- Dissolve starch (75 g) in cold water (150 ml).
- Pour the resulting solution into a plastic bag.
- Add about 60 ml of PVA glue. This is a small vial that can be purchased at any office supply store.
- If desired, add any dye or even aromatic additives, which will give the toy an original color and no less interesting smell.
- Stir the entire contents of the sachet thoroughly until the mixture has the desired consistency.
- Remove the resulting slime from the bag and drain the remaining liquid.

It is worth noting that it is best to use bags that have a sealed lock in the upper part to create a slime according to the described instructions. Such zip packages will greatly simplify the performance of all the above operations.

It is also worth considering that the service life of such a toy will not be the longest, but at the same time it is as safe as possible.
The next option for making slime for beginners, which is always obtained, involves the use of "Naphthyzin". The algorithm of actions includes the following simple steps.
- Polyvinyl acetate is poured into a container small in size and volume. It is recommended to use here not clerical, but PVA construction glue.
- A small amount of dye is added. The best option may be a regular gouache for painting.
- The mixture is thoroughly mixed.
- A small amount (no more than ½ teaspoon) of baking soda is introduced and the composition is mixed again.
- Nasal drops are added. In this case, "Naphtizin" will act as a key component, that is, a thickener. It is administered in small doses with constant stirring, achieving the desired consistency of the future slime.
- At the final stage, the slime is thoroughly kneaded by hand.

Another way to independently create a popular toy and antistress involves using office glue and, oddly enough, an air freshener as the main ingredients. The process itself is again as simple as possible and involves the following steps.
- Pour silicate glue into the container.
- Add any colorant if desired. You will need to mix the ingredients well immediately.
- Sprinkle the future aerosol substance several times with an air freshener.
- Mix the entire contents of the container well.

A thickener must be added until the mixture is thick enough.
You can decorate such a slime by adding a little sparkle to its composition, in addition to the dye.

Sodium tetraborate recipes
However, in practice, most often in the manufacture of slimes, the sodium salt of boric acid is still used as a base, that is, the already mentioned borax. This refers to a white powdery substance, transparent solutions of which are sold in many modern pharmacies. It is important to note that slimes containing sodium tetraborate are the strongest. In other words, the key predictably lies in the properties of the thickener. Naturally, the quality of all other components will also affect the characteristics of the toy.
However, when working with the described substance, it is strongly recommended to use the utmost care. It is important to keep in mind the aforementioned risk of allergic reactions to borax. The signal that the slime must be removed and replaced with a safe (hypoallergenic) analogue will be the slightest irritation and other manifestations on the skin.

Classical
The simplest and, therefore, the most common option for making a slime provides for the presence of three components, two of which are mandatory:
- sodium tetraborate, which can be purchased in pharmacies (we are talking about a 4% solution or powder, which is diluted at the rate of 1 tsp. in a glass of clean water);
- polyvinyl acetate (PVA glue);
- dyes that are added at will.


The sequence of actions is described below.
- In a plastic or glass container, mix ¼ cup of glue with the same amount of water. At this stage, it is important to thoroughly mix the two components until a homogeneous smooth paste. If it is liquid, then the concentration of the glue can be increased.
- To give the slime an original and bright appearance, add gouache, food colors or ordinary medical brilliant green.
- Slowly add the thickener while vigorously stirring the mass in the container until the required characteristics are achieved.
- Knead the slime very well until it easily peels off the walls of the dish and spoon, then bring the toy to readiness, kneading it thoroughly with clean hands.


It is important to note that the properties of the slime directly in this case will be determined by the characteristics of the glue used. Often, in practice, you have to experiment using different brands of PVA.
It is imperative to check the expiration date of the adhesives used. It is also not recommended to add glue that was opened earlier to the mixture.

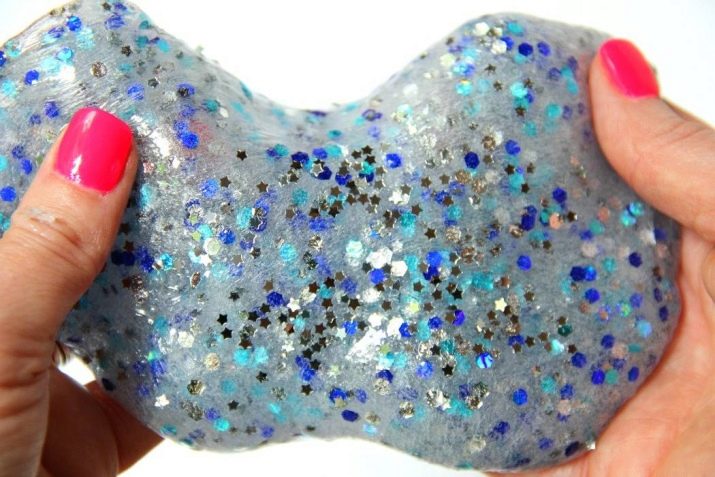
In this case, silicate glue can become an alternative to polyvinyl acetate. Its use will make it possible to make a transparent slime, which can be effectively decorated with sparkles. In addition to the glue itself, you will need a borax and, of course, dishes for mixing the components and kneading the slime. Making a transparent version of the toy looks like this.
- Pour glue into the prepared container.
- Add sodium tetraborate slowly and in small portions. Each dose of thickener should be completed with thorough mixing. In parallel, the consistency of the slime is monitored to determine the required amount of borax.
- If the mixture is thick and viscous enough, you can continue to knead it with your hands.
- If desired, you can add dyes or glitters, mixing the slime well to distribute them evenly.
- Place the resulting substance in a container, close it and wait until the slime becomes transparent. As a rule, the toy takes the required structure and appearance in 2-3 days.

Summing up, it is worth noting that if you wish, you can make a more liquid slime. To do this, you need to add water to the silicate glue before mixing it with other components.
With toothpaste and gel
This is one of the proven and popular recipes. When making such a slime, there will be no difficulties, and the process itself will consist of the following stages.
- Pour silicate glue into the mixing container.
- Add literally a drop of dye.
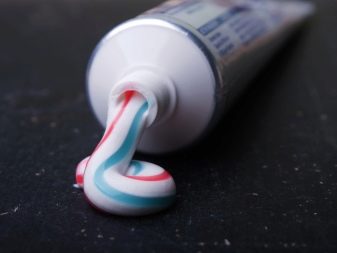
- Squeeze some toothpaste out of the tube and mix all the ingredients.
- Add a small amount of gel (shaving foam) and carefully mix the resulting mass again. You can add a little of this ingredient if necessary.
- Add sodium tetraborate as a thickener.
- After the slime thickens a little, it is recommended to knead it manually at the final stage. As soon as the mass stops sticking to your hands, it is considered completely ready.

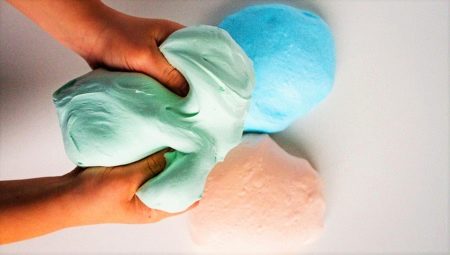
Particularly noteworthy is the method of preparing the so-called fluffy slime, that is, its airy version. The main distinguishing features here are good viscosity, lightness and a pleasant texture to the touch. The list of components includes:
- water - 75 ml (5 tablespoons);
- stationery glue - 50 g;
- PVA - 150 g;
- toothpaste - ½ tbsp. l .;
- liquid soap - 1.5 tsp;
- hand cream - a small amount;
- shaving gel - 10 tbsp. l .;
- thickener - sodium tetraborate;
- food coloring and glitter (optional).


Preparation:
- pour office glue and PVA into the container;
- add water and stir;
- add toothpaste and some hand cream;
- add liquid soap to the mass;
- all components in the container must be thoroughly mixed until the substance is as homogeneous as possible;
- add dye (Easter egg dyes and other food coloring substances are successfully used) and mix it well;
- introduce an ingredient, thanks to which the slime will acquire the necessary lightness and airiness, that is, a gel or shaving foam;
- Knead all the mass obtained at this stage for a long time and with high quality.
The next step is to add sodium tetraborate with constant stirring. This substance is introduced until the desired consistency of the future toy is obtained. As soon as the slime begins to thicken, it is better to knead it with your hands. The finished mixture should not stick.

From shampoo and starch
This slime differs from many other homemade options in that it is:
- dense;
- velvety;
- pleasant tactile;
- matte.

It is very easy to sculpt different figures from such a slime. Its main drawback is its fragility, due to the fact that the starch hardens quickly enough. As a result, the slime loses its elasticity, and even keeping a toy in a closed container will not help to avoid such consequences.
You will need:
- shampoo, liquid soap or shower gel - 1 tbsp. l .;
- dye;
- starch - 2-3 tbsp. l .;
- mixing container and spoon or spatula.


Preparation:
- shampoo, gel or soap is poured into the container;
- add a dye;
- mix the ingredients thoroughly;
- starch is gradually introduced with constant stirring.

From shampoo and water-based plasticine
This option will be a "long-liver". If you store such a slime in a film or in a resealable container, then it will retain its main qualities for a long time. It is important to take into account the increased plasticity of the most important component. At the same time, floating (water) plasticine in tandem with shampoo acquires new unique properties. As a result, the mixture can easily be smeared over any surface, and then, easily collecting, kneading, stretching and performing any manipulations.

To make such a slime you will need:
- shampoo, shower gel or liquid soap;
- water plasticine.


The cooking procedure involves just a few elementary steps. You will need to roll out or flatten the plasticine into a cake and add shampoo, soap or shower gel to the middle. All that remains is to thoroughly knead it all with your hands.

The thickener is added until the desired consistency is achieved.
How do you make an edible version?
In this case, a slime immediately comes to mind, made of cream, dough, jelly powder and other consumables that can be eaten. Unlike classic manufacturing options, such slimes will definitely not harm your health. But it's important to remember that these toys are not meant to be eaten. They are designed so that if a child accidentally tastes lizun, then such a tasting will be safe for him.

These slimes are a great alternative to standard recipes for babies with sensitive skin. In this case, contact with potentially hazardous chemicals that are present in most common slimes is almost completely excluded. One of the simplest cooking methods involves using marshmallows and Nutella paste. The algorithm will look like this.
- Pour the marshmallow into a glass or ceramic container and place in the microwave until it melts and expands in volume (as a rule, 1 minute is enough).
- Stir the resulting mass.
- Add peanut butter to the mixture while still hot in a 1: 2 ratio.It is worth noting that the plasticity of the future slime will directly depend on the amount of this component.
- Knead the mass thoroughly and for a long time with a spoon. Difficulties may arise due to the fact that it will stick.
- At the final stage, knead the slime with your hands.

The next way:
- peel off the wrappers and place the Mamba candies in the container;
- melt sweets in the microwave and stir;
- add starch to the hot mass and knead well again to the desired density;
- if desired, decorate the resulting toy with small sweets.

You can make an edible slime from many raw materials, the list of which includes any jelly candies, diluted gelatin, flour, starch, regular marshmallows, and more.

It should be borne in mind that such slimes in structure and properties will have some differences from the classic options.
For more on how to make a do-it-yourself slime, see the video below.


