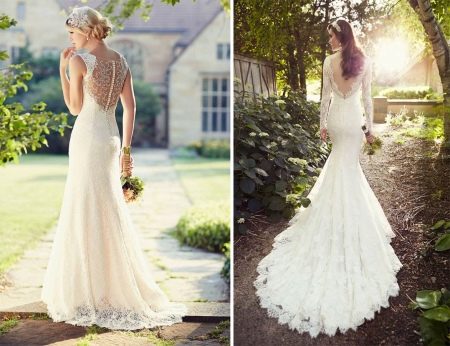
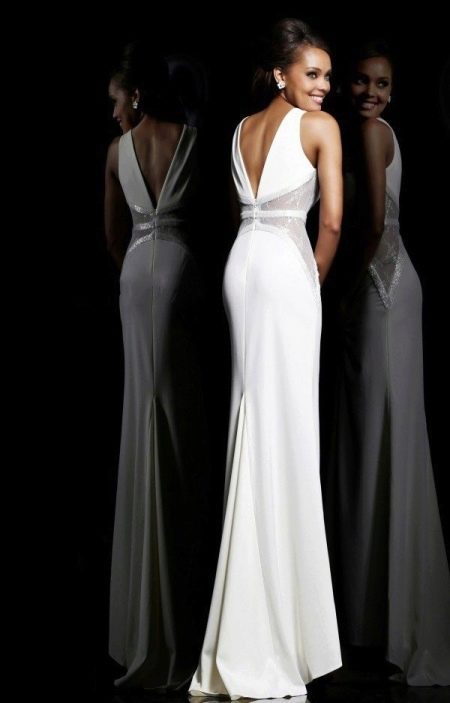
How to sew an open back wedding dress

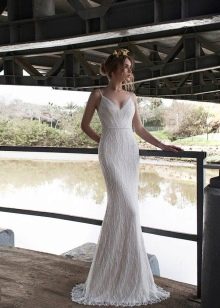
Feminine and elegant, this open back wedding dress is stylish and daring at the same time. Dressing him, the girl demonstrates her figure and posture.
This type of dress is very popular. But sometimes problems arise in sewing: it is difficult to cope with the fit, to connect lace with the main fabric. The construction of the back often adds complexity. Thus, before you start sewing, choose a style that suits your figure. The correct choice will solve all issues with the design and sewing technology. How to sew a wedding dress?
Cut types
Backless dresses are divided into 3 groups:
- Cutout on the back above the waistline. This type is suitable for girls with narrow hips and a protruding belly, as well as if there is no bend from the waist to the hip. A special feature in sewing is cutting off the upper part of the undercut when deepening the cutout. During the fitting, extra centimeters are noticeable. They do not need to be removed either in the sides or in the center of the back, since the fit at chest level will be disturbed. Thus, all unnecessary things need to be removed in the rear reliefs, that is, hidden in the grooves on the back.
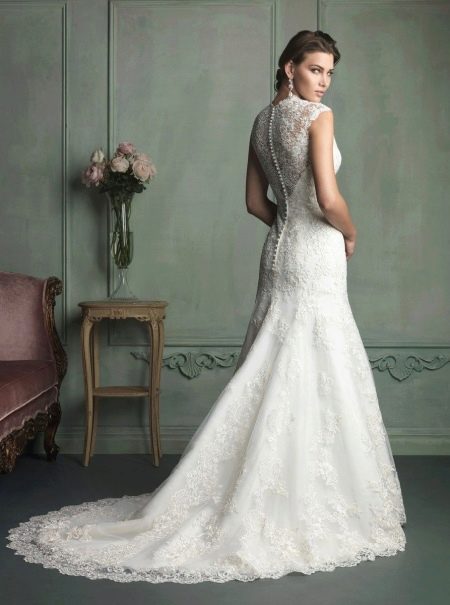
- Cut to the waist. Suitable for girls without a protruding belly and with a good drop from the waist to the hip. It is necessary to take into account when building a pattern that the entire undercut is cut off, and the bend of the back is not taken into account. If the back is not covered with lace, it is necessary to lay an inclined undercut. Its depth should be 1 cm towards the cutout. It is better to model the shape of the cutout on the layout. It is worth noting that the mesh plays an important role in the fit of the back. When using it, you can take into account the presence of a groove.Also, if the dress will be fastened with buttons, then when designing the middle cut, it is necessary to take into account the bulge of the shoulder blades and the degree of bend of the back.
- Cut below the waist... In this model, the requirements for the figure are very strict: a beautiful shape of the back, well-groomed skin and a pronounced waist, as well as moderate sagging of the figure, since it is rather difficult to achieve adherence of the neckline to the back. If the back is kinky, you can insert mesh or lace. It will also hide blemishes on the skin. When making a pattern, you should take into account the undercuts at the junction of the dress and lace at the level of the figure's bend.


The basis for the dress
When modeling a dress with an open back, you need to think in advance about what will provide the tension of the neckline to maintain its shape. Alternatively, it can be:
- heavy skirt;
- corsage;
- corset in the front of the dress;
- panties-bodysuit.


The basis is also selected depending on the type of figure:
- For girls with protruding breasts, you can sew dresses based on bodysuits, bodysuits and corset dresses.
- For a figure with a protruding belly and a belly located at chest level - bodice and corset dresses with a cutout depth of 4-6 cm from the waistline. A dress based on a bodysuit is not recommended, except in some cases.
- For figures with a pronounced belly - only corsage dresses, since this type of figure requires re-shaping. The depth of the cut from the waistline should be 6-8 cm.
Straps shape
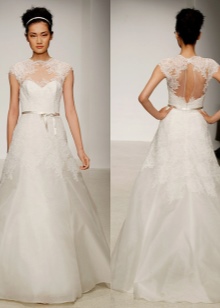
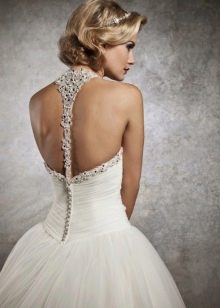
The presence of straps in dresses with an open back is required. The type and width can be varied. Instead of straps, there can be lace.
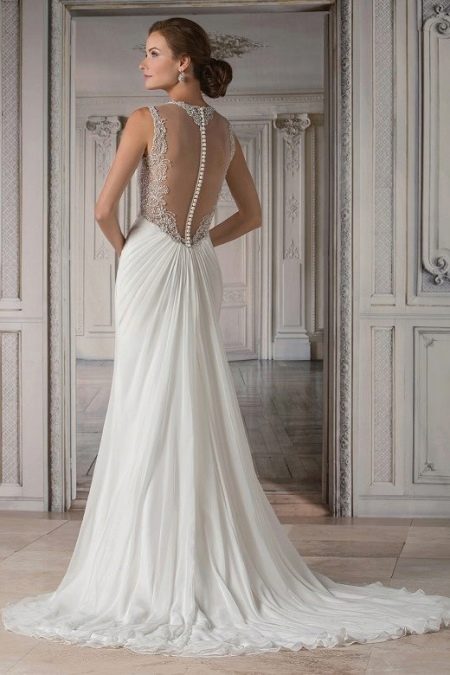
A transparent mesh that fully or partially covers the back will look very impressive. But it will not be very easy to sew such a wedding dress.
The choice of straps must be approached deliberately so as not to spoil the appearance of the dress and not to emphasize figure flaws. That's why:
- For figures with protruding shoulder blades, thin straps are selected. Lace or mesh can be inserted below the shoulder blades to avoid emphasizing the slouch.
- For figures where the shoulder blades and buttocks are on the same line, use thin or medium straps. The back can be decorated with lace partially or completely.
- For figures with protruding buttocks, you can use any straps, as well as lace, which partially or completely covers the back.
- For a figure with protruding breasts and buttocks in models with a cut below the waist at the bottom, it is better to use lace. It will contribute to a better fit, you can also choose loose styles of skirts.


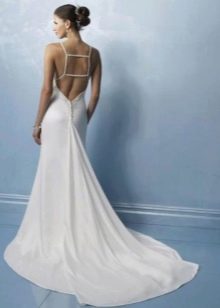
A dress with one strap looks original - asymmetry that attracts attention.
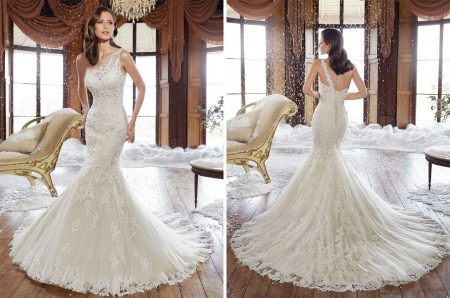
Modeling a dress with a cut-out to the waist line
Before modeling an openwork straight dress with a deep cut on the back and with or without sleeves, take all necessary measurements:
- chest girth,
- girth under the bust,
- product length,
- back height,
- prepare a basic pattern for the dress.

Back pattern
Transfer the following lines to the finished main pattern:
- reduce shoulder 2cm from armhole. Measure its length - 4 cm;
- draw a cutout for the back, like on a mold. At your discretion, the shape of the cutout can be deeper or, on the contrary, smaller;
- make the skirt you want.
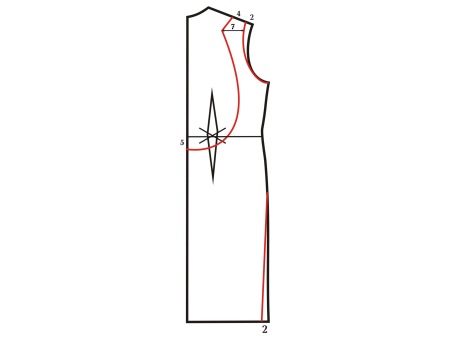
Front pattern
The sequence of actions for the pattern of the front:
- Move the dart on your chest to the side.
- Arrange the shoulder in the same way as on the back (length - 4 cm).
- Raise the neckline 2 cm.
- Draw a boat neckline, like on a template.
- Model a 3/4 narrow single suture sleeve.
Skirt pattern
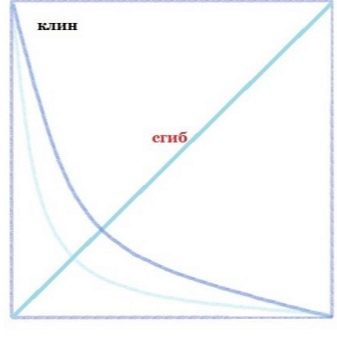
You can also model the skirt model according to your preferences. For example, you can add a small train to the straight bottom of the dress.
It will be obtained by adding a wedge. A train is cut out, like 1/4 of a circle. Forming the bottom, the line can bend more, then the train will be longer along the fold line (dashed line in the drawing).
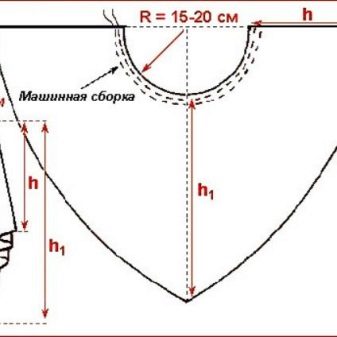
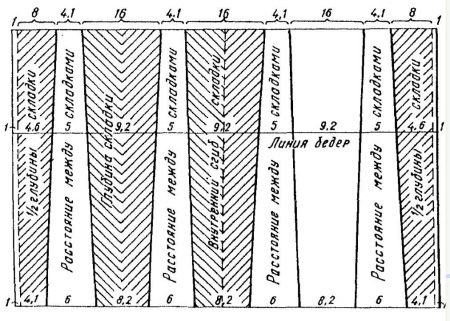
The dress can be half-length, then parallel and tapered dilution is used to form the gathers.


A train will work if you build a wedge along the middle cut of the skirt, while the front of the skirt is made shorter than the back. The loop is already taken into account.
To learn how to sew a wedding dress with an open back and a train, see the next video.
Sleeve pattern
- take the necessary measurements: sleeve length, chest semicircle and sleeve length to the elbow;
- draw a rectangle with points A, B, C, and D. Where sides AB and CD are 38 cm wide. This will be the width of the sleeve. It is calculated by the formula: (48: 3 + 3) x 2 = 38. That is, 48: 3 - 1/3 of the semicircle of the chest (when constructing, substitute your parameters), to which add 3 cm and multiply by 2 cm.
- measure the length of the sleeve +2 cm on the segments AC and BD.For example, if the length is 58 cm, add 2 cm. Get 60 cm.
- the height of the okat is measured as follows: from point A, set aside 15 cm to the bottom and put point P (point P1 on the segment CD). It is measured as follows: 20: 4 × 3 = 15, where 20 is the depth of the armhole of the base of the dress;
- 33 cm from p. A put point L - the length of the sleeve to the elbow. Draw a straight line and put point L1 at the intersection with the BC;
- for the sleeve dividing, divide the AB side into 4 parts and mark the dots as on the pattern;
- Connect t. O with t. P and P1, put t. O3 and O4 on the intersection line. Divide the segments indicated by the dotted line in half. In the segment PO3, step back down by 0.5 cm, in O3O - up by 2 cm. Do the same with the segments OO4 and O4P. Draw an okat line along the new points.
Sewing
How to sew a wedding dress with your own hands:
- From the lace, cut out 1 detail of the back and front, 2 details of the sleeves.
- All parts of the front and back are made of lining material.
- Sew the lining with the lace at the front and back.
- Sew shoulder seams and sew on sleeves.
- Stitch the side seams.


Everything is clear and understandable written) Thank you!