Wedding dress patterns

When modeling and sewing a wedding dress, each figure must be approached individually, since on this day all attention is focused on the bride. Therefore, this article contains patterns of long and short wedding dresses, original and traditional, practical and very elegant, strict and sexy. A step-by-step description of sewing will help you create your own unique wedding dress.
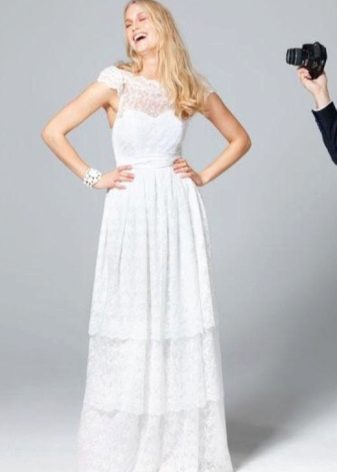


Open back dress
A long wedding dress with a three-tiered skirt and an open back looks very romantic and sexy at the same time. A flirty bow will add spice to the outfit. The dress visually stretches the figure, which is very good for short brides.

Pattern
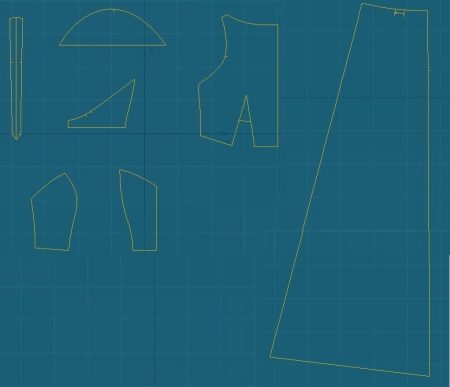
Transfer the details to a large piece of paper according to your measurements. Do not forget to add allowances: along the cuts and at the seams - 1.5 cm, for the hem of the bottom of the dress and the lining - 1 cm. You can make a more accurate pattern of the desired size using the RedCafee program.
Cut open
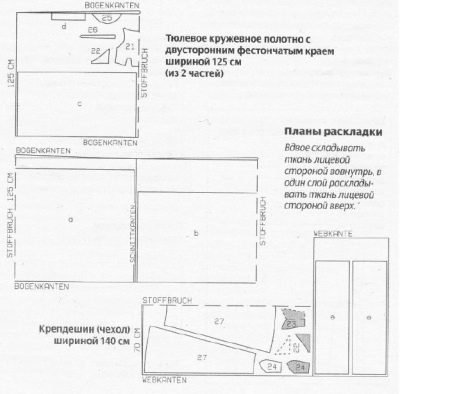
From double-sided scalloped lace fabric, cut according to the layout:
- Front bodice with fold - 1;
- Back bodice - 2;
- Sleeve - 2;
- The strap - 2;
- All details of the skirt (lower, middle and upper tiers);
- A scalloped strip for a neckline approximately 40 cm long and 7 cm wide.
Please note that when cutting the sleeves and skirts, the bottom edges of the sleeves should fall on the scalloped edges of the lace fabric.
Organza cut out 2 straps and 2 edging of armholes 4 cm wide, taking into account the allowances, edging for the drawstrings.
From satin or crepe de Chine:
- The central detail of the front bodice - 2;
- Side part of the bodice - 4;
- Back bodice - 4;
- In front of folded skirts - 1;
- Back fabric of the skirt - 2;
- The belt is 2.3 m long and 34 cm wide, which, when finished, should be 17 cm.
Sewing
Adjusting scallops
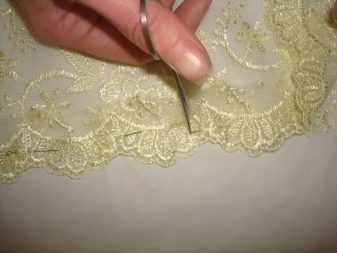
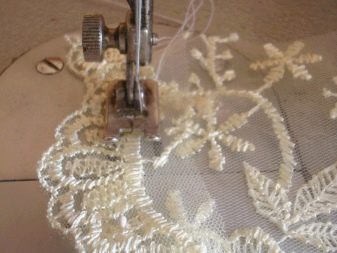
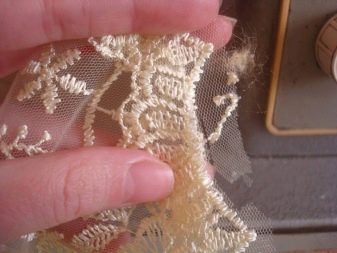
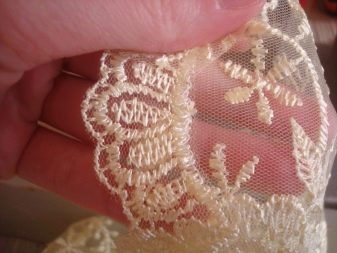
- Iron the fixers on the seamy side of the bodice along the cut of the neckline. Pin the lace strip to the bodice. In this case, the scallops should protrude 1.5 cm beyond the neck cut, the middle scallop is located along the middle of the front.

- Notch a straight cut of the strip in several places up to the bottom edge of the scalloped motif to make it easier to shape the neckline. Sew a tight, tight zigzag stitch around the edge of the motifs. Trim the straight cut and the neckline seam allowance close to the zigzag stitches. Cut the protruding ends of the strip at the shoulder cuts and cuts of the front bodice armholes. Remove stickfleeze.
Sewing straps
- Sew darts on the lace bodice at the front and iron. Stitch the front and back bodice. Cut and press the seam allowances.
- Baste off lace and organza straps. Fold inward with the lace fabric and stitch. Turn the strap inside out and iron the seams. Sew the second strap. Baste them to the shoulder of the front bodice.
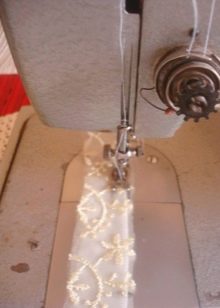

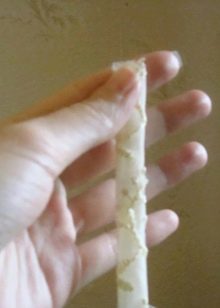
Sewing sleeves
- Collar the sleeves. Sew the sleeves into the armhole of the front bodice and baste to the shoulder straps.
- Fold the organza armholes in half with the outside facing up and press them down. Pin to the upper edge of the front and back, while the fold should be 1 cm from the seam line. Sew the piping and sleeves in one stitch.

Adjusting the wings
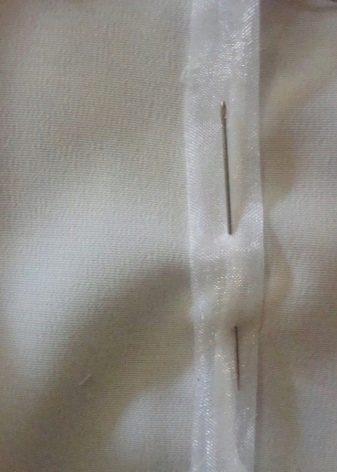
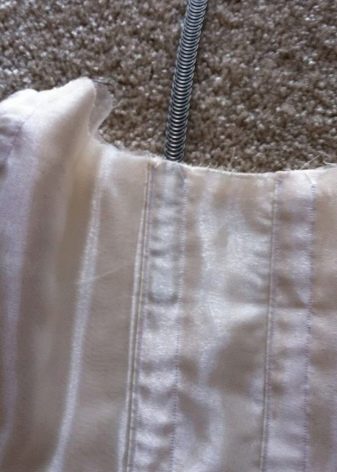
- Sew raised and side seams on the satin front bodice. Iron the seams. Pin the organza side seams over the raised and side seams to the outside piece and sew on both sides 5 mm from the seam.
- Stitch the top sections of the two satin layers along the wrong side, leaving a strap section on the back. Turn the cover over and iron the top edge.
- Cut the underwire tape along the length of the drawstrings. Slip them in and secure the ends.
- Sweep the lace front bodice with a satin cover along the cuts of the front armholes and the upper cuts of the back. The inner part of the bodice made of satin on the back is not fixed. Insert the straps into the holes in the back, pin and try on, then fasten.
Sewing a skirt
- Sew the side seams on the satin skirt. Fold in and sweep pleats at the top of the skirt. On the lower tier of the lace fabric on the back along the middle cut from the top, measure 16 cm for the cut. Add labels. Fold over and stitch the cut allowances. Make similar cuts on the remaining tiers of the skirt. Hem the edges. Gather the top cuts of the tiers of the skirt together and connect to the cut of the satin skirt. Allowances on the back edges of the satin skirt should protrude.
- Tie a skirt to the bodice.
- Sew in concealed zipper.
- Sew a scarf.
Wedding dress with draped bodice
A fluffy light skirt and a corset draped with delicate tulle are a great option for a wedding dress for girls who want to show a graceful neck and beautiful shoulders.

Pattern and cutting
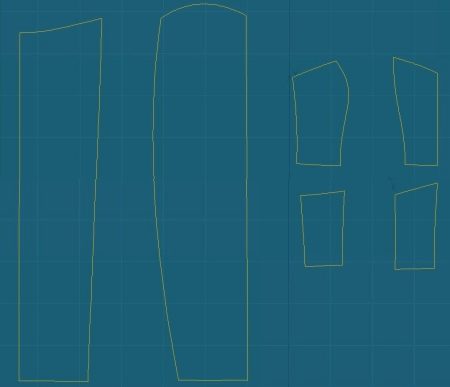
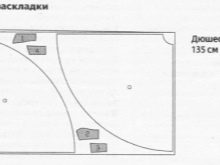
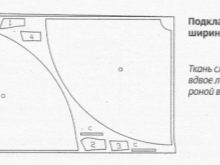
From the duchess and lining, cut out for the front:
- Middle and side details of the front bodice - 2 each;
- The middle part and the side bodice of the back - 2 each;
- Front skirt fabric - 1;
- The back of the skirt - 2.
Tulle cut out 2 front and back draped details. Also cut out the piping from the lining.
Sewing
- Stitch and iron the raised seams on the front and back bodice. Sew the drawstring piping.
- Gather the longitudinal cuts of the draped parts of the front and back, as well as the middle cuts of the front, evenly distributing them. Attach tulle details to the bodice section of the base fabric, baste and secure.
- On the front bodice, stitch the middle and side seams and press. Place piping over the side seams and stitch them.
- Sew the side seams on the duchess skirt.From the top of the middle cuts of the back panels of the skirt, measure down 20 cm to sew the zipper. Gather the top of the tulle skirt. Sweep both layers.
- Sew the skirt to the bodice of the dress and press the seam allowances.
- Sew in the zipper and sew the middle seam only on the duchess skirt. On the tulle skirt, the slit remains open.
- Insert the bones into the drawstrings, having previously cut them to the desired length.
- Sew the side seams on the bodice and skirt from the lining. Leave a slit for the zipper. Sew the skirt to the bodice and iron the seams.
- Stitch the lining and duchess dress along the top. Sew the lining to the zipper tapes.
- Overcast the bottom of the skirt with a zigzag stitch, and make a hem for the bottom of the lining. The underskirt should be 1 cm shorter than the skirt of the dress.
- Sew a satin ribbon.
Short wedding dress with ruffles
Pointed flounces on the sleeves and skirt, tied in grooves and embossed seams, give an effect to this alongside.

Pattern and cutting
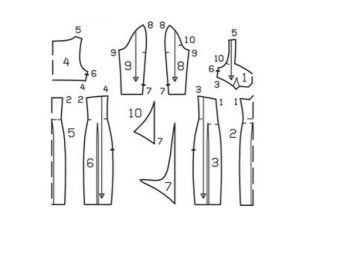
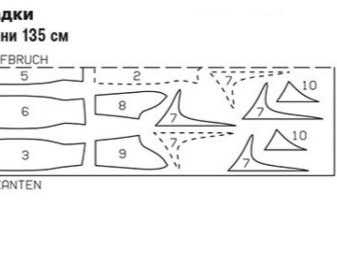
From crepe-marocin or double-faced, softly draped dress fabric, cut out:
- Fold front bodice - 1.
- Fold back bodice - 1.
- The middle parts of the front and rear panel of the skirt are 1 piece each.
- The side parts of the front and rear panel of the skirt are 2 children each.
- Shuttlecock front - 10.
- The front and elbow parts of the sleeve are 2 pcs.
- Shuttlecock sleeves - 4.
Made from lining fabric cut out the front and back bodice.
Press the non-woven fabric along the neckline and hemline of the front and back bodice.
Sewing
- Stitch the bust darts on the front bodice.
- Overlap or zigzag the outer cuts of the front shuttlecocks.
- Make a cut in the middle of the darts on the middle and side parts of the front panel of the skirt. On 6 shuttlecocks, cut the allowances for the edges of the grind to a width of 5 mm. Fold 2 shuttlecocks and glue off the grind sections. Pin the chipped shuttlecocks to the cut darts. Sew them while securing the shuttlecocks.

- Glue the remaining 4 flounces in pairs and pin them to the embossed cuts of the middle part of the front panel of the skirt. Stitch raised seams and iron.
- Sew the front bodice to the front of the skirt.
- Stitch darts on the middle and side backs of the skirt, and embossed seams on the back of the skirt.
- Sew the bodice on the back to the back of the skirt and press the seam.
- Sew shoulder seams, then right side seam. Sew the zipper into the left side seam.
- Sew lining darts, shoulder seams and side seams. Zipper cut does not grind.
- Sew the lining to the bodice of the dress along the neckline and zippers, also baste to the cuts of the armholes.
- Overcast the remaining 4 shuttlecocks and sew one at the front and elbows of the sleeves.
- Sew on the sleeves.
- Hem the bottom of the dress by ironing the hem and sewing it by hand.
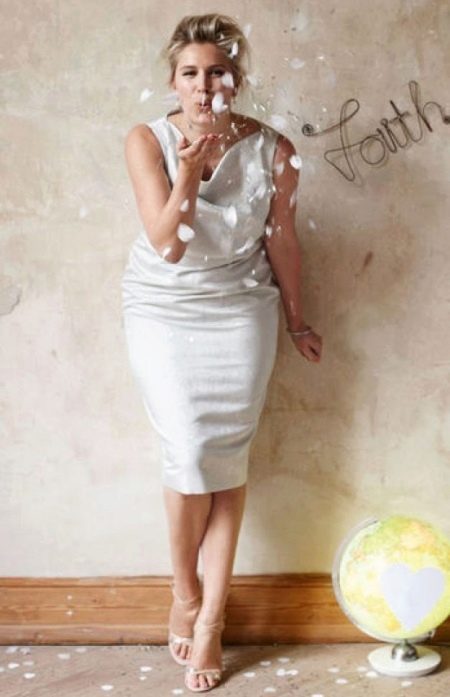
Short wedding dress - sheath
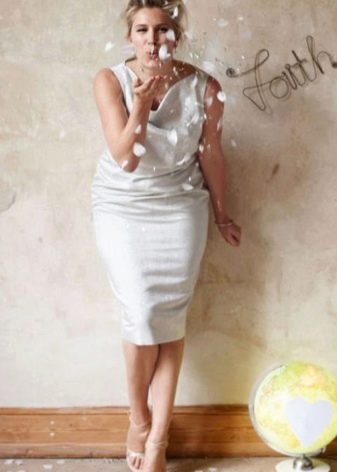
A not quite standard wedding dress looks austere and sophisticated. The advantage of the outfit is its practicality. A dress with a loose-fitting neckline and a narrowed bottom will decorate more than one gala evening.
Pattern and cutting
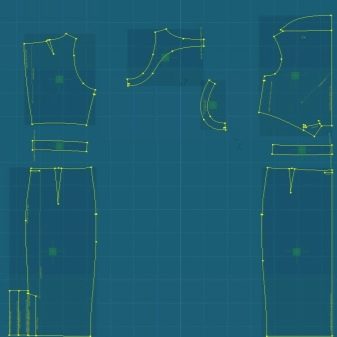
From a shaped fabric with a melalyk effect or a lightweight, keeping the shape of a dress fabric, cut out:
- Top of the front - 1.
- back top - 2.
- Front and back set-in belt with a fold of 2 children.
- Fold front panel - 1.
- Back panel of the skirt - 2.
- Front armhole facing - 2.
- Fold back facing - 1.

Sewing
Iron the non-woven fabric along the cuts of the armholes and neck before sewing.
- Sew on the back bodice and sew the undercuts.
- Sew darts on the front and back of the skirt. Make mid-cuts on the back of the skirt, leaving a slit for the spline.
- Sew the front and back set-in belts from the lining to the bottom of the bodice of the front and back and to the top of the corresponding parts of the skirt.
- Along the cuts of the armholes and neckline, sew the piping of the back and back on the wrong side.
- Sew the facing of the armholes to the cuts of the armholes of the front. Make notches at the rounding points.
- Sew the front neckline one-piece seam.
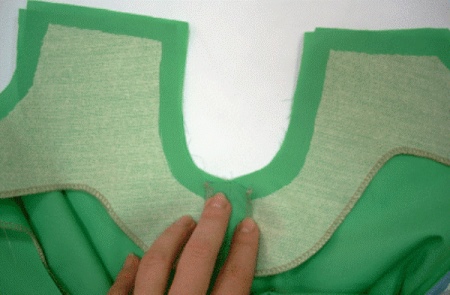
- Stitch the right side seam.
- Sew the zipper into the left side seam.
- Stitch a side seam on the inner set-in waistband and sew it to the outer waistband with wrong side to wrong side. Sew the sections to the zipper and from the front side, insert the stitches into the seams of the outer belt.
- Cut the splines.

Greek style
An empire or Greek wedding dress is versatile in that it suits any body type. The lightness and airiness of the dress emphasizes femininity and gives the bride a special charm.

Modeling
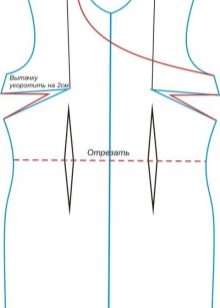
Take the basic dress pattern and transfer the neckline as shown in the photo and shorten the darts. Measure the length of the bodice. For the back, close the darts.
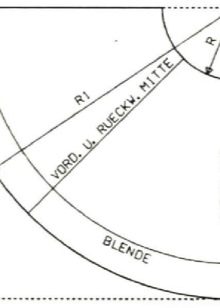
Draw a rectangle for the skirt. Draw a circle in the upper right corner. To do this, you need to calculate the radius of your waist using the formula R = (P / 3.14) \ 2, where P is your waist. You also need a rope and a pencil to draw the radius. Tie the pencil to a rope, the length of which should be slightly larger than the radius of the waist. Draw the upper circle, securing the rope at the right corner of the rectangle, and then draw the lower one, setting aside the length of the skirt.
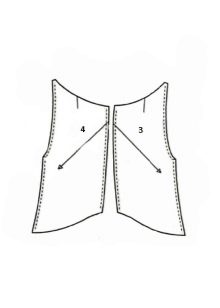
Also cut out a draped bodice.
Cut open
Crepe de Chine and lining cut the front, back and front fabric of the folded skirt 1 piece each.
Chiffon cut out the draped details of the front and back, as well as the folded top skirt - 2 details, bias tape.
Organza - oblique inlay.
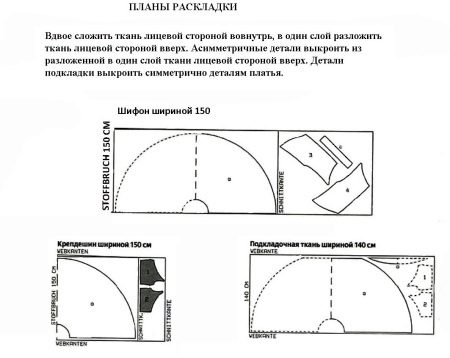
Sewing
- Stitch and iron the front and back darts in crepe de Chine and lining. Stitch the left side seam on the details.
- Gather and sweep the draped organza bodice with matching crepe de Chine details. Make sure the draped details are taut. Lay the protruding ends of the draped parts with folds along the bottom cut, which are sewn on the sides with as few noticeable stitches as possible at an interval of 8 cm.
- Sew one side seam on the chiffon top skirt. Gather it along the top edge to match the width of the crepe de Chine skirt. Sweep both canvases. Sew the side seams, leaving a 20 cm zipper opening.
- Sew the skirt and bodice together.
- Sew in the zipper.
- Sew a side seam on the lined skirt. Leave the zipper opening open. Sew it to the skirt of the dress, and sew the slits to the zipper tapes.
- Sew the lining with the bodice of the dress along the cuts of the bodice and armholes. Leave the shoulder section open. Turn the lining inside out, then stitch to the skirt seam and zipper headbands.
- Form the hem of the bottom.


Oh thanks! I have been looking for a lot of wedding dress patterns with a description.
It is not clear how to carve out a draped bodice? This is the most difficult and incomprehensible thing in the dress.