How to make a telescope with your own hands?
Every person at least once in his life wanted to take a closer look at the stars, and for this purpose it is necessary to use a telescope. But purchasing such optical equipment is quite expensive. However, there is a way out of the situation - you can make a telescope with your own hands. Thanks to a homemade telescope, it becomes possible to view lunar craters, Jupiter and its 4 moons, Venus, a large number of stars and nebulae.


Tools and materials
All telescopes are classified into two types: refractors and reflectors. For telescopes of the first type, different types of lenses are used, while for the second type, mirrors are used. For self-manufacturing of the device, it is better to choose a refractor model, since the collecting lenses, which are necessary for assembly, are much easier to obtain than the collecting mirrors, which are required for a reflector telescope.


The image in the telescope is upside down, so it cannot be used for observing objects on the ground. It is possible to flip the image. This can be done by adding positive lenses to the circuit, but it should be borne in mind that in this case the image quality will be worse.
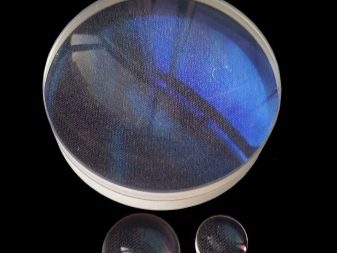
The most important part of a homemade telescope is the lens. The project of making a device with your own hands involves the use of two optical suitable lenses, while both lenses must be convex, that is, magnifying.

Sometimes it is possible to hear the opinion that you can make a telescope yourself from spectacle lenses. This is indeed the case. But it is preferable to use other types. There are several reasons for this.The first is that there is no way to find out the exact focus - as a result, it is unlikely that it will be possible to select the necessary glasses that have the necessary parameters for creating an optical device. The second reason lies in the peculiarities of optics: glasses from glasses or from a magnifying glass transmit an image of any objects with distortion.
In this regard, attempts to make a telescope according to the drawings using lenses from glasses or from simple magnifiers ends with a certain disappointment. This is due to the fact that the object of the celestial sphere (planet, nebula or some kind of star) looks like a fuzzy blurry spot. And it is very difficult or impossible to consider any clear specific details.


It is generally accepted that for a homemade telescope, it is better to choose achromats... The achromat itself is formed from two separate lenses, one of which is scattering, and the other is collective. Such lenses are made from optical glass of different dispersion. Due to this, chromatic aberration is almost completely neutralized. Achromat lenses stick together and can transmit the clearest and clearest image possible, so their use in homemade devices is quite justified. You can actually buy such lenses on the Internet or in specialized stores; to assemble a telescope, you need three separate lenses. Moreover, two of them should be the same in size, while the third should be slightly larger.
In some cases, lenses from binoculars or from a monocular are used to assemble a home telescope, but in such a case, distortion of the image in question is possible.
In addition to the lenses themselves, a few more additional materials are required.
- Whatman sheet (for pipe).
- Black paint for the inside of the sheet.
- Adhesive for bonding the sides of the sheet.
Tools required for work:
- a clerical knife or regular scissors;
- brush (for paint).


Assembly
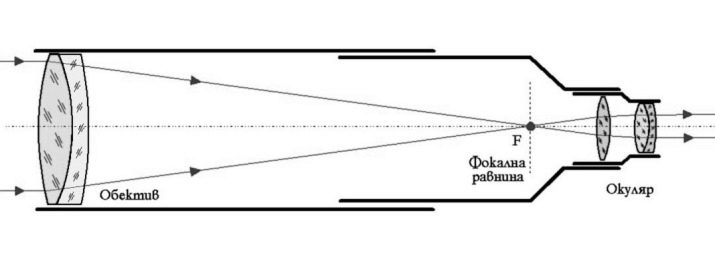
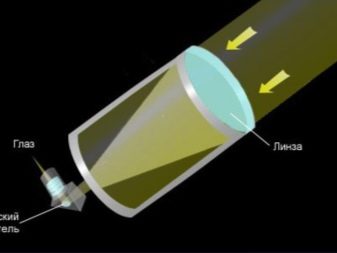
To make a telescope at home with your own hands, you first need to understand how it works. The main part of the device is the lens. It is a biconvex lens that is located at the front of the optical device and collects radiation. At home, it is necessary to initially determine the required increase. It depends on this how powerful the assembled telescope will be afterwards. You can independently achieve the necessary approximation of objects by choosing the right lenses.
The main characteristics of a home-made telescope are the diameter of the objective... This value is called the aperture. According to its indicators, the larger the aperture, the more the device collects radiation, that is, the greater its resolution. Therefore, it is possible to achieve greater magnification. For example, a device with a magnification of 700 times. If the lens has a smaller diameter, then the resolution will be lower, respectively, the device will work with 200x magnification or with another similar value, depending on the lenses used.
You can build a good home optical device yourself if you follow a few simple rules. The main one is the correct choice of lenses, since they are the basis for making a telescope.

Next, you need to prepare a tube from whatman paper. Its length should be approximately 60 centimeters, but it can be either larger or smaller. In this case, the diameter of the tube must be larger than the diameter of the selected lenses. Then it is required to cut out whatman paper according to the prepared drawings, while its inner part must be carefully and carefully painted black. Thanks to this, it is possible to successfully protect the future telescope from the possible penetration of extraneous light, which may come from possible external sources.
When the paint is completely dry, the drawing paper must again be carefully rolled into a small tube and carefully glue all the edges that touch. Next, you need to fix a large lens at the very end of the assembled pipe from a sheet of Whatman paper. In this case, the lens used for the future eyepiece must be fixed on a sheet of cardboard or paper, and wrapped in the same pipe from a sheet of Whatman paper... Next, you need to cut out two separate circles from the cardboard, in which you need to make holes in the very center. After that, these circles must be fixed inside the previously prepared tube. Wherein a tube made of paper (cardboard) must be able to move freely inside a large tube made of Whatman paper... This will allow you to tune the telescope for the clearest and brightest image possible.

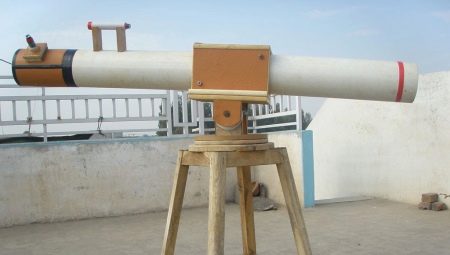
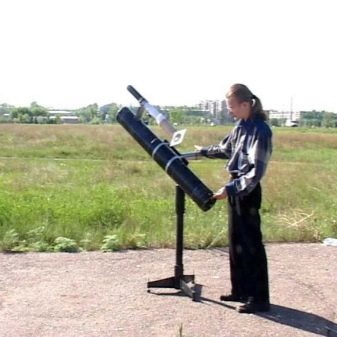
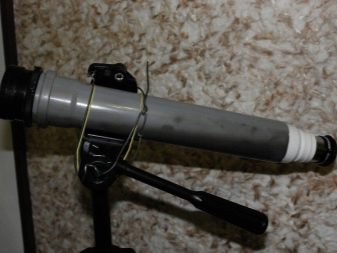
If necessary and for greater convenience, it makes sense to fix the assembled optical device on a convenient tripod. In this case, it will be much more convenient to use a homemade telescope. For this purpose, you can use a conventional camera tripod. By fixing the telescope on a tripod, observing the sky is much easier and more convenient. If you do not have a tripod, you can use other static objects on which you can fix the telescope. For example, the back of a chair, whatnot, other.

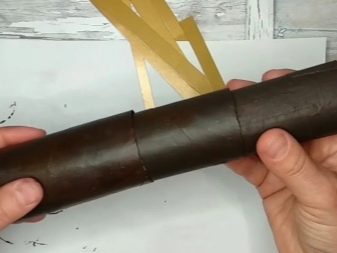
Another option is to use a pipe from an old vacuum cleaner instead of a Whatman paper... Since there is some thickening on one side of the pipe, its inner diameter is about 30 millimeters. This location is a great option for mounting a lens. And there is also a slight edge just in front of the lens itself. Thanks to this edge, it is possible to protrude a small canopy, designed to maximize protection against the entry of external rays. Thus, unnecessary glare will not appear, interfering with observations.
The smaller tube will slide freely in the main tube of the DIY. You need to insert a sheet of black cardboard into the pipe, which will help protect against unwanted glare.

Setting up a homemade telescope
To set up the telescope, you must first practice on any object outside the window.... Without proper adjustment, any subject image will look fuzzy and blurry. Therefore, the telescope needs to be adjusted to get a good image.
Do not aim the telescope at objects that are in the immediate vicinity. Because the true purpose of a telescope is to observe objects that are far away. Therefore, it makes no sense to focus and adjust the optical device on close objects.
Adjustment is carried out by carefully and slowly moving the inner tube until the selected object of observation takes on a clear outline. If the telescope is used by more than one person, but several, then the adjustment will have to be done constantly. This is due to the fact that each person has their own peculiarities of vision, therefore, it is necessary to choose such a distance between the lenses that will be optimal for a particular person.
It is worth remembering that even a previously tuned telescope will still constantly need additional tuning. Therefore, before each use, you need to make sure that the DIY telescope is set up correctly.


For people who like to observe the night sky, but do not want to spend a lot of financial resources on the purchase of expensive optical equipment, making a telescope with your own hands is an excellent opportunity to practice your favorite hobby. After spending quite a bit of time, you can make a simple telescope that allows you to observe objects in the celestial sphere.

Next, watch a DIY telescope workshop.


