Satin ribbon topiary: interesting options and care
Such an unusual decoration is often found both in residential premises and in offices. It is also called the tree of happiness because it brings good luck to its owner like an amulet.
Peculiarities
Topiary is not a copy of a living tree, since a large number of different materials and colors are used in the process of its creation. To decorate such a tree, ribbons, coffee beans, beads, rhinestones, natural materials and many more interesting things are used.
Topiary is a small decorative tree that can be a wonderful gift for a dear person or serve as a talisman to attract good luck.
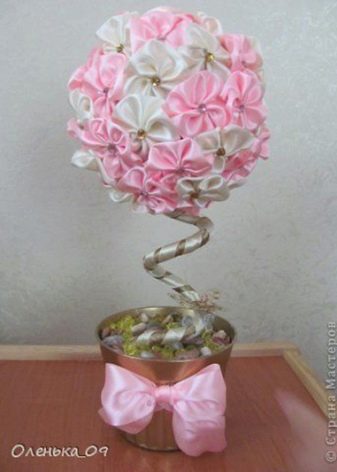
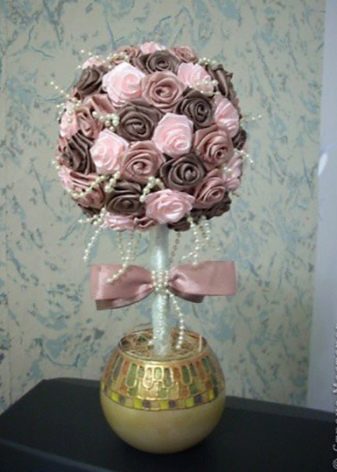
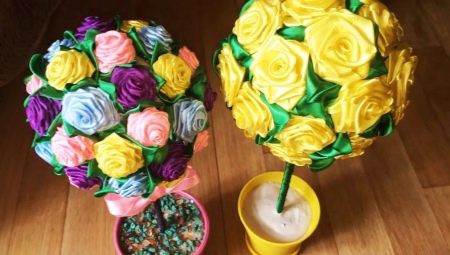
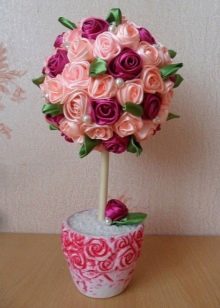
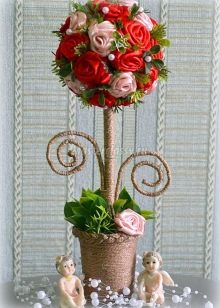
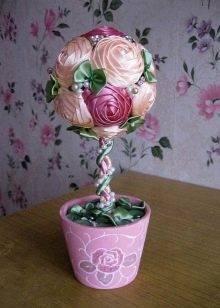
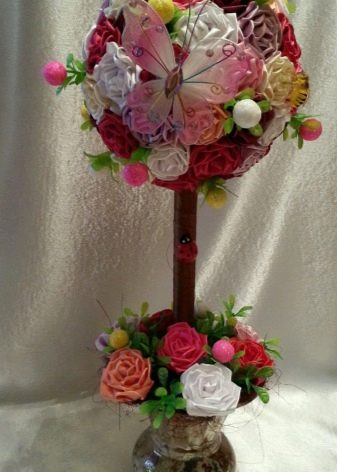
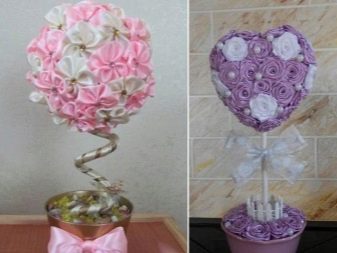
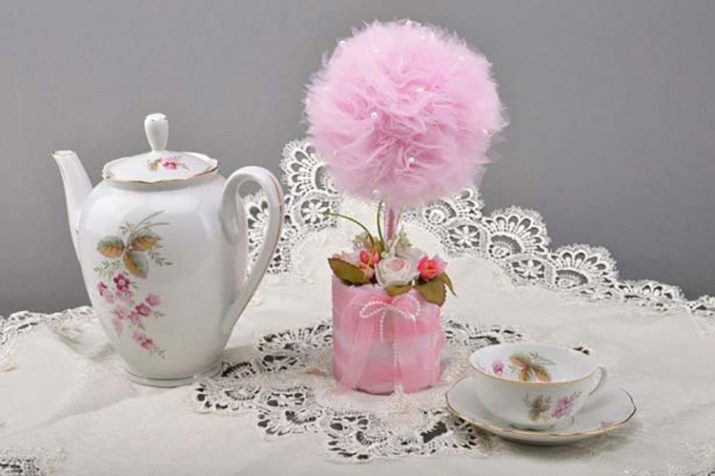
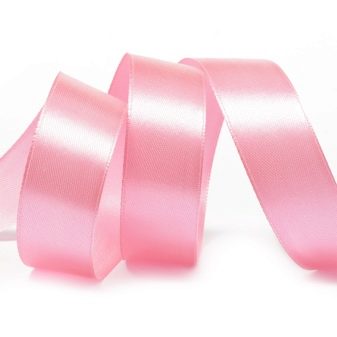
Topiary made of satin ribbons. Delicate satin ribbon will add special refinement and delicacy to the topiary. Ribbons of contrasting shades will look great, but trees made in pastel colors look great. You can make different flowers from ribbons, make balls or droplets, wrap the trunk with a ribbon. Small ornaments such as beads of different sizes, stones, decorative rhinestones and small figurines of insects will successfully complement the product.
Such a souvenir is the most popular among other types of topiary, since it is easy to pick up a gift for any event or arrange it for an interior.
Such a tree can be made from satin roses or from curls of ribbons. Any of these options will look organic and festive.

Selecting and collecting major parts
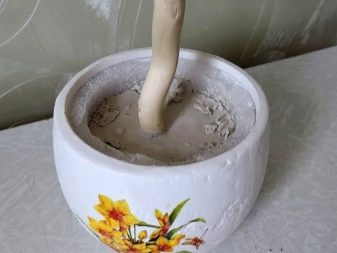
The choice of the main components of the topiary should be approached thoroughly, because the general appearance of the tree depends on it. The crown and the trunk are fastened together with a glue gun, and the trunk is fixed in a flowerpot with plaster.
- Crown. This is the main part of the decoration.What to make it from - it all depends on the imagination of the master (ribbons, flowers, beads, coffee beans, coins, rhinestones, small buttons, butterflies, etc.).
- Trunk. Here you can simply pick up something similar in shape: a small stick, a pencil, a twig, a thin roll of cardboard, etc. In the process, the barrel is either painted or wrapped with decorative tape.
- Pot. A small container suitable for the general appearance is selected. They buy it and modify it to fit the image.
Decoration options
Materials:
- satin ribbon;
- a piece of silver fabric;
- white satin ribbon, 1 cm wide;
- threads similar in color to ribbons, fine needle;
- stuffing material (for example, synthetic winterizer balls);
- Cup;
- lighter;
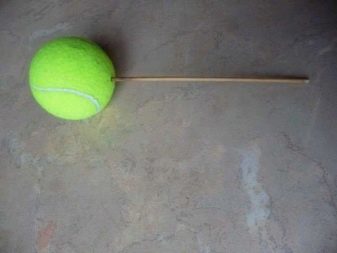
- tennis ball;
- pins;
- glue gun;
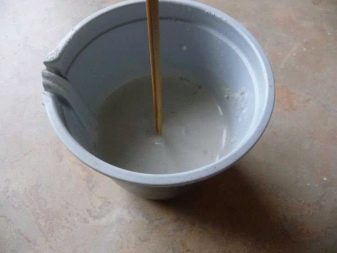
- alabaster;
- small flowerpot for indoor flowers;
- small decor items.


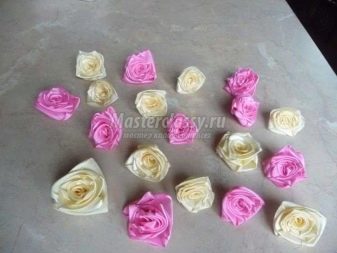
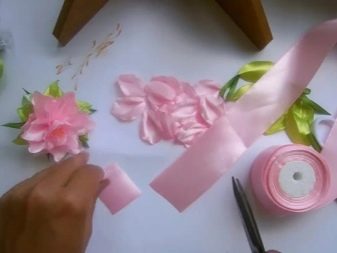
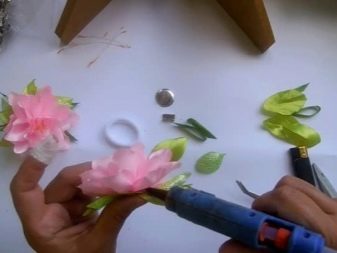
First we make a hole in the ball. Gypsum or alabaster must be stirred with water until a homogeneous mixture is obtained, pour the solution and insert our workpiece. We leave to dry. While everything is drying, you can start with the roses from satin ribbons. You need to fold the right end into a triangle so that the right end of the tape looks down, and the shiny side is at the top.
Turn the lower right corner to the left and make a tube again, turning to the left. Then you should continue to bend and twist the ribbon, not forgetting to stitch the middle. In the same sequence, we continue to make the petals until the ribbon ends. The tip of the tape must be hidden and secured with a needle. Using the same technology, we make the following roses.
Having decided on the places of flowers, you can start gluing them. We decorate the trunk of the topiary with a decorative ribbon. Then we start decorating the pot with sequins.
You can put decorative moss in it.
Organza flowers
The most elegant topiary is made of it. It is quite possible to make such an airy decoration with your own hands.
Consider a step-by-step master class (MC).
- Cut out a narrow strip of fabric, roll it up with a snail, after having processed the split edges. In order to get a lush, beautiful flower, you first need to work with the bud.
- We draw a template and cut out the required number of parts. Try to do the job carefully to get a beautiful flower.
- We collect the finished petals in a bud and fasten them with several stitches or glue them. Similarly, we glue the beads that play the role of stamens. The finished product is attached to the base with pins.
Poppy from satin ribbons
Necessary materials:
- felt blank;
- satin red ribbon;
- scissors;
- floss;
- lighter;
- paper;
- needle and thread.
Manufacturing method.
- We draw a petal on a piece of paper, which will become a template for creating a flower.
- We apply a template and cut out the required number of petals; for convenience, templates can be pinned with pins.
- Six petals should come out. If not everything worked out perfectly, then after firing the flaws will disappear.
- Make the next template 0.5 cm smaller than the previous one and also cut out six petals.
- Cut the petals to the pattern.
- Make another template 0.5 cm shorter than the previous one and cut out six petals.
- Treat all cut petals with a lighter.
- We fold the petals, starting with the largest size in a circle, sewing each row.
- When the first row is ready, we insert the stamens from the floss, sewing them.
- We carefully sew each row.
- We glue the felt blank at the base of the flower.

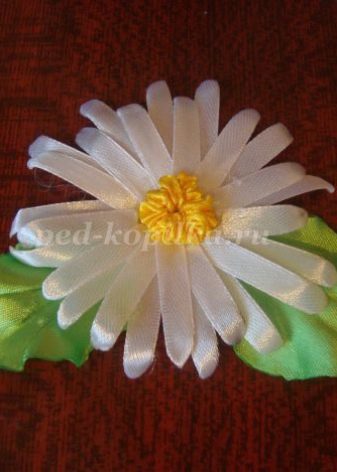
chamomile
Materials:
- button;
- satin ribbon;
- scissors;
- ruler;
- glue gun;
- lighter.
Procedure:
- we make blanks from a tape 10 cm long in an amount of 6 pieces;
- we process the cut edges;
- apply a drop of glue to the middle of each strip;
- bend the middle of each strip by gluing it;
- we glue all the blanks by placing the petals on top of each other in a checkerboard pattern;
- glue the button like the middle of a flower.
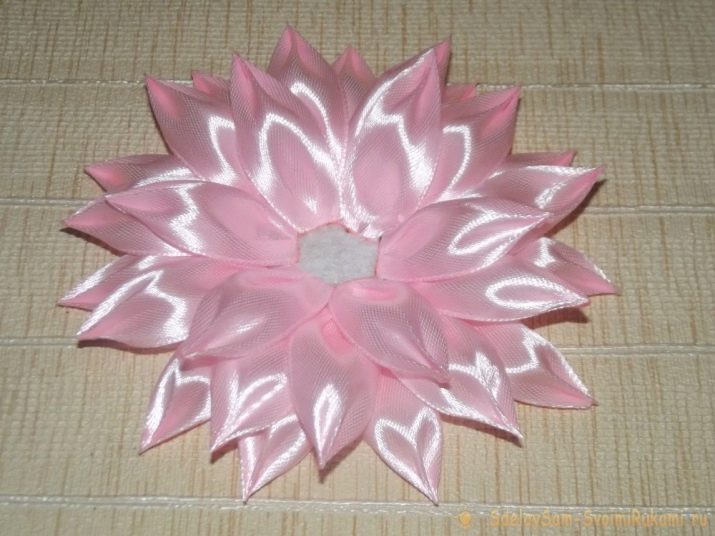
Dahlia
Materials:
- two satin ribbons, similar in shades;
- glue gun;
- tweezers;
- lighter;
- felt blank;
- beads.
Manufacturing method.
- Cut out squares from the tape, and the squares of one color are 1 centimeter larger than the other.
- Each square must be folded diagonally.
- Fold each resulting triangle two more times in the middle, fixing each position with glue. We cut off the ends and process them with a lighter.
- We pierce each petal and form a flower, fixing everything with glue.
- Glue the felt blank at the base of the flower.
We begin the process of flower formation with large leaves, ending with smaller petals.
Satin Ribbon Lily
Materials:
- ribbons: pink and green;
- round gold braid;
- scissors;
- glue gun;
- lighter;
- hair fixation spray;
- needle, thread.

Manufacturing method.
- Preparing templates for petals and sepals.
- Cut out blanks from a satin ribbon - 6 from pink and three from green satin.
- We process the edges with a lighter.
- We bend each leaf in half, stroking the middle with our fingers, slightly burn the fold, so that the vein is preserved and a relief appears.
- This is how all the petals are processed.
- We make stamens from the braid. Tie the edge of the braid into a knot, process it with a lighter. This is how we make five stamens.
- We collect all the blanks of the stamens and tie them.
- Sew each leaf to the stamens.
- There should be three pieces of paper in the first row. In the second, there are also three leaves, which need to be shifted slightly in relation to the first row.
- The green details are sewn on the pink petals with a slope - they should slightly hug the flower.
When the whole flower is collected, it is necessary to spread the leaves and sprinkle them with varnish. Then we give the flower a shape and leave it to dry.
In the kanzashi technique
In this technique, we will study the making of three crafts - "Asters", "Sunflower" and "Hearts".
"Aster"
Necessary materials:
- red satin ribbon;
- green ribbon;
- scissors;
- thread, needle;
- beads;
- glue gun.
Manufacturing process. Cut the satin ribbon into 12 mm pieces. It is better to burn the edges of the tape so that they do not crumble. We fold the workpiece in half, wrap the edge, getting a petal, which we sew along the edge. We also make the rest of the blanks. We connect them together, making a circle. In the same technique, we make two more circles. We try on the blanks and connect them together in a checkerboard pattern using hot glue. The flower is ready.
We make the leaves from blanks of a green satin ribbon, 6 cm long. We fold the blank in half, facing outwards. Using a thin soldering iron, select the triangle in the upper right corner. We turn out the blank and get a sheet. They are attached to the flower with hot glue.
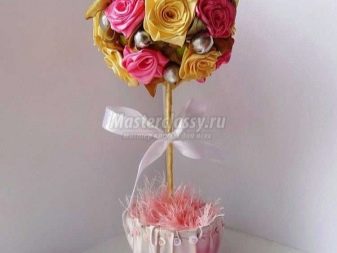
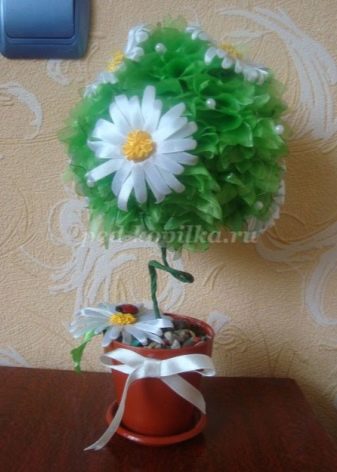
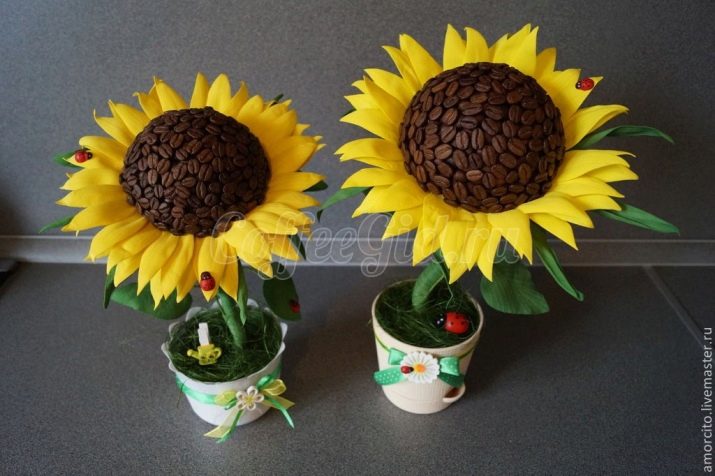
"Sunflower"
Materials:
- satin ribbons in bright yellow and dark green colors;
- large coffee beans;
- pot;
- gun;
- scissors;
- gypsum;
- newspaper;
- lighter;
- acrylic varnish;
- thick thread;
- green sisal;
- twigs;
- bugs and butterflies for decoration.


Procedure. We make the blanks of the petals. Cut the yellow tape into blanks and fold them in half. Next, we fold the blanks onto a cone and glue the cut place with a lighter. In the same sequence we make leaves, but the size of the blanks is 10 cm. To form a beautiful flower, many petals are required. They are glued along the rim of the disc - exactly, one after the other. Then they turn it over and glue the green leaves. The initial row is fastened, retreating from the edge of 2.5 cm, and the subsequent ones - closer to the central part.
Next, the work should be well dried and painted with an acrylic compound. It should be painted very carefully so as not to stain the products. A hole is made on the back of the disc for the stalk.
Further, coffee beans are glued to the middle, furrow down. They are attached in two layers and covered with acrylic varnish. We choose a suitable branch, process it with sandpaper and wrap it very tightly with green thread. Alternatively, you can paint the stem with green paint.We fix the flower on the top of the stem. After drying, it is covered with green leaves.
In the final part, we decorate the pot. Cut dry twigs into equal pieces. We attach them to the pot in the form of a fence and tie them tightly with twine. Paint the branches with acrylic varnish.
"Heart"
The manufacturing process is similar to the creation of the previous topiary. The only difference is that we choose not a round crown as a basis, but a shape in the form of a heart.
The workpiece is pasted over on both sides with paper corrugation. We form hearts from ribbons and glue them to the workpiece in random order.

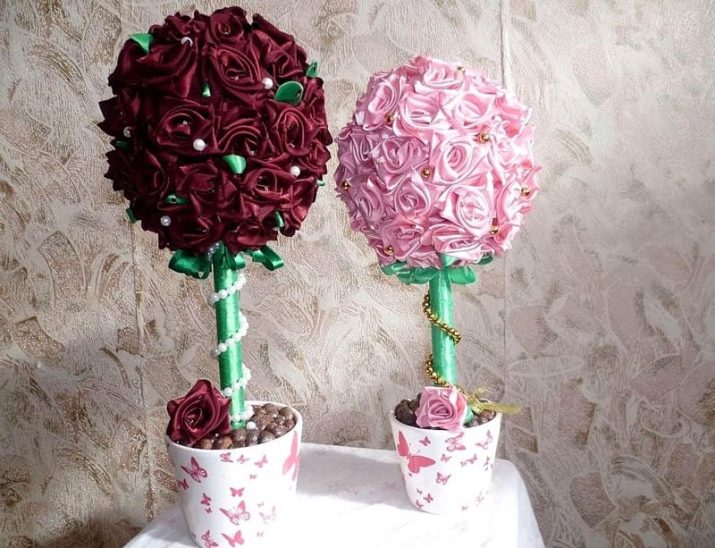
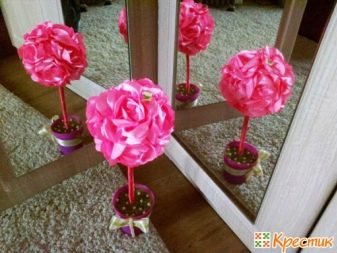
With roses
We select a tape 6.5 cm wide and 90 cm long. Fold the ribbon in half, inside out. Then we sew the workpiece from the fold line to the edge, along the edge. Pulling the end of the thread, carefully assemble, and wrap the edge of the ribbon, get the central flower bud.
Then we twist the tape around the circumference of the bud, securing the turns along the edge.
At the finish of the work, you need to carefully cover the ends, and spread the petals of the finished flower.
Care Tips
Topiary does not require special care. It is advisable to place the tree away from direct sunlight so that the colors remain bright as long as possible. Wipe off the dust periodically.

For information on how to make topiary from satin ribbons, see the next video.


