How to arrange an embroidery in a frame yourself?
When the embroidery is ready, it remains to complete the last stage - decoration in a frame, which depends on the taste and imagination of the needlewoman. Glass and frame are commonly used for this, although other options are possible. In this article, we will take a closer look at how to do it yourself correctly.
Preparation
To frame an embroidery, you should contact a special baguette workshop or make it yourself, so to speak, at home. This process is quite simple, so even a beginner in this direction can handle it.
Initially, you should pay attention that certain elements may be needed for embroidery design.
- Base. The fabric is pulled onto this part. A stretcher or backing can be used as a base.
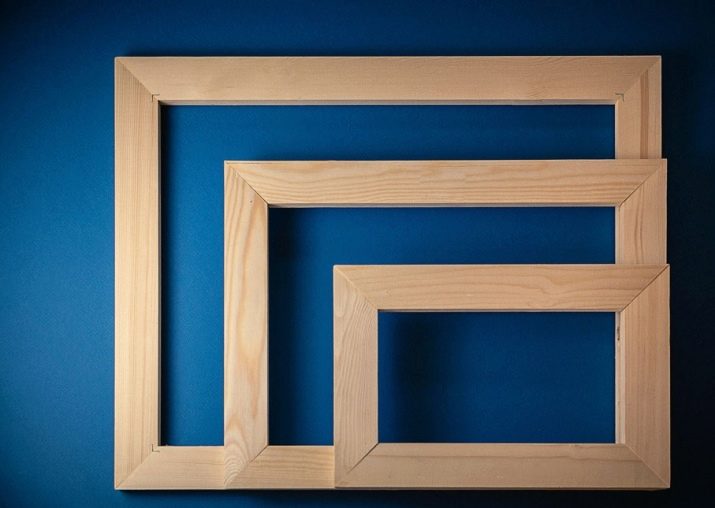
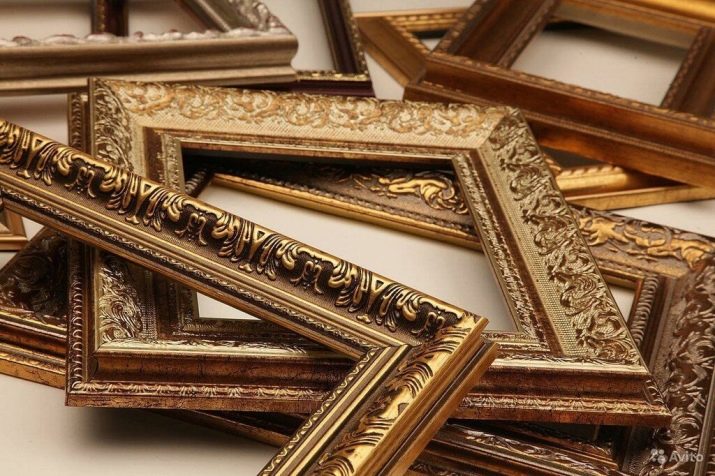
- Baguette or frame. Usually a baguette made of wood or plastic is used. The wooden version is more durable and reliable, and the plastic one is lightweight and inexpensive. The frame can be purchased ready-made or made to order. In addition, you can make a baguette yourself using materials that are at hand at home. Usually a custom-made frame is purchased for non-standard embroidery dimensions.
- Glass. This is an important element as it protects the embroidery at the front. You can apply normal or anti-glare. It is the second option that is in demand, since it is this glass that allows you to get rid of reflections, the work can be viewed from any angle and at any time. In addition, the anti-reflective glass makes the painting more expensive.
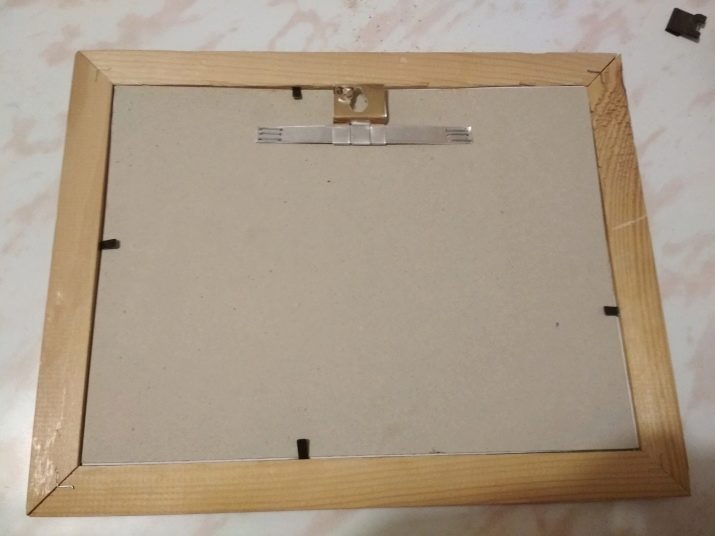
- Backdrop. This element may not be used, since it is possible to design the embroidery without it. The backdrop is usually created from a thin sheet of chipboard, cardboard or hardboard. It is used to protect the painting from the back. In addition, it is on the backdrop that the mount is located, which allows you to hang the embroidery vertically or place it on the table.
- Passepartout. This is a kind of frame that is located under the glass. It can be either wide or thin - the choice depends on the preferences of the craftswoman. Passepartout is not used in all paintings. It can act as an additional decor or be used for non-standard embroidery, for example, in the form of an oval. This item is made from cardboard or paper. It can be of any color.
If you decide to make a frame for embroidery on your own, then you will need to prepare both materials and tools. The set of elements may vary, but the following are mainly used:
- embroidery;
- baguette and glass;
- a stretcher or cardboard of a certain size, taking into account the dimensions of the embroidery;
- materials for attaching the picture: strings, paper clips, scotch tape and so on;
- scissors, a ruler and a few pins.
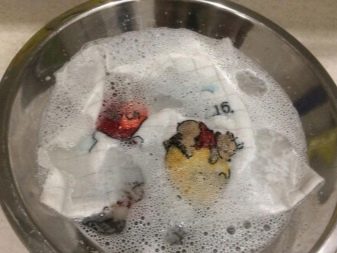
Before proceeding directly to the design of the embroidery in the frame, it is advisable to prepare it by performing the following simple steps:
- the embroidery should be washed and only by hand, you can use a little product intended for washing multi-colored clothes - this stage will remove traces of marking, dust and dirt;
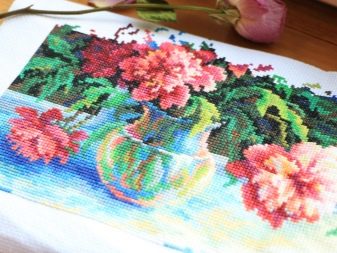
- spread the embroidery on a flat surface, give it time to dry;
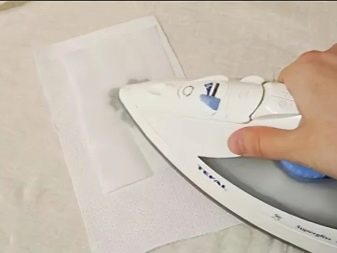
- turn on the steam mode on the iron and iron the embroidery at a low temperature, the picture should be placed face down and only on soft material (for example, on a towel), and it is recommended to iron it through a damp cloth in order to preserve the stitch relief as a result;
- if you wish, you can also starch the embroidery using a special tool or sprinkling with water and starch, the fabric becomes tougher, so the work on decorating the picture will be easier.
Important! It is strictly forbidden to wash embroidery that contains beads, rhinestones, sequins or ribbons.

Pulling methods
To decorate embroidery with a cross, ribbons or beads, be sure to pull the fabric onto a stretcher, which you can make yourself or purchase with a frame. The tensioning technology includes several stages.
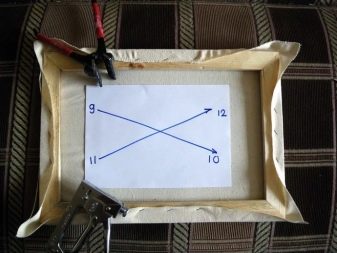
- Find where the center of the subframe is. It is necessary to draw two lines, one horizontally and one vertically. The place where they will intersect will be the center. Further, the center of the embroidery is determined by the same method.
- The next step is to connect these two centers with a pin, so as not to displace them later during pulling.
- The embroidery should be placed evenly, fit into the stretcher, and not have any creases. It is recommended to leave about 3-4 cm on each side, which will later be hidden under the frame.
You can fasten the fabric yourself, but you should choose one of the methods described below.
With buttons
This option is not very popular, because it is not characterized by durability: the buttons may loosen, and the picture - "creep". This method requires the use of chipboard or plywood, which has the correct size. The underlay must be a few centimeters smaller than the frame itself. Initially, the embroidery is located exactly on the backing, and then it is fixed using buttons on one side.
It is advisable to use a large number of them to make the mount more reliable.
Then the fabric is stretched, the second edge of the embroidery is attached with buttons to the stretcher.
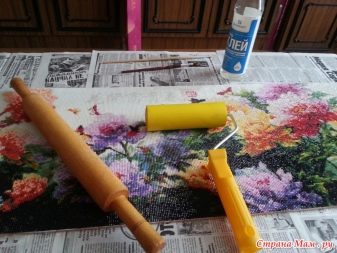
With glue
A fairly wide range of glue for fixing embroidery is on sale. Please note that it must be applied exclusively along the contour.It is very important to use the correct amount of glue. If there is more of it than needed, then it will begin to seep through the canvas, switching to a mat (if available). As a result, the picture will look casual.
Many needlewomen use glue interlining for this purpose.
With threads
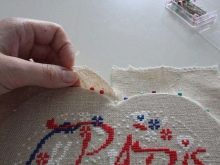
To fix the embroidery on the frame with your own hands, threads are often used. Follow these steps step by step:
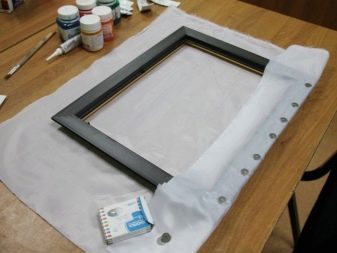
- you need to take the backing and pull the embroidery on it, pins are used for fastening from the wrong side;
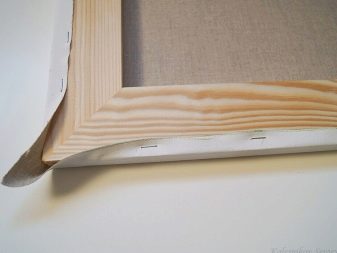
- when the picture is already taut, then it should protrude a few centimeters on each side;
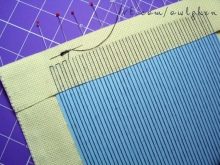
- at the corners, the edges are folded, and then sewn together - it is better to do this diagonally to get a criss-cross, using wide stitches, such a fixation will securely hold the picture;
- it is necessary to carry out the work as carefully as possible, while making sure that the embroidery lies exactly on the front side.
With scotch tape
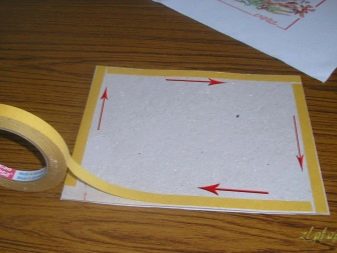
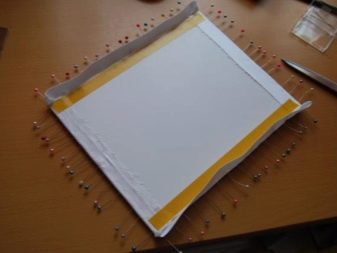
This option requires double-sided tape. It should be fixed around the perimeter of the stretcher, while the edges of the picture should not go over the edges of the tape when folded. Next, you need to peel off the protection on each side and glue the canvas, pressing it tightly.
Besides, if desired, it is allowed to place adhesive tape around the perimeter and on the front side, and then you will need to pull it over and press it. If tensioning errors occur, they can be corrected immediately. To better fix the canvas on the stretcher, you can stick adhesive tape not only on the sides, but also in the center. This option is very simple, which is why beginners often use it.
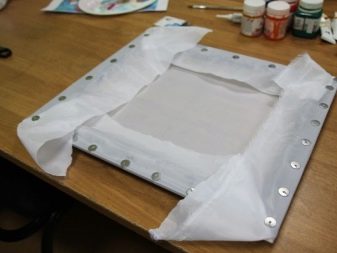
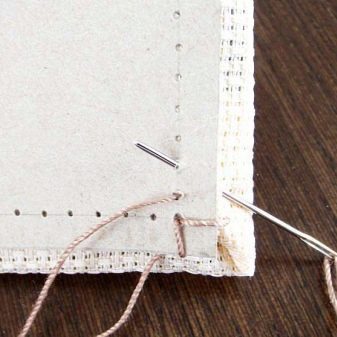
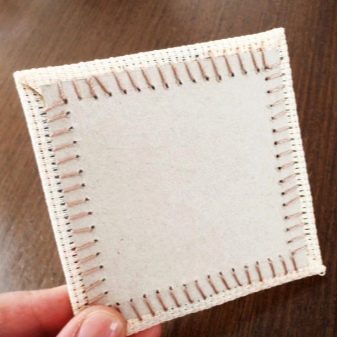
"Stitching"
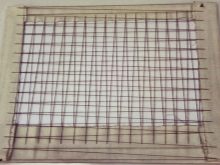
This method consists in the fact that initially you should create holes along the perimeter of the backdrop. The distance between them should be about one centimeter. Then the canvas is stretched, the material is sewn on thanks to the needle and thread, while the seam "forward to the needle" is used. You should be careful that the embroidery does not slide out during operation.
Helpful hints
In order for the process of decorating embroidery in a frame to bring only pleasure, and the result to exceed all expectations, it is recommended to adhere to the following rules:
- initially, you do not need to trim the edges of the canvas, since they will be needed to frame the picture;
- before inserting the embroidery into the frame, it must be soaked for a while in warm water and washed gently, then the fabric should be rinsed in cool water;
- the embroidery should be dried only in a horizontal position on a towel;
- ironing is recommended using the "cotton" function;
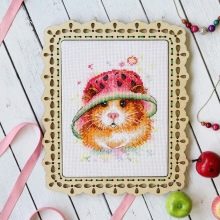
- for oval or round embroidery, you can use a mat to give the picture a square shape;
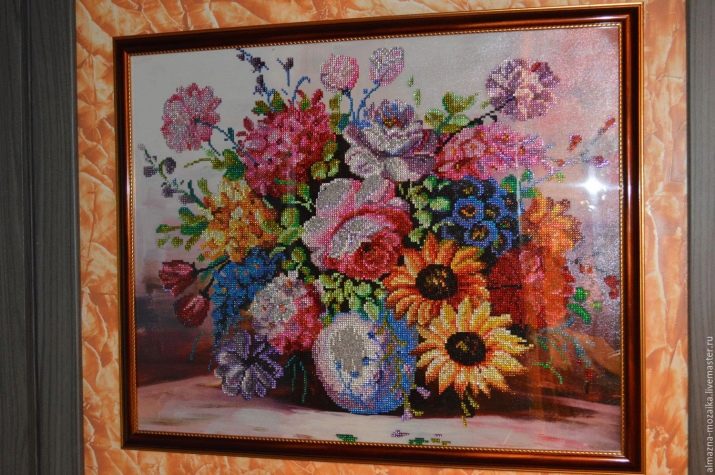
- it is better to decorate beaded embroidery under anti-reflective glass, since beads reflect the sun's rays.

Beautiful examples
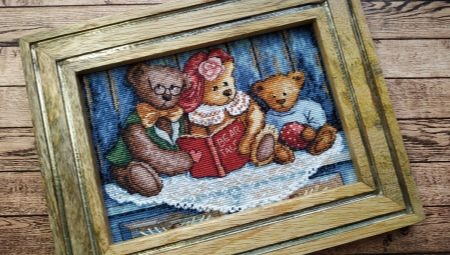
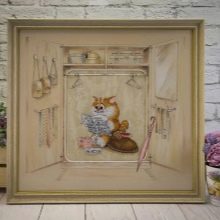
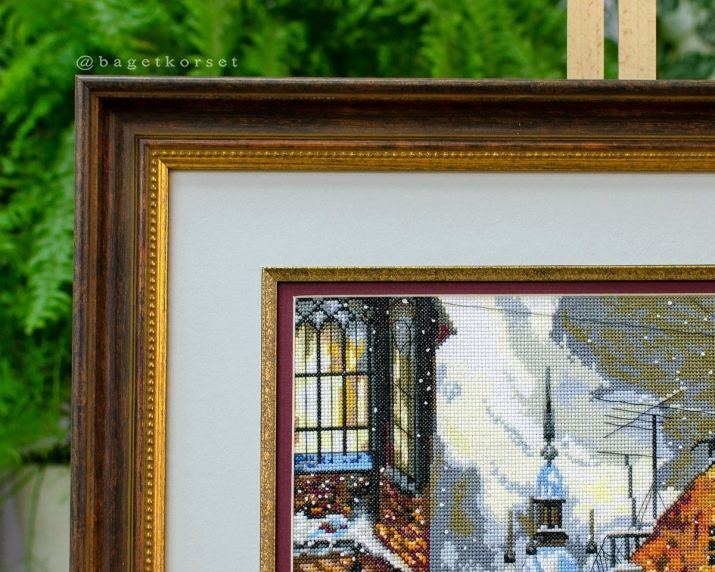
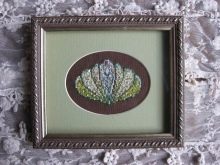
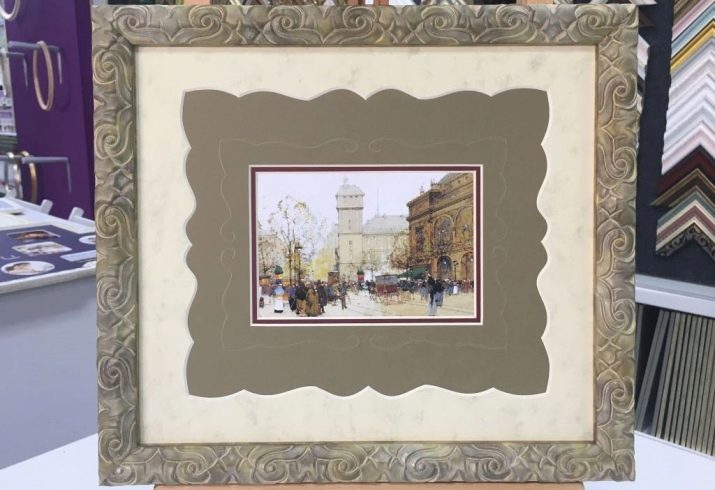
A picture in a plastic baguette with a double mat looks very unusual and stylish. Cream shades add tenderness and romance to the embroidery.
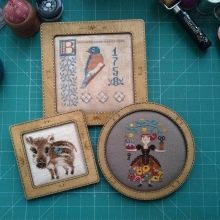
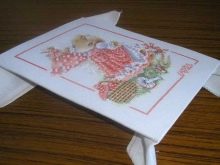
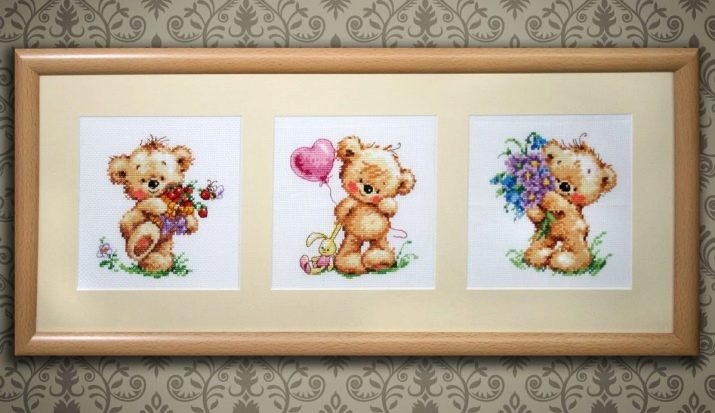
If the works are from one collection, then they can be framed in one frame. They are separated from each other by a mat. The triple window looks very cute and stylish. All three embroideries are united by one theme.
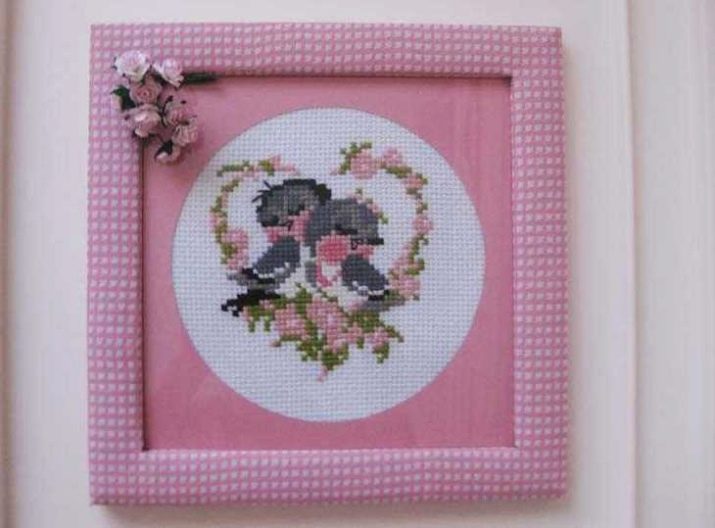
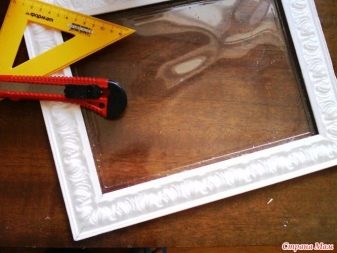
If desired, the frame can be made from the tools that are at hand. For example, stretch the fabric over a cardboard frame. The round neckline for the passport looks very stylish, while it and the frame are made in the same color scheme. The highlight of the picture are exquisite roses.