Surprise boxes: description, tips for making and decorating
With such a wide variety of souvenirs in specialized stores and boutiques, it is not so easy to acquire the most suitable gift for the recipient on the occasion of a special occasion. The present itself must be original and affordable in terms of pricing. But besides the gift, special attention should be paid to its packaging. Traditional paper and ribbon bows are gradually fading into the background. The same goes for colorful bags.
Today, packaging assembled using the scrapbooking technique is very popular. thanks to which, at minimal cost, you can independently create an exclusive box that is suitable in size for the prepared surprise.
What it is?
The official name for everyone's familiar surprise box sounds like Magic Box. Literally translated from English Magic means "magic" or "magic", Box is translated as "box" or "box". Even in the figurative sense of the phrase, there is a desire of the donor to please the recipient of the presentation not only with the contents of the gift, but also with the outer cut of the packaging. In appearance, the box can have different shapes, its simple design often hides in itself special content. The recipient of the gift, opening the box, will experience positive emotions and a lot of vivid impressions.
It may seem that the creation of hand-made packaging using the scrapbooking technique is a rather complicated procedure.Of course, you will have to spend a lot of effort, but seeing a progressive result, it will be very difficult to stop, especially when decorating with exclusive decorative elements.
Having seen the final version, it becomes clear that the most difficult thing is just to start creating the base, and then everything will go like clockwork.
Magic Box is a rather interesting idea of packaging design; its creation consists of several steps.
- Desire to surprise... The main thing is that the addressee gets maximum pleasure from the presentation. Especially vivid emotions are caused by the frame of souvenir packaging made by hand.
- Original design... To do this, you need to connect imagination. As a last resort, you can search the vastness of the World Wide Web for ideas for inspiration. It is enough to improve any of the proposed options, which will result in an exclusive packaging. It is important not to forget that the design of the greeting box must correspond to the age of the recipient. When looking for a design solution, special attention should be paid to the lifestyle of the hero of the occasion, as well as his exclusive preferences.
- If the recipient is a small child, the gift box should be bright, differ in cheerful colors, images with cartoon characters, rhinestones and shiny elements will be appropriate.
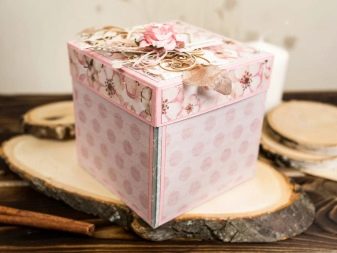
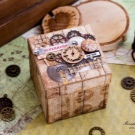
- For girls between the ages of 20 and 25, a vintage-style craft is suitable, where decorative elements are feathers, ribbons, and aged photos.
- It is more relevant for men of any age to compose packaging from decor with cold tones. But at the same time, the box should be supplemented with interesting images directly related to the life of the recipient of the gift.
- List of tools and materials. Having developed the design, you will need to collect the necessary items, without which it is not possible to create a packaging masterpiece. And some of them lie in the far corners of shelves and cabinets. The missing items will have to be purchased at a specialized store.
- Free time. To create decorative packaging, it is necessary to allocate a sufficient amount of time, so that it will be possible to create a special box with a surprise.
These 4 steps allow each person to approach work with maximum readiness. The main thing is to decide on the complexity of the design. Wanting to surprise the recipient of the presentation, it is best to get acquainted with the master class on creating a drop-down gift box, where each side will carry a special part of the whole congratulation.
How to make boxing?
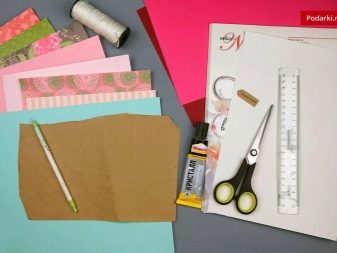
Before you start creating a magic box or clamshell box, you need to collect material for work. First of all, you should pick up special paper. Scrapbooking stores sell sheets of different formats and colors, which do not contain lignin, which provokes the subsequent yellowing of the material. In terms of texture, scrap paper can be thick or thin, one-sided or two-sided, smooth or embossed, as well as matte or glossy.
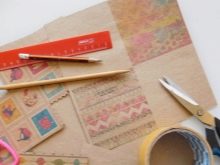
If it is not possible to purchase specialized material, it is proposed to use cardboard or drawing paper as an analogue. Next, you need to prepare the tools:
- scissors;
- glue;
- plastic spatula;
- Crochet hook;
- ruler;
- any elements and objects that can be used as decor.
In the proposed list, a question may arise regarding a plastic spatula. It is necessary to create neat curvatures of the cardboard. As an analogue, it is proposed to use scissors with a blunt tip.
Professional craftsmen use a special tool for such purposes - a special knife.

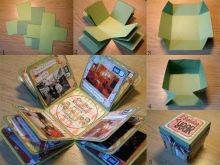
After collecting the materials and equipping the workplace, you can start making the frame part of the box. As a ready-made sample of the basis, you can use templates taken on the Internet. But it's better to do all the work with your own hands.
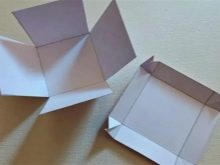
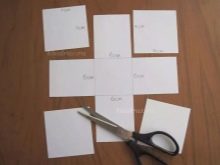
- On an A4 sheet, you need to draw a grid consisting of nine squares, each side of which is 9 cm.
- The figure of a regular cross is cut out of a lined sheet.
- The squares on each side must be folded along the fold line.
- Next, you need to cut 6 squares from scrap paper with side lengths corresponding to the prepared cross, that is, 9 cm. Five squares will be used immediately, the sixth figure will lie idle for a while.
- The prepared scrap paper squares are glued to the cross and placed under the press. You can use books as a weighting agent.
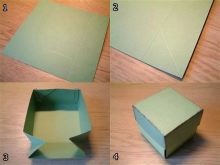
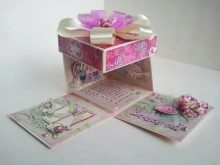
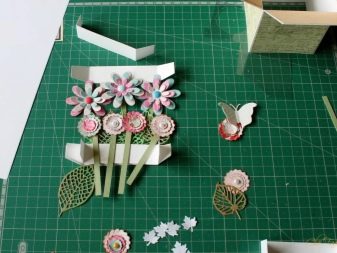
The first 5 steps form the basis of the future box, decorated from the outside. Next, you need to start decorating the internal parts, lay out the gifts and write wishes for the recipient of the presentation:
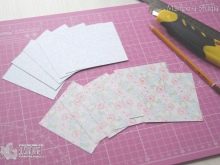
- 5 squares with rounded ends must be cut out of scrap paper of a different design;
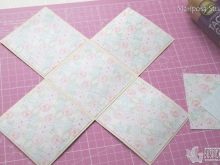
- prepared figures are glued to the inside of the cross;
- then decorative elements are attached that serve as an ornament, a wish or a stand for souvenirs.
After decorating the inner parts of the box, you need to make a lid. To do this, you need to cut out a square from thick paper, or better from a sheet of Whatman paper, a square, each side of which is 11 cm. Inside, draw a square shape of the base, which is 9 cm.On each side in the margins, make 2 cm cuts. Then fix the corner cuts of the cover, and on top stick the remaining decorative sheet of the scrap paper square.
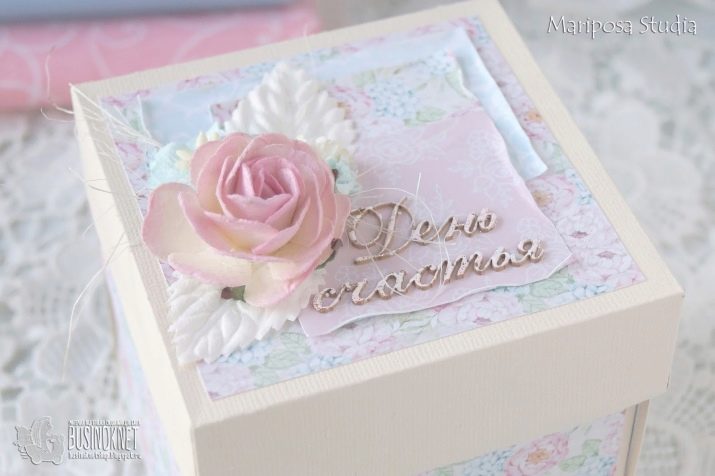
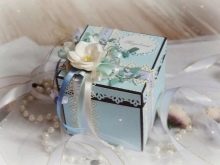
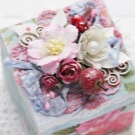
The dimensions shown are an example for creating a box. If you do it yourself, the dimensions can be changed. Special attention should be paid to decorating the box. If the present is intended for a friend, it is suggested to use paper of bright colors, on which beads, artificial flowers, satin ribbons, figures of people and animals will look laconic. A gift for mom should be decorated in pastel colors.
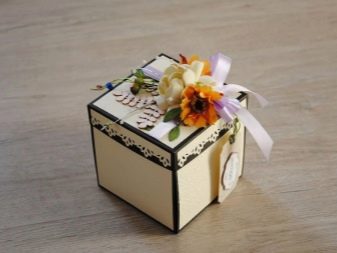
The most suitable option would be a vintage style. Boxes for men are executed in strict shades, they do not have to be black, it is quite possible to use blue, brown, green and gray tones.

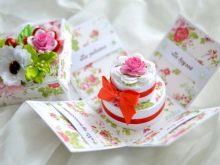
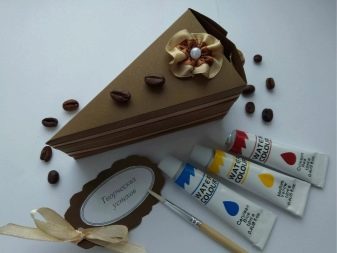
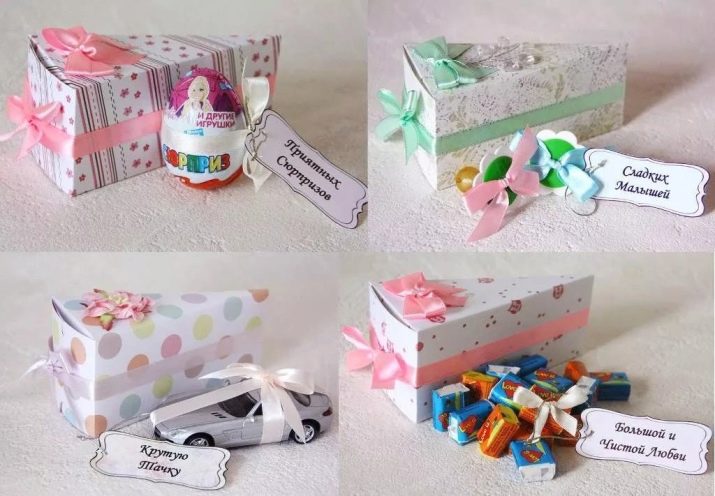
Step-by-step instructions for making a cake
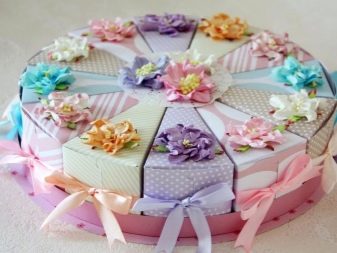
Any festive event is not complete without the sweet part of the buffet table, where the cake plays a key role. Modern masters decided to slightly replay the creamy treat, replacing sweet cakes with cardboard. Small bonbonnieres can be used to create a gorgeous cake composition.
Such a miracle can be presented as a gift to the birthday person or, conversely, from the heroes of the occasion to the guests who have come. A small souvenir should be placed in each individual bonbonniere, depending on the situation and the festive event.
Ready-made options for cardboard cakes can be purchased to order, but it is much better to create it yourself.
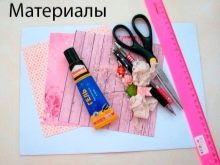
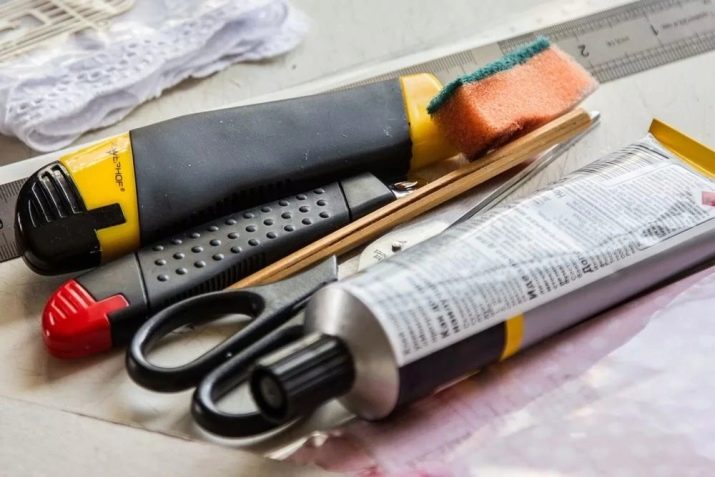
First you need to prepare materials and tools:
- one-sided cardboard;
- glue "Moment";
- scissors;
- pencil;
- wrapping paper;
- tapes;
- stationery knife;
- thick paper with a bright design;
- hole puncher.
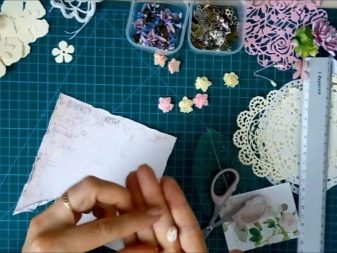
Having prepared the workplace and positioned the tools, you can get to work.
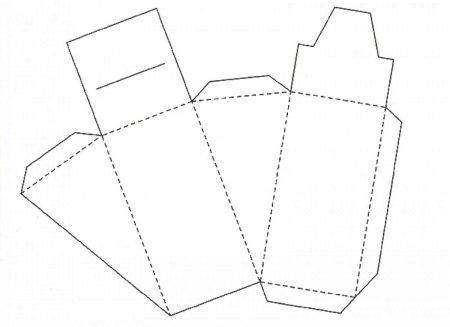
- First you need to prepare a template. You can draw a sample yourself or take it as a basis on the Internet, having outlined and calculated the dimensions of the future cake in advance. Next, transfer the paper blank to cardboard to make the template more dense.
- The template is applied to thick bonbonniere paper and outlined with a pencil. The seamy side must be colored and the front must be colorless. Then the workpiece is cut out.
- Next, the folds are processed. Stripes are neatly traced with a sharp object, but in such a way that no cuts are made. The cardboard should be slightly pressed.
- Along the prepared fold lines, the structure folds to the inside.
- To fix the bonbonniere, you need to use glue. It is necessary to fix the triangular part of the dummy piece of cake, but do not touch the side.
- The side ears fold down neatly. With the help of a clerical knife, a slot is made so that the tongue sinks in the opposite direction of the attachment.
- It is necessary to close the locks of the bonbonniere.
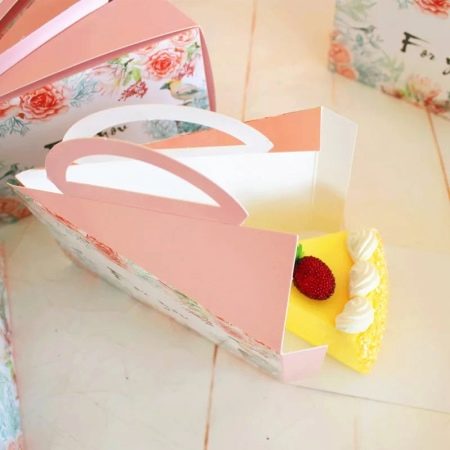
- To decorate the finished structures, you must use wrapping paper. Cut out triangles to the appropriate size and glue to the face of the bonbonniere.
- Using a figured hole punch, you can make additional decor that resembles a patterned napkin.
- By a similar principle, all the bonbonnieres are assembled and folded into a circle. To secure them, you will need to use a wide satin ribbon.
- As an additional decoration, it is proposed to paint over the sides of the bonbonnieres with a lock in a single color with a ribbon.
You can clearly see the process of making a box in the following video.
What can you put inside?
Creating an original box with a surprise, many can get lost in ideas and assumptions about how and what to place inside the craft. In addition to the standard gift, the inside of the decorative packaging should be decorated with special items. For example, memorable photographs or miniature objects that remind the recipient of the vivid emotions of the past.
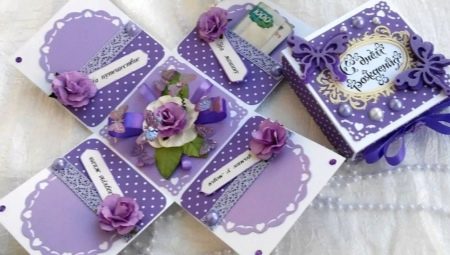
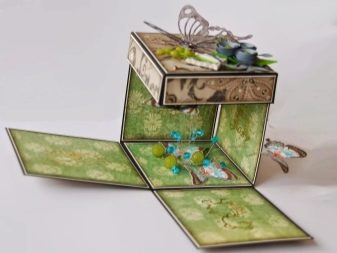
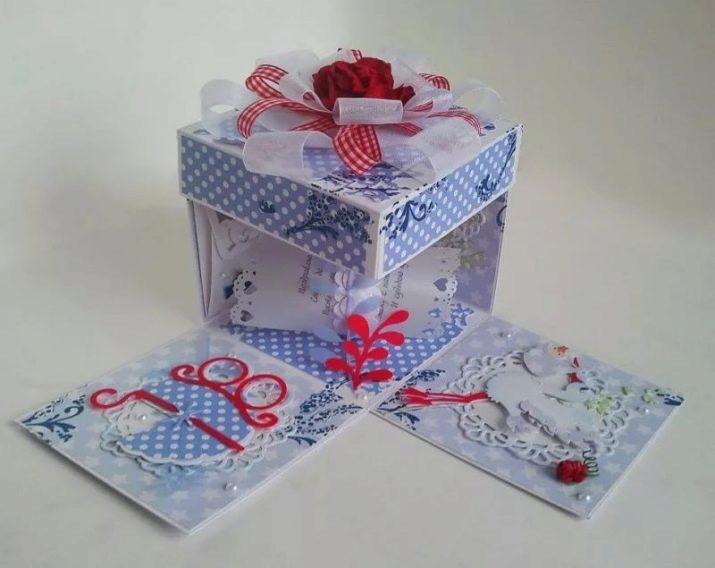
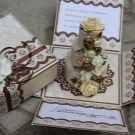
Composing the original box, you can use a more complex design. So, when the cover is removed, the base will unfold into 4 main parts, and each side will unfold separately into several additional sections. And in each section, you can arrange pictures with wishes, notes and any miniature items.
With such a complex origami, it's a good idea to propose marriage to your girlfriend.
But with the internal components of a cardboard cake, the question is much more complicated. Not always the performer of the gift, having prepared the base, knows what to put inside each bonbonniere. Although there are many ideas for filling empty boxes.
- Sweets... Optional chocolate or caramel. M&M 's or Skittles dragee can be the perfect solution for filling the empty space of the box. Moreover, the brighter colors of the candies only raise your spirits.
- Collectible Models... Connoisseurs of rare cars will appreciate the miniature copies of cars, which will be conveniently located in bonbonnieres, like in a garage.
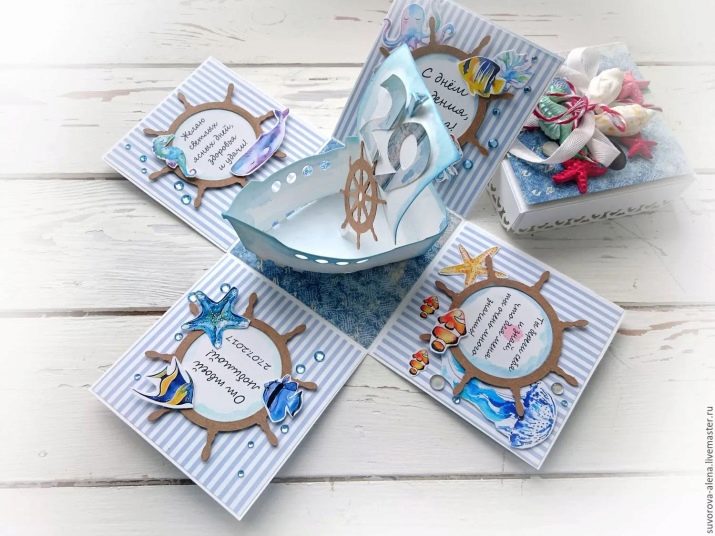
- Sea shell... It can be used as a symbol or a wish to go on a long journey.
- Different types of coffee. In each individual bonbonniere, you can put any kind of coffee, for example, ground or grain coffee. The main thing is to pack them in tight bags. Tea of various sorts can become a coffee analogue.
- Kinder Surprise. This kind of attachment is perfect for a presentation on February 14th or a small child for his achievements.
- Money. Today, such gifts are quite relevant, but since there can be 12 pieces of bonbonniere in one cake and more, it is supposed to put a banknote with a minimum value in each piece of cardboard. In doing so, use well-known currencies.
- Decorations. Quite an original option to propose a girl to marry. To stand on one knee in front of a woman, open a box with a ring in front of her, and say a few words about love has become a banal and uninteresting tradition. And if you present her with a cake of 12 dummies, where at 11 there will be children's rings that change color depending on the mood of the owner, and only one will have a beautifully folded and packed wedding ring.
It is very important that each box is correctly composed, the design must contain secret pockets, clips for other decorative elements, and always a card with congratulatory text. From the outside, it would be nice to complement the craft with balloons of the original shape.
Ideas for inspiration
Today, you can get inspiration for creating an exclusive surprise box from any source. And if you visit a specialized scrapbooking store and carefully familiarize yourself with the proposed decorative elements, you will be able to independently invent and make a unique masterpiece.
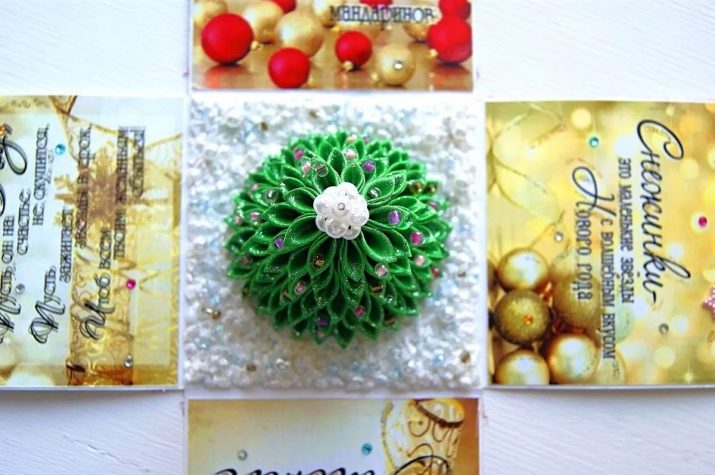
In this case, a variant of the New Year's greeting box is offered. On four sides of the opened craft, wishes and congratulations to the recipient of the gift are painted, in the center is the holiday symbol - New Year. The snow surface can be made from pieces of foam or cotton wool.
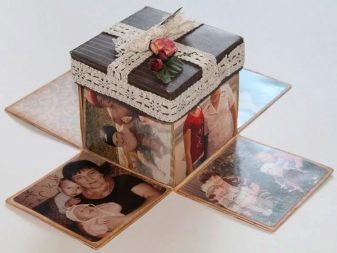
Wedding photobox is a unique present for newlyweds. Memorial photographs are placed on the walls of the box of a complicated type of construction. Inside, you can place a calendar with marks of memorable dates for a couple.

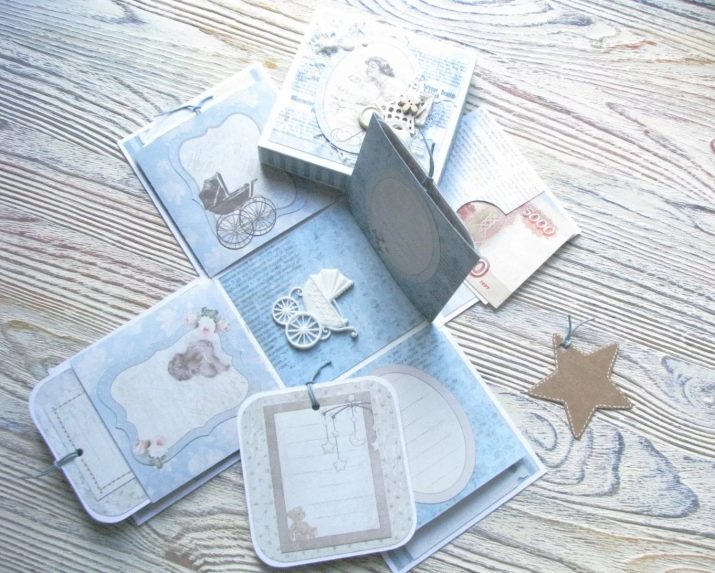
Quite an interesting way to congratulate young parents on a new addition. The color palette should match the gender of the baby. In the center of the craft, it is appropriate to depict the image of a stroller, paste postcards with wishes on the side walls, leave space for entering data about the baby who was born.
On one of the walls, it is appropriate to glue a decorative pocket, where a symbolic amount is supposed to be invested.


Thanks for the ideas!