How to make a kite?

A kite can become a full-fledged entertainment not only for a child, but also for adults. And if the ready-made purchase option pleases you only during the launch process, then the home-made one will captivate you even during its manufacture. Let's get acquainted with the options for making kites from improvised means, and also study in detail all the nuances of the launch process, selection of materials and tools.

What can be made of?
Various materials are used to make kites - from specialized materials that you can purchase in creative stores, to the most common improvised means. Let's take a closer look at how to choose a material, and how to determine if it is suitable for creating such a product.


Material selection
The choice of material must be approached responsibly, because it depends on it whether the kite flies or not. Below are the most popular options for creating a kite.
- A regular plastic bag. Tying the knobs together and letting the air flow in is a great option for flying entertainment. And to make it look more unusual, you can pre-paint it and add various decorative elements.


- You can also make a great option out of paper. There is nothing difficult in manufacturing - the main thing is that the sheet of paper is sufficiently dense and even, and in the absence of the necessary material, you can use an ordinary newspaper.


- Parchment paper is fine for making a flying toy for kids. The lightness and sufficient density of the material will allow it to easily rise into the air and withstand gusts of medium wind. And also this option can be supplemented with various pictures and stickers to make it look more colorful.

- If you don't have heavy paper handy, you can use thin tracing paper., but it must be borne in mind that the material is rather fragile and unreliable, so the product may fail at any time.

- A kite can be made from lightweight fabric. The advantage of this option is that it will last much longer than all of the options listed above. The main thing is to choose a fabric that does not allow wind currents well, for example, nylon, raincoat or membrane. In order not to buy fabric on purpose, you may well use material from an old umbrella.

- For the manufacture of volumetric kites, which are also called box kites, you can use food grade or thicker packaging film. It will give the necessary tension between the parts and will not weigh the product down.

What else do you need?
In addition to the material from which the main part of the kite will be made, it is also necessary to select other components for the construction of parts, without which the launch of the product into the air will be impossible. Here is a rough list of what you will need.
- Bamboo skewers or longer wooden sticks are required to frame the product. In order for the kite to take off without difficulty, we recommend using grape branches that are light enough.
- In some cases, thin metal rods can be used for the frame, but for the structure to be functional, the area of the base material must be large enough.
- You will need glue to attach some parts. It is better to abandon the popular glue gun, since its consistency will make the product heavier, and give preference to the "Moment" or the composition that is used to fix polyurethane ceiling panels.
- To connect the frame parts to each other, you can also use tape, electrical tape and some types of adhesive plaster. By combining these attachment options with bonding, you can create a truly sturdy base for your kite.
- To launch a kite you need a line or thin but strong rope. As a last resort, you can use a strong thread, but handle it with extreme care, because with strong pressure on your hands and sufficient tension, you risk getting injured in the form of cuts.
- In order to avoid injury to fingers and palms, it is necessary to construct a spool for thread or line. For these purposes, you can take ordinary cardboard: you just need to draw a diagram of the future part, cut it out and fix it with glue.
- When making a kite, you can't do without scissors and a paper cutter.
- And in order to simplify your work, we recommend that you find in advance a drawing of a pattern for a fabric, or a scheme for creating a paper version.


This minimum set is quite enough for making a kite at home. The main thing is to familiarize yourself in advance with the sequence of actions, and clearly follow the instructions.
How to make a simple frameless option?
There are several options for making a kite without a frame. Let's consider the most popular method step by step. To make a frameless version, you will need the following materials:
- white or colored paper;
- hole puncher;
- stapler;
- staples for the stapler (you can choose colored ones);
- scissors;
- simple pencil;
- ruler from 20 to 30 centimeters long;
- a skein with strong threads.


Fold the rectangular piece of paper in half so that the middle is on the longer side. Iron the fold line well with your fingers.
Now you need to position the sheet of paper so that the smaller side is at the top. Using a pencil and a ruler, measure and mark 5 and 10 centimeters from the top. Next, we need to drag the left corner to the first point without selecting the fold line. We fasten the place of contact of the corner with the area near the point with a stapler. We repeat the same manipulations with the right corner. From the bonding point, you need to indent about 1 centimeter, and punch a hole with a hole punch. If you do not have this tool, you can use the tools at hand that are in every home - an awl, narrow scissors or a thick needle.


Then you need to take the edge of the thread, and tie a wide knot, then thread it into the resulting hole, fixing it on top with a small piece of tape. Your kite is ready and you can safely exploit it. The manufacturing technology is very simple, so you can use this option for children's creativity, experimenting with sizes.


Making a skeleton kite
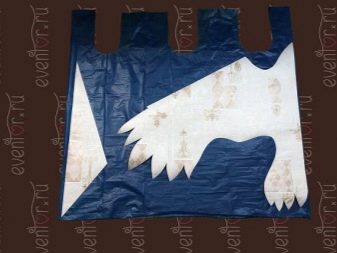
The process of making prefab kites takes a little more time and effort, but gives you much more room to experiment with shapes and décor. For example, you can build a mini-version for playing with kids, because it will be much easier for them to control a small snake on their own. As for the large sizes, it is better to manage them independently, or entrust them to adolescent children. Consider in stages a master class on making a frame kite from a plastic bag. For work we need:
- a large plastic bag of sufficient density;
- thin wooden sticks corresponding to the size of the bag;
- an ice cream stick or wooden spatula;
- strong, but not very thick twine (you can take a strong woolen thread);
- pen or pencil;
- long ruler;
- scissors;
- scotch tape (it is best to take a transparent and narrow one);
- glue.


The first step is to take two sticks and shorten one of them by about a third. Then the sticks need to be folded crosswise so that the longer one crosses the short one in the middle, and the short long one - by a third. The place of their intersection must be securely fixed with glue or tape. Next, we cut the bag into two parts, and lay out one of the halves on a flat surface, apply the cross obtained from the sticks, and mark each end on the bag. After the ends of the frame are marked on the bag, it must be removed.


Using a ruler, connect the points so that you get a rhombus, and cut out the shape with scissors. Then we put the cross back on the bag, and secure it with tape and glue. The sticks must be securely fixed so that when launching the kite it does not break in the first minute. In the area of intersection of the sticks, you need to make two small holes in the bag, thread the end of the twine through them and fix with a pair of knots. And also for additional strength, you can fill the nodes with glue. We measure 20 centimeters from this knot, and cut off the twine. Next, we unwind a long rope, through which we will control the kite, and attach one of its ends to a wooden stick, and the other to the end of a long stick of the frame. We connect a short piece of rope that holds the intersection of the sticks to the long part and fix it securely.


In the end, it remains only to decorate the kite, make a tail for it, and also wind a long rope around a wooden handle.
More ideas
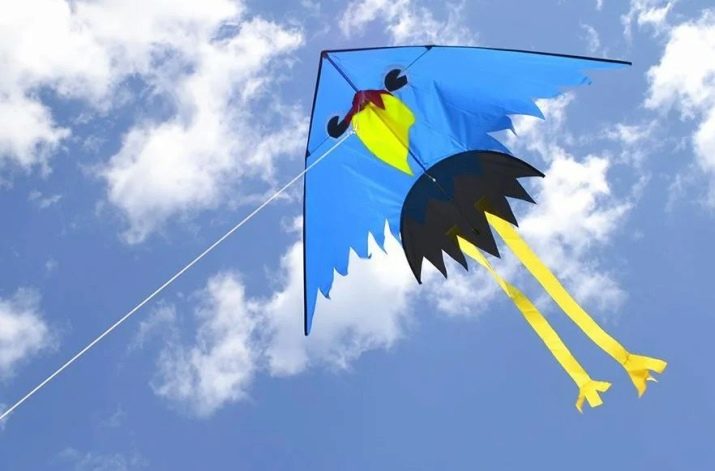
A homemade kite doesn't have to be monotonous. To make it look spectacular and unusual, you can make a version in the form of a bird, imitating the flapping of the wings due to the tension of the bowstring between the two edges. To make a kite in the form of a bird, we need:
- 8 sticks about 30-31 centimeters long;
- 3 sticks 92 cm long;
- 3 sticks 1.5 meters long;
- suitable fabric or thick film;
- coil;
- fishing line or strong thin rope;
- glue;
- scissors.


Such a craft is very laborious to assemble, so it is necessary to act consistently and carefully.
- The longest sticks should be placed in front of you so that they are parallel to each other. Across them, you need to place a medium-sized stick, stepping back from the edge about 60 centimeters. Next, we fix these sticks between ourselves so that the distance between the first and second long rod is equal to 30-32 centimeters, and between the second and third - twice as much.
- After stepping back 30.5 centimeters, you need to repeat the same manipulations with the second medium-sized stick.
- We tie the short slats to the middle ones in such a way that their ends are connected, forming a triangle. Then we attach a third medium-sized stick to their ends.
- The free ends of long slats should be soaked in water so that they do not break when bent. After they become pliable enough, we connect them with a rope to each other, at both ends.
- Absolutely all joints made with ropes are additionally coated with glue - this is necessary for better fixation.
- After all the fasteners of the frame are dry, we proceed to work with the main material. To do this, we cut out the corresponding parts that should cover the surface of the two large wings, as well as the two volumetric squares under them. The space in the middle must remain free.
- Pull the bowstring between the wings, and fix a long rope with a reel to control the air bird. We can start operating.


Using this method, you can make an unusual kite in the form of absolutely any bird, for example, in the form of a crow or a swan. As we can see, making a kite is not difficult at all, especially since the process of preparation and work can be an excellent leisure option for the whole family.
For information on how to make a kite with your own hands, see the next video.


