How to assemble a kite?

After reading the article, you can clearly find out how to assemble a kite. The procedure for assembling a kite from a store according to the instructions is described. Also, general recommendations are given, it is described how to properly collect a domestic baby snake.
Assembling the model from the store
With rail and bridle
The kite is the earliest heavier-than-air flying device that has ever soared into the sky on our planet. But even in the 21st century, when the heavens are plowed by devices much more powerful and more perfect, its attractiveness has not diminished. Assembling a purchased kite does not take much time and does not entail significant costs. The important thing is that its weight and design have a direct impact on "flight performance". It is customary to divide kites (this is the term in use abroad) into frame and frameless options.
Before describing how to correctly assemble both of them according to the scheme, it is necessary to understand the difference between them. Frame models, which are more common than others, are distinguished by increased controllability. They include a track supported by rails, and a tail section that allows you to adjust the course, as well as stabilize the flight.
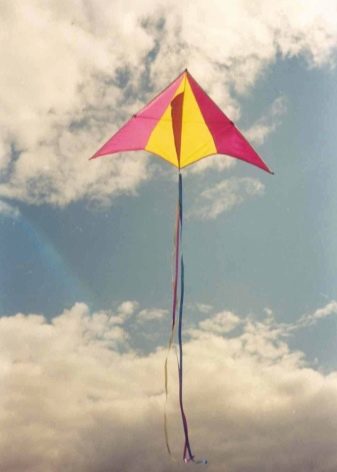
More often than not, this is how stereotypical flat-plate kites are. The shape of the product is very different: there are rectangles, there are diamond-shaped options.


Typically, it contains a "bridle" for which you need to tie the rope. In some versions, the toy is assembled from a pair of planes that are located at a certain angle to each other. To connect them, you need additional clamps. The tail is not always there. The controllability of such structures is questionable (how far can a kite be considered controllable at all).

No additional elements
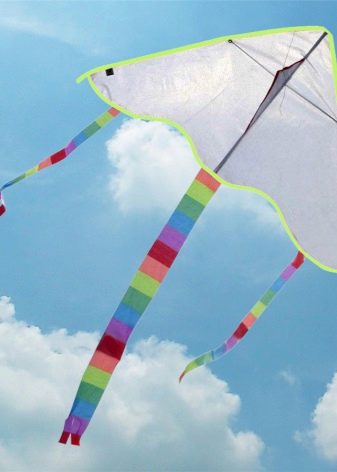
Handling a purchased frameless kite is even easier. Such devices lack a rigid base part. They float in the sky simply because the canvas is blown (and inflated) by the air stream. 2 slats are sewn into the fabric base - and this is where the production process ends. The assembly usually consists only of adding an elongated tail.
In some cases, there are also more complex kites. But they are no longer designed to be assembled by hand. Such products are usually bought for professional large-scale events. In any case, it is very important to follow the instructions for assembling the kite. But in order to understand it better, one should also take into account the function of each of the constituent elements of the product:
-
the frame allows you to stretch the canvas (it is formed by one or more slats);
-
the canvas (sometimes called a sail) turns out to be an obstacle to the flow of air and therefore provides a lift;
-
a rail (special thread) designed to provide controllability of a homemade kite in the air;
-
the bridle (aka binding) attaches the handrail to the canvas;
-
tail (part responsible for aerodynamics and overall balance in flight);
-
spools used to wind the thread - if there were none, these threads would get tangled and twisted much more often.


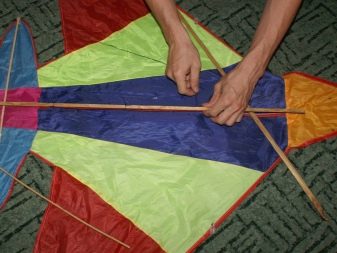
Obviously, even after such a general acquaintance that even a child's snake is not as simple an apparatus as it seems. But this concerns, rather, aerodynamics and precise calculations that are performed by engineers in production. The assembly itself is usually not difficult. A typical sequence of steps if the wireframe is initially disassembled:
-
put all the tubes in their proper places;
-
rigidly secure them with spacers;
-
strengthen the fastening with tape or insulating tape;
-
push the bridle into the holes of the frame (there may be several such attachment points);
-
put a rail in special structures at the edges of the bridle;
-
place the rail in the grooves located at the edges of the panel;
-
tie a rope thread to the bridle on the front side of the canvas;
-
in the absence of a rail, attach the bridle to the standard holes, and then tie the fishing line and tail.


Sometimes the set contains only a rail without a bridle. This is not a marriage or a violation of the equipment, but just another engineering option. In this case, you need to find a special hole or a carabiner on the case. Further, using these elements, the coil line is tied. The rail is inserted from the back.
With strict adherence to the instructions, assembling a kite can be done quickly. Its characteristics in the sky will also be provided. All that is required from buyers is attentiveness, methodology and accuracy. But some difficulties are sometimes associated with individual Chinese and supplied models from other Asian countries. They may not be of sufficient quality.

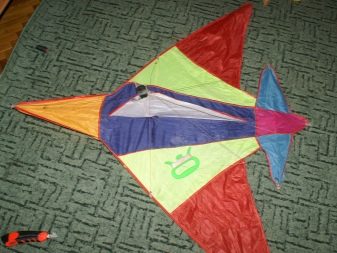
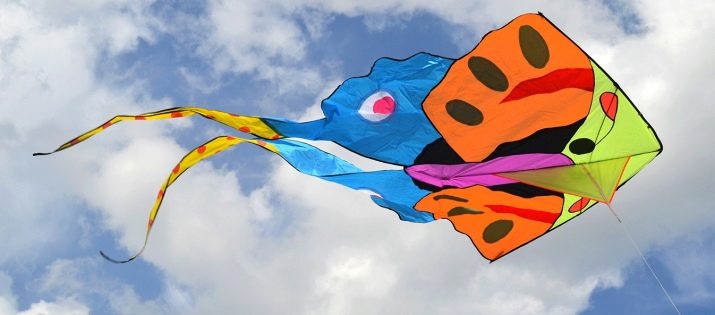
The attractiveness of such versions for children is usually due to the fact that they imitate various animals, and the choice is quite wide. When folded, these products often look like ordinary umbrellas. Sometimes the reels are equipped with special cuts that prevent the line from unwinding.
The fishing lines themselves are usually tied to special holes in the canvas. It is necessary to carefully check whether everything you need is included in the delivery set.
Detailed assembly instructions are presented in the video below.
How to assemble a pet snake?
As wonderful as the products of modern industry are, a self-made kite is much nicer. The easiest way to do it yourself is flat or box-type kites. Other design options require much more materials at hand. For work, you may find it useful:
-
thin glazing beads from windows;
-
long culinary skewers;
-
vinyl tubes approximately 600 mm long.

All three product variants are suitable for creating frames. The canvas is made from tracing paper, plastic bags or canvases of old umbrellas.A strong sewing thread or fishing line becomes a bridle. For the manufacture of handrails, they usually start up a fishing forest or a rope from nylon. Their length should be between 100 and 200 m.
Additionally you will need:
-
cloth strips, ribbons or knitting threads to get a tail;
-
a reel made of cardboard or plastic, which becomes a replacement for the factory reel;
-
adhesive tape and superglue, which increase the rigidity of fixing some parts;
-
scissors - helping to cut the sail blank;
-
an awl or large needle is needed to pierce holes.

Next, it will be necessary to decide whether a frame is needed in the kite being created. Models without rigid parts are easier to assemble. But it still makes sense to try the wireframe model too. For the frame itself, take 2 wooden slats - 500 and 600 mm long, respectively.
Their edges are notched 10 mm in depth to let the fishing line or thread pass through. Further, the longer rail is placed vertically.
The shorter one is placed at a distance of 150 mm from the top point. It should stand horizontally in relation to the longer one and form a cross in combination with it. The intersection point is fixed with a stable thread coated with glue. Next, you need to do the canvas. It is made according to the pattern.


The pattern itself is obtained by laying out the selected material on a flat area. A frame is applied to it. Next, using a pencil, marker or felt-tip pen, they outline the entire figure around the perimeter. They transfer the geometry and size of the future kite to the canvas. Left:
-
make fold allowances on each side;
-
cut out the blank for the sail;
-
form a tail from twine;
-
complement it with bows or a bundle of knitted satin ribbons for weight.

The assembly itself has a number of subtleties. Having passed the fishing line along the perimeter through the notches, you need to tighten it properly and fix the edges. As a result, the frame will look like an irregular rhombus. The canvas is fastened by applying a blank to the pattern and bending the allowances. Reinforcing triangles are placed at the corners; the polyethylene sail is thoroughly pulled and tied at the corners.
When working with a woven body, the allowances are folded to the wrong side. There they are stitched with threads. Correct fixing of the line is very important. Above and below the kite is pierced at the corners, and a meter rope passed through the holes is connected with a ring. A handrail must be attached to such an improvised bridle; the tail is attached to the bottom point of the vertical rail using tape or glue.

Useful Tips
No matter how good the kite is in itself, it reveals its merits only in the sky. It is best to launch kites where there are no obstacles. At a wind speed of 6 to 11 km / h, the lightest structures fly successfully. For beginners, lovers of such crafts or purchases, it is better to wait for the wind from 12 to 19 km / h. An ideal moment - if its speed is from 21 to 29 km / h.
At an even higher speed, only experienced and sophisticated people will be able to launch a kite. If it exceeds 50 km / h, nothing can be done. It is necessary to launch the kite facing against the wind, holding it in front of you, turning it with its nose up and pulling it a little. The rope should be held by hand directly near the bridle. As soon as there is a feeling of filling the snake with air, the thread is unwound so that it rises.


The thread should be attached to the bridle exactly in the middle. If this rule is violated, there can be no talk of any controllability. Sometimes experienced DIYers will lengthen or shorten the tail to influence flight parameters. It is better for beginners not to get into such subtle matters.
But you can try to lighten and make the structure heavier in order to navigate through experience in the influence of such manipulations on aerodynamics.

For the most inexperienced, it is better to make or buy models with a long tail. They have the best balance. Beginners should fly the kite with a 3-strand bridle. The 2-strand design is the prerogative of more experienced people. The frame can be made not only from plastic or familiar pine, but also from bamboo slats.
To tighten the blanks, if necessary, take an oilcloth or thin paper. But paper is not ordinary, but rice, cigarette or mica paper - only they are quite strong and stable. If the snake is made for children, it makes sense to draw cartoon characters on it. Adults can choose the story they want. Having practiced making the simplest crafts, you can start assembling:
-
monk snake;
-
flat bow design;
-
box model, devoid of a tail.


