All about plywood burning
Wood burning is a separate category of applied art, through which you can create real original masterpieces. These can be various landscapes, images of animals, and even portraits. Monochrome colors do not diminish the beauty of the products. In this article we will understand all the intricacies of burning on plywood.
Types and thickness of plywood for burning
It is important to carefully select the right plywood to be fired. It is necessary to find out the type of wood from which it is made. In most cases, only 2 common types of wood are used as the source material - coniferous and deciduous. As a rule, deciduous counterparts are made from birch, while conifers are made from larch or spruce.
Plywood is also made from valuable wood species, but in extremely rare cases. Most often, solid mahogany, wenge or oak is used for such manipulations. Such products are much more expensive and can be very difficult to find on sale.
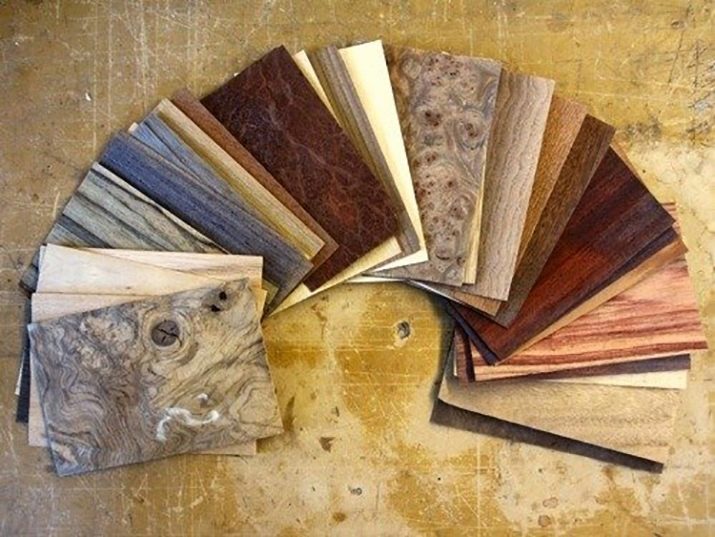
For the burning process, plywood sheets are often used, which are made from hardwood species. This is due to the fact that the structure of such materials is ideal for the considered creative manipulations. Coniferous plywood is currently widespread, but, despite this, it is not recommended to use it as a base material for burning. This is due to the fact that such budget products contain many natural resins, which, under the influence of elevated temperatures, begin to appear on the surface of the workpiece.
Plywood made from birch is not characterized by the above disadvantages. A similar material will work well as a good workpiece. However, it should be borne in mind that birch wood has high strength characteristics, which can complicate the burning process.
The ideal solution is plywood sheets made from lime wood, which is soft and pliable. It is easy and convenient to work with it.
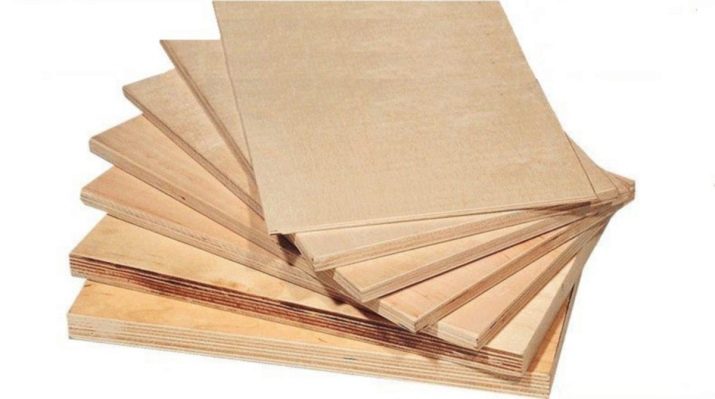
When choosing the right plywood, you should take into account its grade.
-
E. Thus, an elite type of sheet material is designated, on the surface of which there are practically no natural or artificial defects. Only the smallest changes in the wood structure are allowed without affecting the general characteristics of the material. Grade E is ideal for burnout.
-
Grade 1. On such sheets, a small number of cracks and deformed zones are permissible, but their length should not exceed 20 mm. Mostly the blanks examined are intact and undamaged.
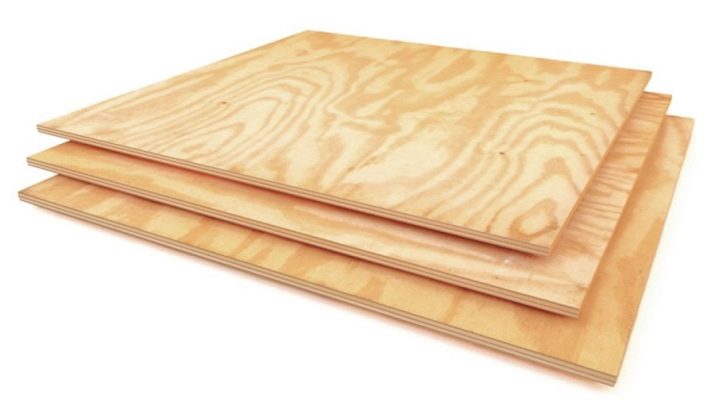
When choosing plywood for burning, you should also pay attention to the parameters of its thickness. If you want to make a beautiful and neat portrait, it is recommended to use sheet material with a thickness of 6 mm. Such bases are more suitable than 4 mm sheets. This is due to the fact that thinner plywood deforms quickly during sawing. At the same time, sheets with a thickness of 6 mm are lighter than 10 mm versions.

What will it take to work?
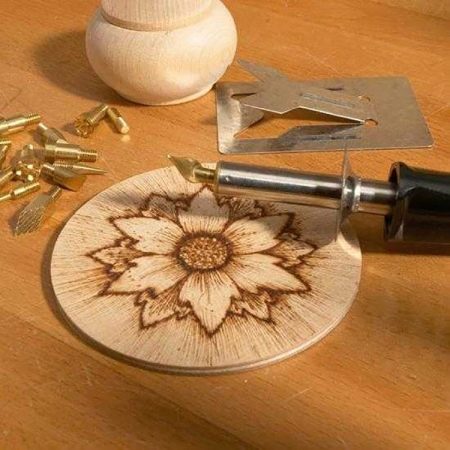
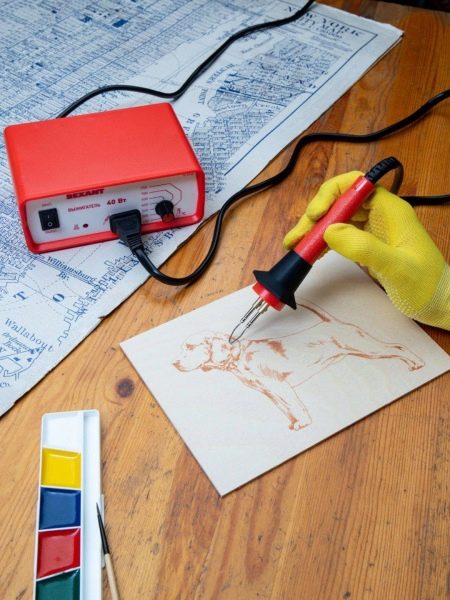
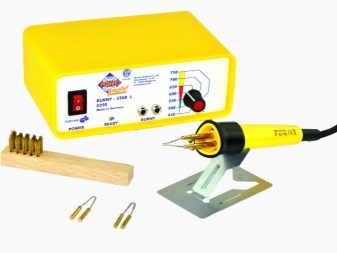
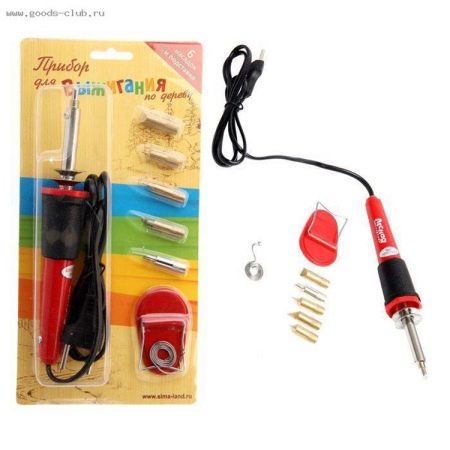
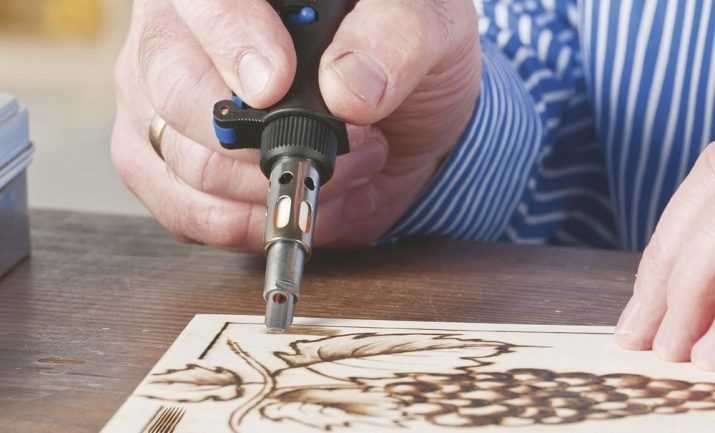
The main equipment in the considered creative works will be a special burning device. In the olden days, people used a small plastic box that contained a soldering iron with a tip resembling a paper clip inside. Today, more serious and modern versions of such devices are being produced. Of course, it is allowed to use old-style equipment, but it is still more convenient to use a hard nib burner.
Such a device will last for a long time, since it is characterized by a higher level of strength, and is often equipped with many additional attachments.
All modern devices for burning on wooden sheets are divided into:
-
wire pen devices;
-
hard nib devices.
The principle of operation of these devices is the same. They can be equipped with different types of handpieces:
-
needle;
-
wedge-shaped;
-
conical.
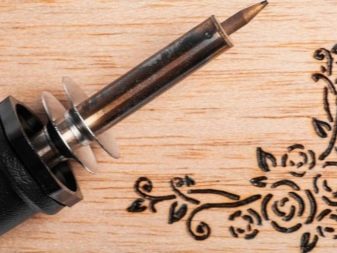
People who are professionally engaged in wood burning often have special seals in their arsenal that easily leave a variety of patterns on the blanks. Such items greatly facilitate the work of the master.
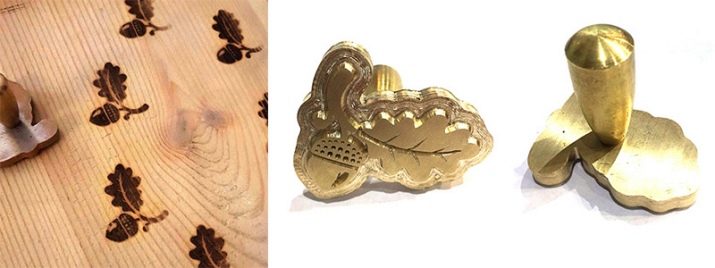
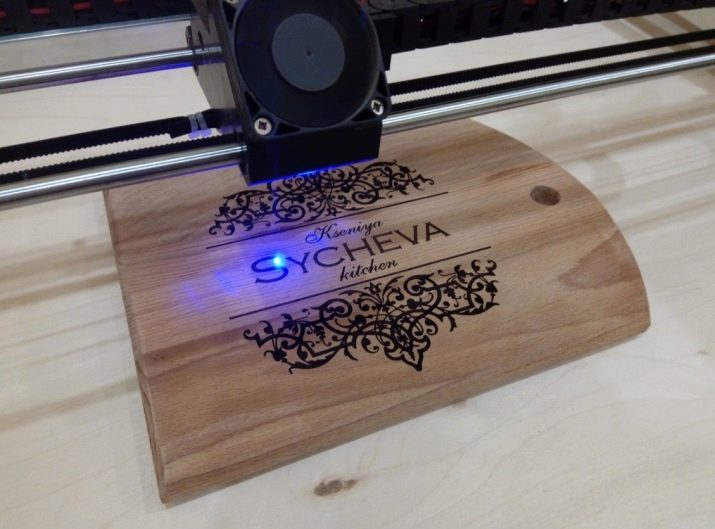
Based on the selected method of burning, various devices and working components will be selected. Many craftsmen prefer to use a special pyro-printer with nichrome or laser. Using laser technology, it is possible to create truly intricate and clearly defined patterned compositions.
Often, machines suitable for such creative procedures do not require the master to have artistic skills, reading the desired image from a USB drive.
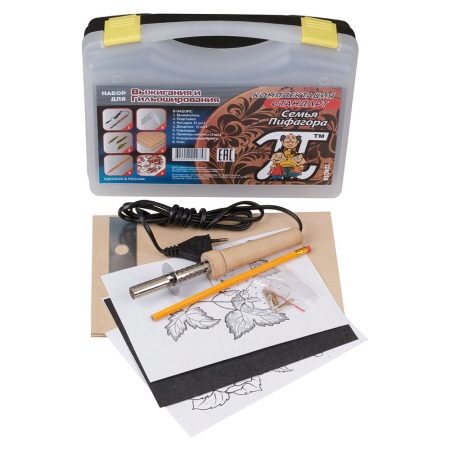
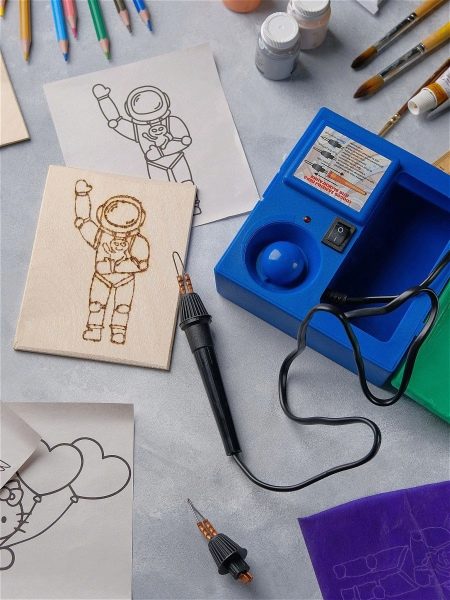
If you do not want to prepare all the required components separately, you can immediately buy the complete burnout kit. Typically, these kits consist of:
-
wood blanks;
-
sketches with patterns and images;
-
special devices for pyrography;
-
sandpaper sheets;
-
copy paper;
-
wax;
-
palettes of paints;
-
eraser and pencil;
-
several brushes;
-
rags.
Preparation
Let's consider what preparatory procedures will be necessary before burning images on wood sheets.
-
First you need to cut the blanks. The format and sizes of sheets are selected individually. Craftsmen often decide to use A3 or A4 plywood sheets.
-
Before burning, plywood must be properly processed. It should be sanded carefully. This is especially true when the material is not of the first grade. By sanding, you can get rid of microscopic cracks and protruding villi. Such manipulations should be carried out in a circular motion so as not to spoil the plywood. The base can be processed with special grinders.
-
After sanding, gently wipe the material with a damp cloth. Next, the plywood must dry.
-
If necessary, you will need to bleach the sheet material. Different people use different means to bleach plywood. Most often, craftsmen choose the most ordinary soda for lightening the base.

What can be burned out?
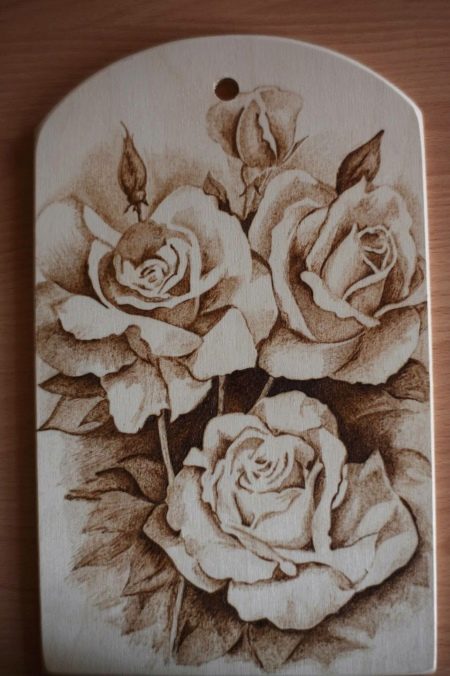
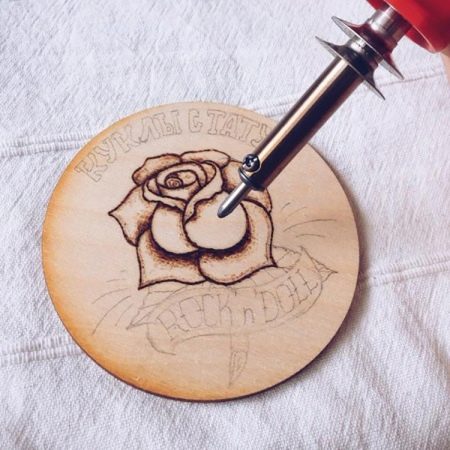
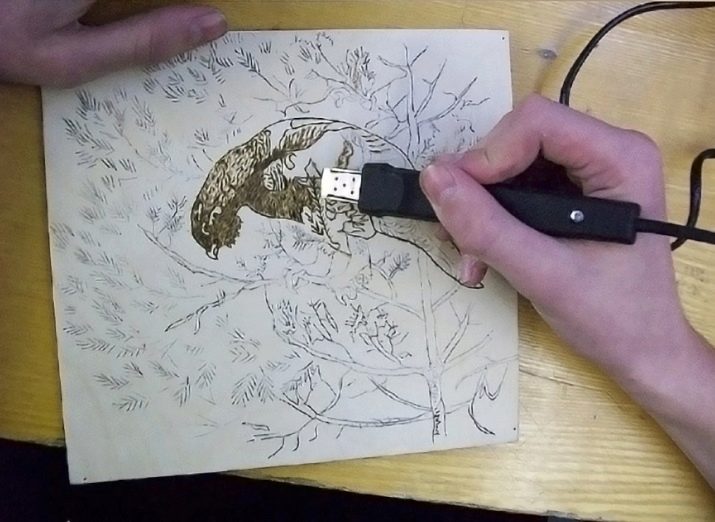
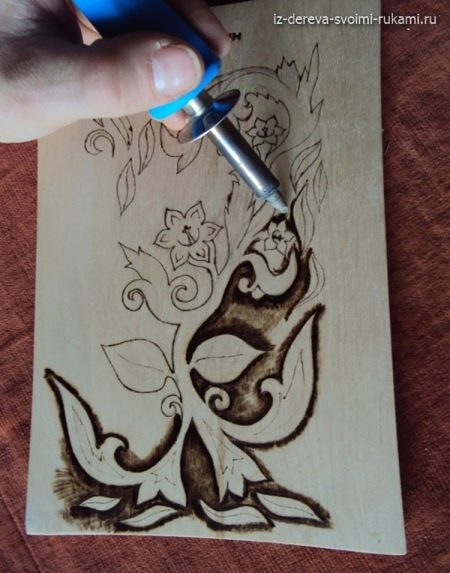
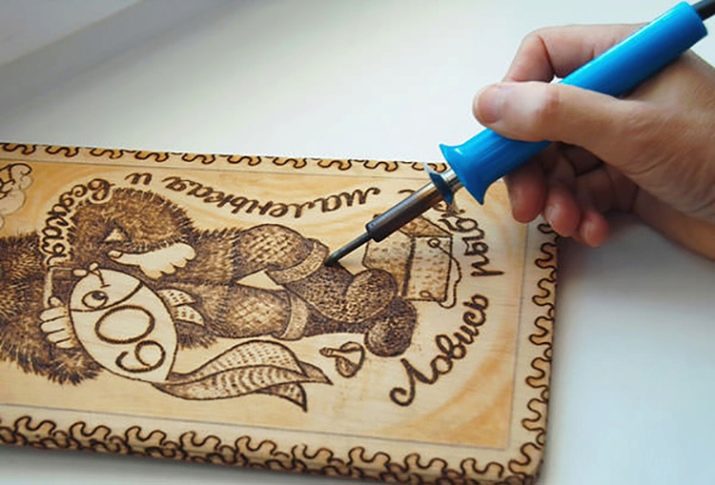
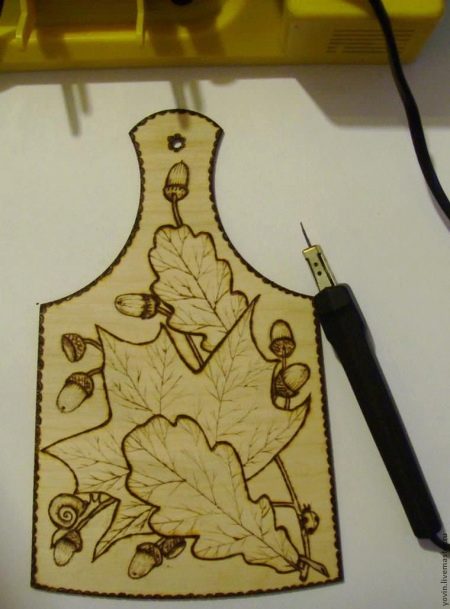
Plywood is an excellent base for applying various images and patterned weaves. On such blanks, both the lightest and very complex ideas can be realized. For example, many novice craftsmen burn various flowers and flower arrangements on plywood bases.
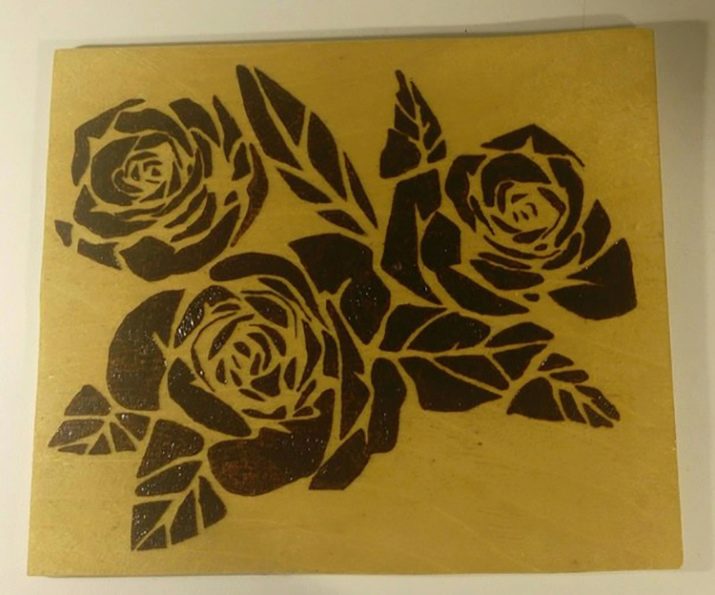
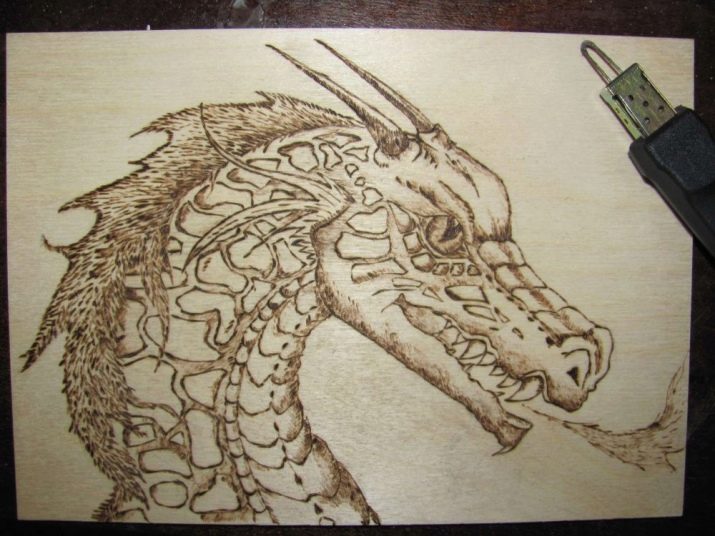
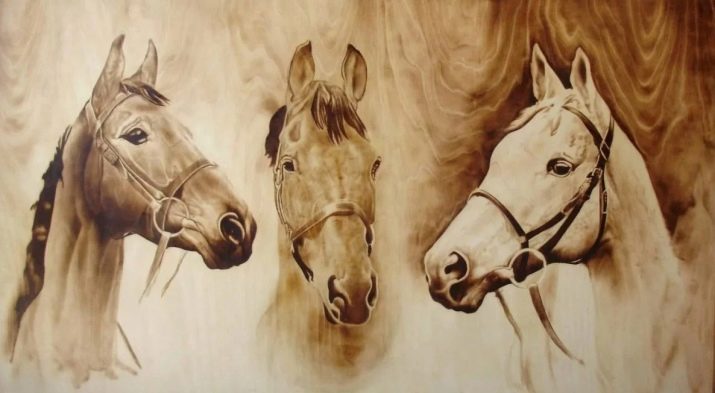
Animals depicted by means of burning look very beautiful and impressive on plywood. Pictures depicting nature and detailed landscapes look interesting and attractive. You can also burn a simple or complex ornament on a plywood sheet.
The choice of a suitable pattern largely depends on the skill of the master, as well as on the equipment that he uses for burning.
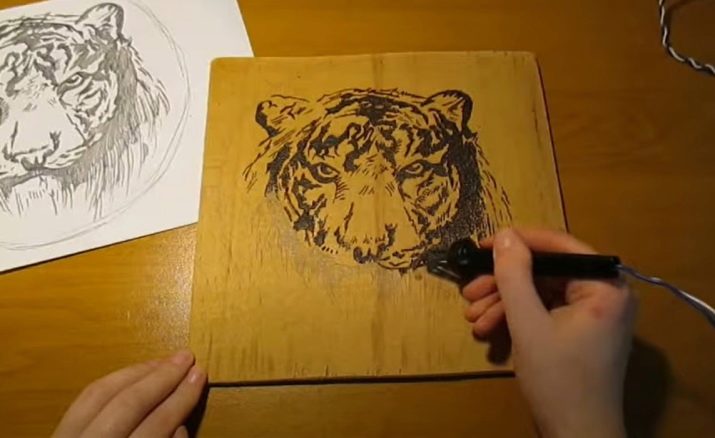
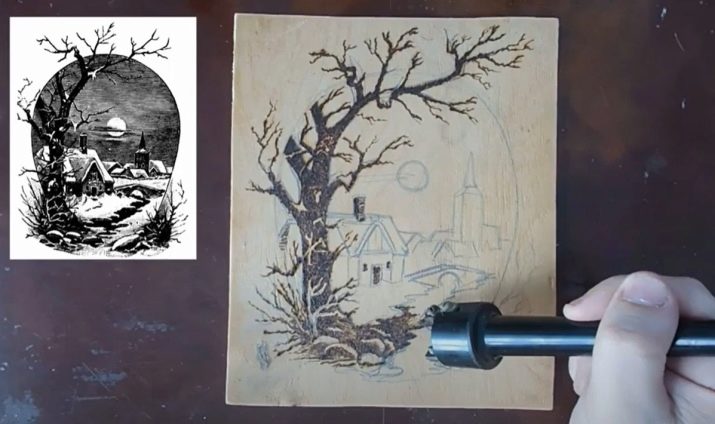
How to transfer a drawing?
Before starting the burning procedure, it is necessary to correctly transfer the selected sketch to the plywood base. Basically, initially the drawing is on paper. Before proceeding with the formation of a neat contour, it will need to be duplicated on the workpiece.
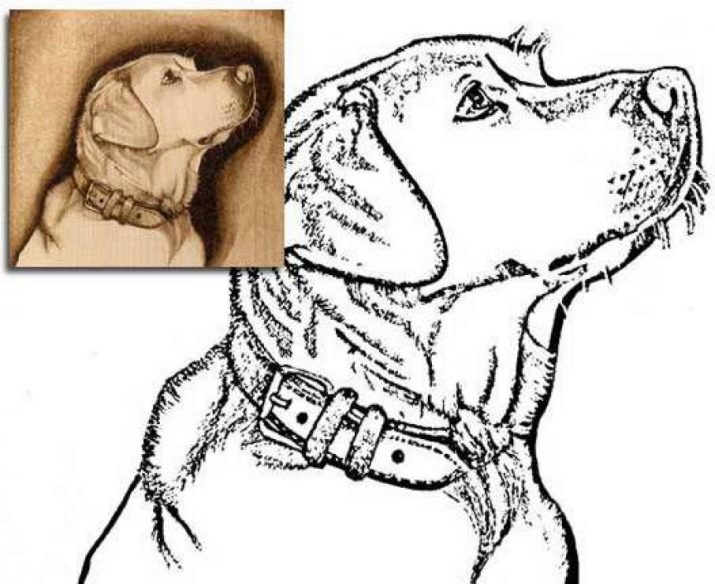
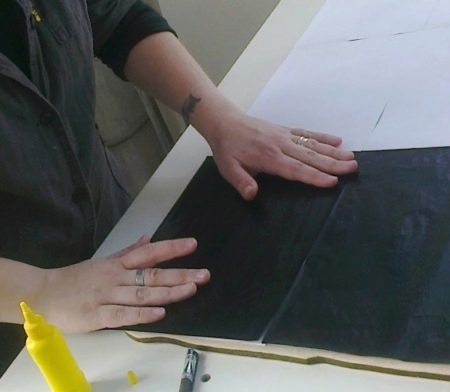
The easiest way to do this is using regular carbon paper.
-
Before transferring the image, the upper part of the sheet base will need light processing - all dust and wood particles should be removed.
-
The base should be degreased with white spirit and then dried.
-
Next, copy paper is applied to the plywood and secured with tape so that it does not move as the pattern is applied.
-
Then a paper sheet with a drawing is placed on the "carbon paper" and all contour lines are drawn using a pen.
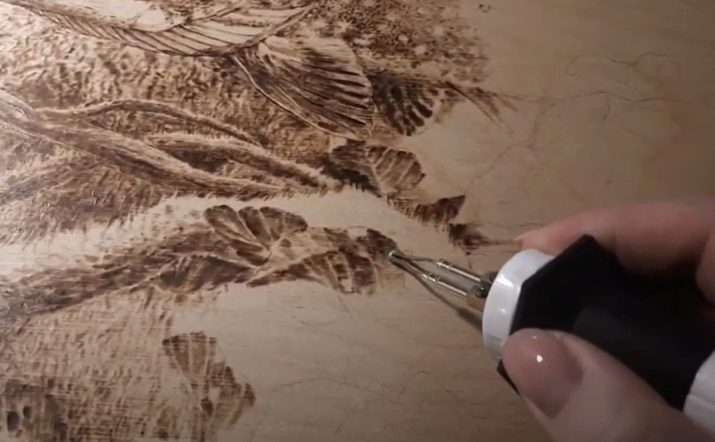
How to burn out?
Let's find out how to professionally and accurately burn an image on a sheet plywood base.
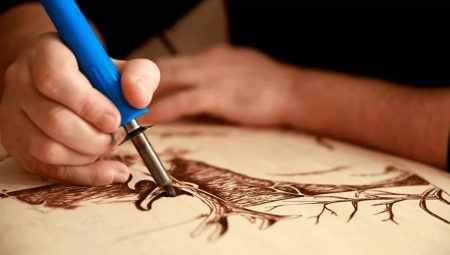
- You will need to apply fine lines with the burner you choose because it will make it easier to guide the pen in the right direction. Do not use bold lines.
- The pen needs to be pressed with the same effort.
- The longer the pen of the used burner is held in one place, the darker and deeper the lines and stripes will become.
- It is recommended to move the burner feather strictly along the growth of the wood fibers.
- Before embarking on such creative procedures, it is recommended that you first conduct a small test of the equipment and your own skills on a board, which will not be needed in the future. In this case, it is advisable to test various options for nozzles in order to fill your hand, and also have an idea of how to use the existing components according to all the rules.
- Burning must start from the edge zones of the transferred sketch. This area is the least visible and noticeable, so mistakes will not be conspicuous here.
- In the same place, you will need to carry out the apparatus several times, making thin and light strokes. Due to this, it will be possible to achieve the optimal thickness of the contours.
- It is recommended to put a compact board under your arm, so as not to accidentally smear the translated image, not to stain the base board.
- At the first stages, you should burn through all the main lines of the contours of the sketch, so that after that you can see and appreciate the complete basis of the future composition.
Once you have mastered the lesson on how to draw accurate and even lines yourself, you can resort to experimenting with shadows. Using this interesting technique, it will be possible to form a spectacular volumetric image. To correctly display the shadows in the picture, you will need to use various types of attachments.
During the burning process, the nozzles used will need to be periodically cleaned from the remaining carbon deposits.
For these purposes, you can use a special sanding pad or strap and aluminum oxide.