All About Origami Bookmarks
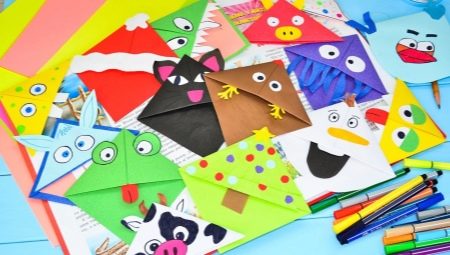
Origami bookmarks - butterflies and hearts, unicorns and cats, chanterelles and other simple options can be made with your own hands at home, as part of a joint pastime with your child. For creativity in this case, expensive materials are not needed - ordinary sheets of paper that are in every home will be enough. A detailed story about how you can make original bookmarks for books or textbooks using the origami technique yourself will help you understand the features of this process.


Advantages and disadvantages
The ability to independently make useful accessories for study can be appreciated by many children who are passionate about creativity. A simple origami bookmark created with your own hands for your favorite books or textbooks will fully correspond to the preferences of the master who created it. You can arrange it in the form of a cute animal, cartoon character, heart, decorate with rhinestones or glitter.


Origami work is available even for preschoolers, and older children can use more complex techniques, decor options.


The obvious advantages of making bookmarks of this type include such moments.
- Availability of materials. For folding crafts, both a notebook sheet in a cage and a Whatman paper, landscape paper, pages of glossy magazines are suitable.
- Variety of schemes. There are hundreds of options for bookmarks, from simple corners to sophisticated weaving options.
- Minimum investment of time. A child can fold a beautiful bookmark in 10-15 minutes.
- Development of creativity. The child can decorate the finished product himself, give it individuality.
- The ability to create bookmarks by size for books of different formats and thicknesses.
The only downside is the instability of the material to external influences.
The product will get wet when exposed to moisture, it may tear or fray over time.
Species overview
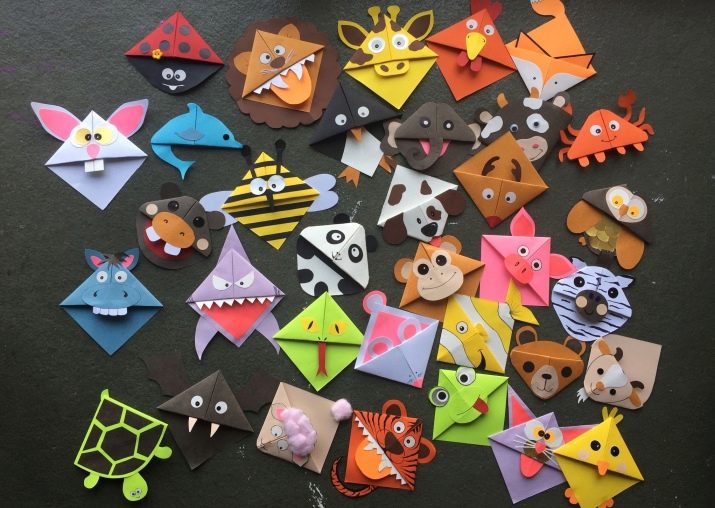
Modern origami techniques allow you to create many simple bookmarks for textbooks from colored paper. For girls, cute rainbow anime-style crafts will do. Boys will also appreciate products with their favorite cartoon characters.
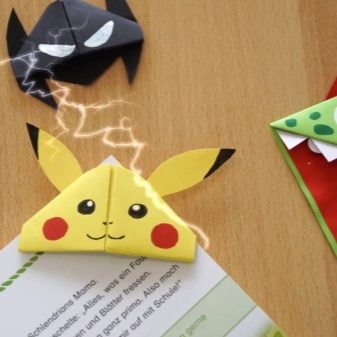

Very young children can easily instill a love of reading, simply by offering to use a bookmark in the form of an animal - a hedgehog, a chanterelle, a cat.

All the variety of ideas for making origami crafts can be divided into groups, according to their individual characteristics. The following options are considered the most popular.
- Smiley. Sad and cheerful, in love or brooding. You can bookmark according to your mood or your taste. Only the rounded shape and bright yellow color remain obligatory.

- Animals. Cute kittens, foxes, pandas, beavers, mice, koalas, dogs - any of these options will work as an idea. Among wild animals, the leaders are hedgehogs, wolf cubs, and bear cubs. Among the pets are cats, decorated in a wide variety of designs and styles.

- Building. You can fold a small house with a roof or a castle from a fairy tale.


- Insects. Ladybug, butterfly, dragonfly will easily decorate a textbook of natural history or biology.

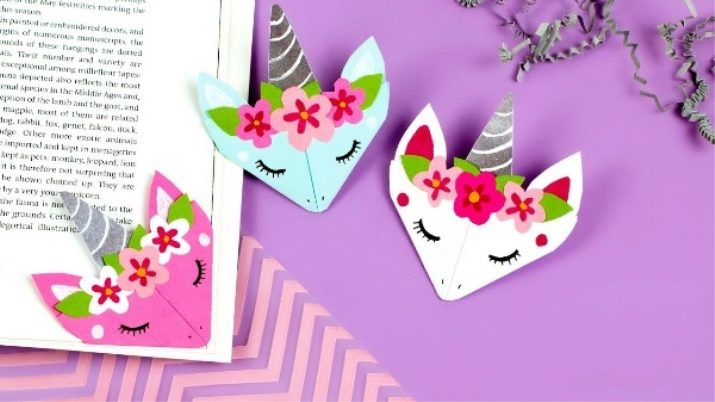
- Fabulous creatures. Dragons and unicorns, fairies and pirates - such bookmarks will be the best solution for children. You can create themed crafts for different series - in the form of a magic owl or a magic hat, in the shape of a witch's cauldron.
- Cartoon characters. Pokemon Pikachu and his brothers, cheerful bright blue Stitch and SpongeBob. You can give almost any kind of bookmarks in the shape of a corner, the sizes are also not limited, from miniature to large.

Even using a simple technique, you can make completely different crafts. Using appliques made of colored and corrugated cardboard, felt, fabric, the decor can be easily varied to your liking. Bright colored inserts, eyes and ears will help to get a monster and a hare, a bear and a frog from the "corner", you just need to give free rein to imagination.


How to do it yourself
Creating the first corner bookmark can be quite difficult for a child.
That is why detailed diagrams have been created for beginners that allow you to step by step disassemble the process of forming paper crafts.
Toddlers can easily make a simple corner bookmark that can be made in a couple of minutes without glue. Each master class contains instructions that clearly and clearly explain the entire process from start to finish. The most popular circuit options are worth exploring in more detail.
"Corner"
The simplest version of an origami bookmark has just that name. For making crafts, you can take an ordinary white sheet for a printer, colored paper, or even cardboard of a small thickness. The procedure will be as follows.
- Cut out a square from the available material. For kids, an option with a side size of 10-15 cm will be enough.
- Fold the corners to form a diagonal fold. You should get a triangle. Its corners join at the top to form a diamond.
- Expand the workpiece, again returning it to a triangular shape, but with fold lines.
- Bend the upper corner to the fold line. You will get an "envelope" inside.
- Bend the side corners of the workpiece. They are tucked into the formed envelope, carefully tucked in.
- Decorate the craft to your liking.

If single-sided colored paper is used for work, when folding, its painted side should be placed inside the product. Then, after the completion of the work, the bright part of the sheet will appear inside the envelope.
If you want to get a more decorative bookmark from the beginning, you can use double-sided paper or gift wrapping. Appliques made of felt, sequins are suitable as decorative elements for the product, you can simply paint the craft with pencils, felt-tip pens.

In the shape of a heart
An interesting and unusual bookmark without a single glue seam, made using the origami technique, will melt even the most callous heart. This option can be done for the holiday on February 14 or for another reason, used as a sign of expression of personal sympathy. Step-by-step instructions will help you not to get confused when creating a heart bookmark. The sequence of actions will be as follows.
- Form a 7 × 7 cm square paper blank.
- Fold the resulting figure 1 time on each side.
- Turn over, bend 1 side to the center line so that it fits well.
- Turn again. Fold the corners of the folded part to the center line.
- Expand the workpiece. Pull out the resulting pockets. Iron all lines thoroughly.
- Carefully straighten the formed pockets.
- Fold the edges of the triangle up.
- Bend all the remaining parts of the bookmark inward around the formed heart.
The resulting product can be easily decorated to your liking. You can use sparkles, beads, rhinestones, fix the volumetric parts with a heat gun.


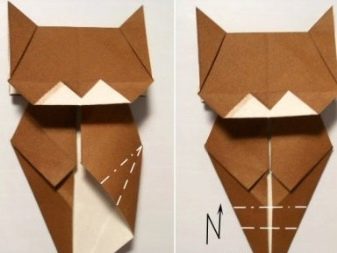
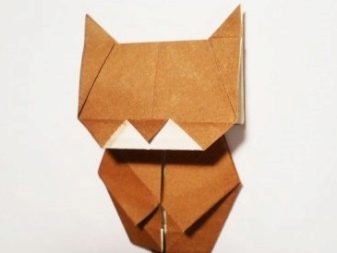
In the form of a cat
To make this unusual origami bookmark, you will have to use thick one-sided paper.
You can take a metallized "bronze", "silver" sheet or just a glossy product.
At the initial stage, the workpiece is bent along the diagonals, by analogy with the usual "corner". Then you need to proceed in the following order.
- Straighten the workpiece. Place it in a diamond shape on a work table or stand. Bend the lower parts towards the center. This will be the muzzle.
- Similarly, make ears from 2 opposite corners. They will come out sticking out like a real cat.
- Bend the remaining sharp corner outward, and then its tip inward.
- Fold the workpiece in half horizontally.
- Open the product, straighten the previously bent part.
- Wrap the triangles at the bottom, pointing upwards with their tips. Straighten the ponytail element.
The cat bookmark is ready. It remains only to decorate it to your liking, adding original decor.


With a bow
This type of origami bookmark is made on the basis of a conventional "corner". For work, you need a fairly voluminous square of paper 15 × 15 cm.The product turns out to be very elegant, it is better to immediately make it from double-sided or wrapping gift paper with a beautiful pattern. A step-by-step and detailed checklist will help you easily cope with this complex scheme.
- Fold the square workpiece diagonally, then in half.
- Fold the origami to make it a triangular shape.
- Place the parts on the right and left inside so that the pockets are formed.
- Place the triangle on the table with the top up. Bend the corner on the right to the center. Open the pocket. Perform the same actions with the left side.
- You will get an origami blank in which the rhombus lies on top of the triangle. Its tops are bent forward at a corner.
- The procedure is repeated for part 2.
- The workpiece is wrapped. The bow is straightened to the front side of the corner.
Even without additional decor, such a bookmark will look very attractive. It can be made as a pleasant craft for the celebration, made a decoration of the home library.


Butterfly
Such a bookmark is made not from a square, but from a rectangular blank. This slightly changes the origami scheme used in the work process. Nevertheless, working in this technique is quite simple, even a child can handle it. It is enough to follow simple instructions.
- Cut out a blank 120 × 75 mm in size from colored paper.
- Fold in half, repeat. Expand the workpiece.
- Bend the corners of the upper part inward so that you get a "house" with a sharp top, and the lateral edges of the rectangle are closed.
- Flip 1 side.Raise part of the workpiece at the bottom.
- Expand the resulting butterfly wings.


The butterfly bookmark is ready. It can be decorated on top with felt details or rhinestones, painted with glitter along the edges of the wings. There are many options for the original decor.
Kids can decorate their butterfly with appliques, paint it with felt-tip pens.


Flower
A more complex, modular version of the bookmark will appeal to schoolgirls. For him you will need to prepare 8 identical squares of colored or white paper. Then you need to act according to the following scheme.
- Fold each square piece diagonally twice. You should have fold lines on both sides.
- Form 8 triangles. Fold the right and left parts of each of them inward so that you get "pockets".
- Wrap the free corners towards the center, towards the top. Volumetric "petals" should be formed, laid with a rhombus on a triangular base.
- Glue the resulting rhombuses together in the form of flower petals. Glue the finished decor on a regular "corner".
- You can make the work easier if you cut 2 round blanks - a larger and a smaller diameter. One of them will become the base - the corners of the rhombuses will be glued to it. The second can be applied over the "petals". This will give the flower a core. It should be made bright, contrasting.
You can also arrange the middle in another way. For her, the same flower is formed, only in miniature.
The number of petals can be reduced to 4-6.


Beautiful examples
Making origami bookmarks is a creative process that can captivate people of any age. Literally all family members can be attracted to it. Even in 1 evening, you can make mini-bookmarks for all dictionaries, textbooks or volumes from your home library. And vivid examples of ready-made works will help inspire creativity.
- The bright hedgehog is a real hit among reading lovers. With such a bookmark, it will be quite difficult to lose space in the book.

- Simple and bright origami bookmark made of thick cardboard. Such a "pencil" can be easily put into every textbook.

- Preschoolers and junior schoolgirls are better off making bookmarks brighter. A bear, frog or bunny are suitable for first graders, older children will appreciate the applique in the form of ice cream or other favorite delicacy.

- Fans of the popular animated series will be delighted, having received as a gift a bookmark in the form of your favorite characters. An uncommon solution for teenagers and students.

- Such different bookmarks-hearts. They may look traditional and futuristic, but they always remain a striking addition to your favorite book volume.

You will see another way to create an origami bookmark in the form of a panda in the next video.


